Fallout 3 The Pitt: The Mill Worker - part 2
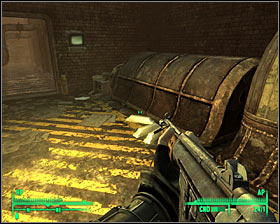
Turn around and begin moving south-east. You will soon reach an area with a few pods [#58]. If you're skilled enough you can hack into a nearby terminal in order to activate Protectrons. Watch out, because you may get attacked by new Trogs in the process.
![[#58] - Additional quest - QUEST 4: The Mill Worker - part 2 - Additional quest - Fallout 3: The Pitt - Game Guide and Walkthrough](/fallout3thepitt/gfx/word/1655546062.jpg)
You can also ignore the pods, because you've already secured the area near the train tracks. If you've activated Protectrons, they should begin sweeping the area for more hostiles, but don't count on them moving further into the factory complex. For now focus on finding a small door in this area. Confirm that you want to travel to a Supply Plant. Once inside start moving forward. Inspect a destroyed Protectron and collect energy cells. You can now hack into a nearby computer terminal [#59] in order to activate security turrets. This will allow you to dispose of a Trog located in the next room.
![[#59] - Additional quest - QUEST 4: The Mill Worker - part 2 - Additional quest - Fallout 3: The Pitt - Game Guide and Walkthrough](/fallout3thepitt/gfx/word/1655546078.jpg)
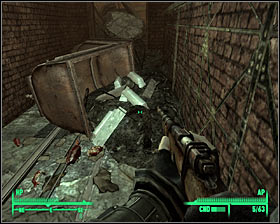
Notice that by going towards a nearby tunnel you've put yourself to a small dose of radiation. Begin retreating as soon as you reach the second room, because you'll notice more Trogs heading your way, as well as some wildmen. Kill all of them, disable the turrets and return to the second room. This time focus on finding three new ingots.
INGOTS #19, #20, #21 | Location: In the second room, next to a terminal. |
 |  |
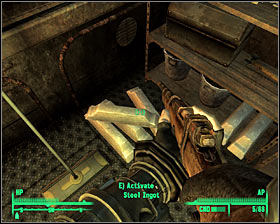
Ignore the second terminal, because it doesn't control any turrets nor any other objects inside the plant. Instead start moving forward. I wouldn't recommend making any unnecessary stops, because you'll only become more radiated. The only exception should be a medical kit on one of the shelves. Once you've reached a much larger area start firing at the Trogs from the upper balcony. Get ready for the monsters to attack you as soon as they locate your position. Once they're gone use the stairs to get down to a lower level. Inspect a small carriage with a destroyed Protectron inside. You will also find more supplies nearby, including RadAway's, Rad-X's, stimpacks and ammunition. Use the third terminal to activate a fully functional Protectron if you want to. If not - proceed directly to the train tracks located to your right and head on towards a relatively small tunnel [#60].
![[#60] - Additional quest - QUEST 4: The Mill Worker - part 2 - Additional quest - Fallout 3: The Pitt - Game Guide and Walkthrough](/fallout3thepitt/gfx/word/1655546125.jpg)
I would recommend to be cautious here, because there are hostile units nearby. Check your surroundings - you'll soon find a flamethrower on the ground. There are a few wildmen just around the corner. They've killed the Trogs and now they're after you. I would strongly recommend using grenades to eliminate them. Don't move too close, especially since one of your enemies is carrying a flamethrower. Kill them, proceed to end of the tunnel and collect eight (!!!) steel ingots.
INGOTS #22, #23, #24, #25, #26, #27, #28, #29 | Location: At the end of the tunnel, inside a small carriage. |
 |  |
Go back to the previous area where you found the supplies. Notice that you haven't been to the left corridor, so that should be your next destination. Thankfully you won't have to worry about encountering any new monsters for the time being. Keep moving forward until you reach a metal door with two corpses on both sides of the door [#61].
![[#61] - Additional quest - QUEST 4: The Mill Worker - part 2 - Additional quest - Fallout 3: The Pitt - Game Guide and Walkthrough](/fallout3thepitt/gfx/word/1655546171.jpg)
Sadly it won't be easy to get to new ingots, because the door is locked. You should have more than enough bobbypins (you'll find them on almost every Trog corpse), so it all depends on your lockpicking skills. Once inside take your time to collect new supplies, including radiation drugs, stimpacks and ammunition. The most important activity here is to take six ingots. Two of them can be found on the ground and the remaining four on the shelves. There's also a terminal here, but may as well ignore it.
INGOTS #30, #31, #32, #33, #34, #35 | Location: Inside a small room. |
 |  |
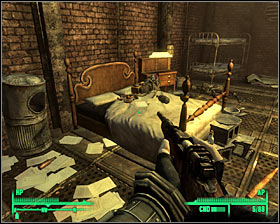
Leave this small shed and proceed to your right. Use the stairs to get to the upper level and you'll find yourself standing inside a much larger room. Your primary object of interest is the bed. Collect an improved version of an autoaxe. You can also take some fuel for the flamethrower. Finally go to the nightstand and take a single steel ingot. Use the control panel that is located next to the nightstand.
INGOT #36 | Location: Next to a large bed, on the nightstand. |
 |  |

You are not permitted to copy any image, text or info from this page. This site is not associated with and/or endorsed by the developers and the publishers. All logos and images are copyrighted by their respective owners.
Copyright © 2000 - 2026 Webedia Polska SA for gamepressure.com, unofficial game guides, walkthroughs, secrets, game tips, maps & strategies for top games.