Battlefield 5: Twisted Steel Map - Frontlines Mode
Last update:
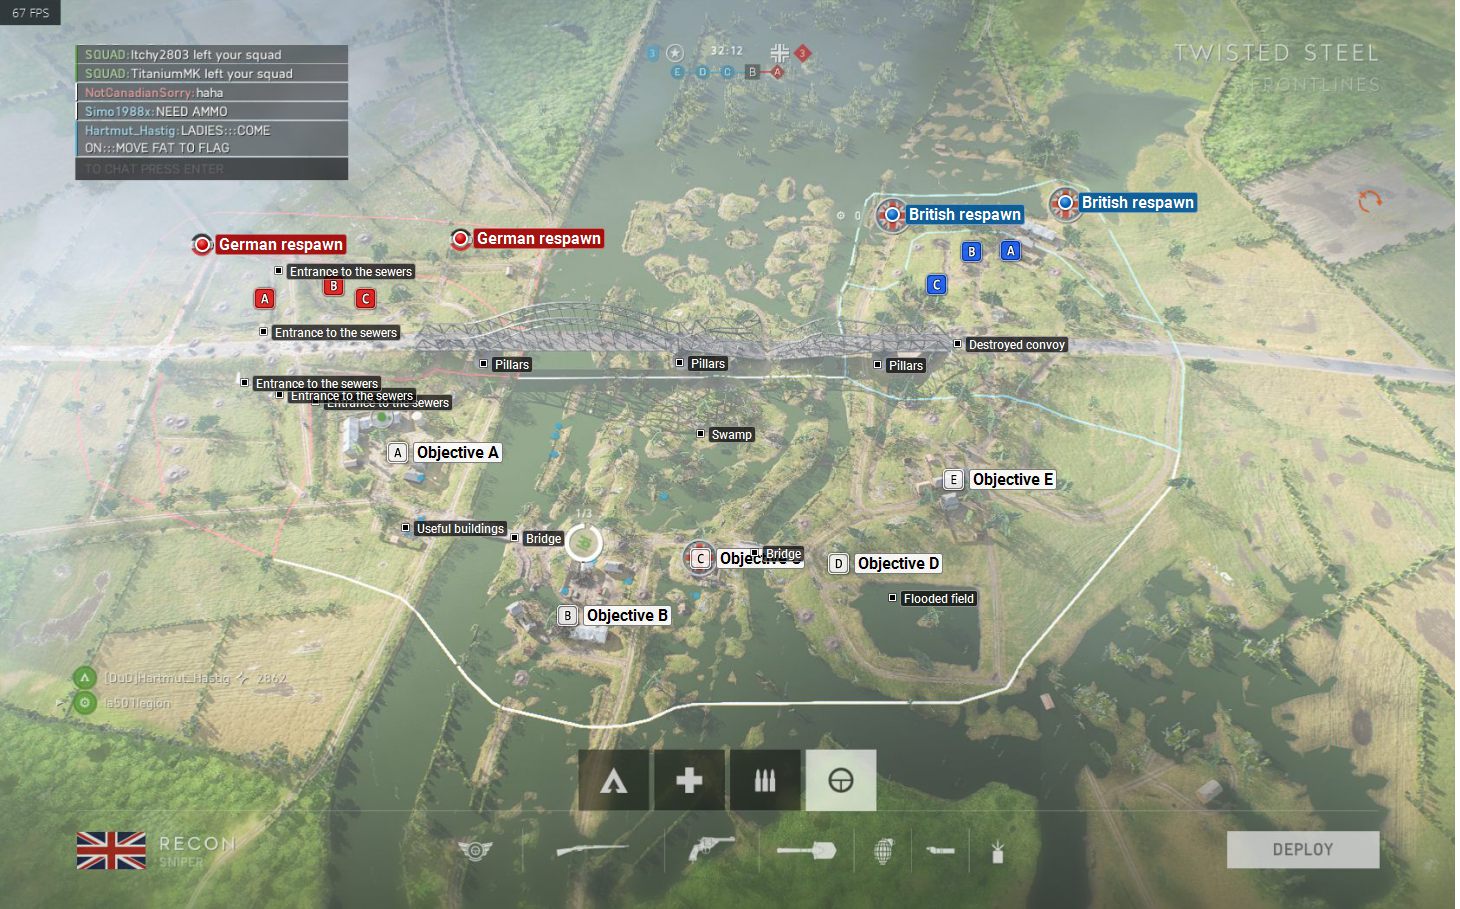
In this chapter you will find the map of Twisted Steel in the Frontlines mode. The chapter contains a general characteristic of the map, map legend, as well as descriptions of flags in terms of available covering spots. The Battlefield 5 game guide will guide you on the battlefield.
Characteristic of the map
The map for the first day is very similar to the one from the Conquest mode - the only difference is that the points must be captured in order, one after another, pushing the frontline. The game in this mode can be very long, lasting up to an hour. Generally a good idea here is to fortify the previously captured points in case the storm on the further ones is unsuccessful.
Point D is the most difficult to fight at, due to the small amount of cover spots. The point is located close to the road, near trees and swamp. The rest of the points - E, C, B and A - can be heavily fortified. There is no golden mean here - play smart, fortify, use all of the available means to exterminate the enemy. Points E, C, B or A have a lot of buildings and barns, allowing you to find a good shooting position quite easily. Between points E, C, B and A you will find bridges that can be destroyed and rebuilt. You can even construct anti-tank blockades. Be careful when near the Bridges, as players like to wait (mainly underneath the bridge) and wait for the enemy. The same applies to places near the river.
After capturing 5 flags by your team, your task will be to destroy 3 points near the enemy base. In the scenario in which the enemy captured 5 flags, your team will be forced to defend its own points near the base. Regardless of the side controlling the flags, the attacking side has a limited amount of tickets to perform the assault. The game ends once all of the points are destroyed or when at the end of the map one of the sides has more defensive points. Playing as part of a team is crucial here - if you do not have it or there is no one alive at the moment, you will need to travel back to the battlefield from the last captured point.
The easiest point to destroy from the German side is A, due to the fact that it is divided from the rest of the by a bulwark. Points B and C are located close to one another, making them difficult to attack. Points to destroy on the British side are also quite difficult, as cover here is scarce - you need to use the terrain and trenches.
- Battlefield V Guide
- Battlefield 5: Game Guide
- Battlefield 5: Maps
- Battlefield 5: Frontlines
- Battlefield 5: Aerodrome Map - Frontlines
- Battlefield 5: Arras Map - Frontlines
- Battlefield 5: Devastation Map - Frontlines Mode
- Battlefield 5: Fjell 652 Map - Frontlines Mode
- Battlefield 5: Hamada Map - Frontlines Mode
- Battlefield 5: Narwik Map - Frontlines Mode
- Battlefield 5: Rotterdam Map - Frontlines Mode
- Battlefield 5: Twisted Steel Map - Frontlines Mode
- Battlefield 5: Frontlines
- Battlefield 5: Maps
- Battlefield 5: Game Guide
You are not permitted to copy any image, text or info from this page. This site is not associated with and/or endorsed by the developers and the publishers. All logos and images are copyrighted by their respective owners.
Copyright © 2000 - 2026 Webedia Polska SA for gamepressure.com, unofficial game guides, walkthroughs, secrets, game tips, maps & strategies for top games.
