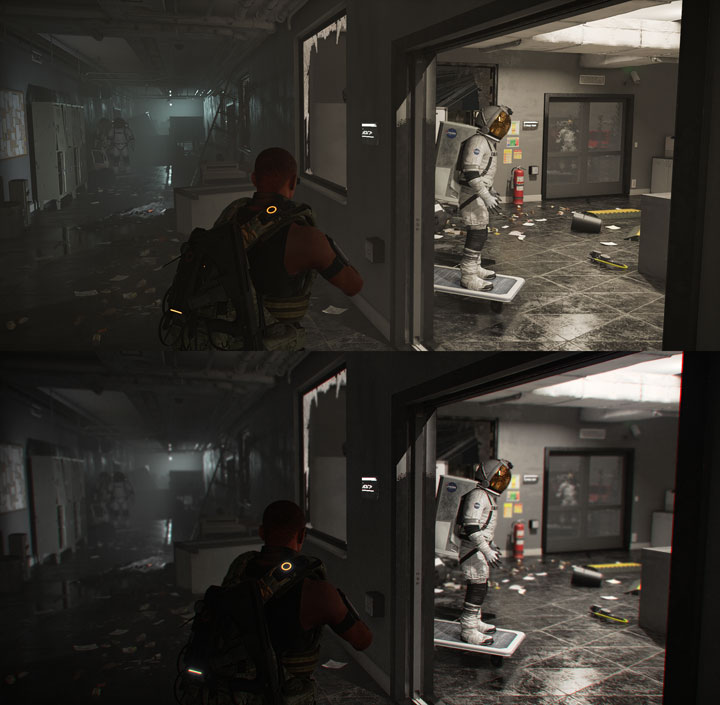
Vanilla game on top, modded version on the bottom.
Project Liberty -- Photorealistic Lights and Cinematic Effects is a mod for Tom Clancy's The Division 2, created by TheMercsAssassin.
Description (in author’s own words):
Project Liberty ReShade aims to overhaul the Division 2's visuals to mimic the feeling of viewing the game through a camera lens. In addition to color correcting the image by eliminating the vanilla yellow tint, Project Liberty also adds tons of OPTIONAL high-quality, fine-tuned cinematic effects. These optional effects include depth-of-field, multiple choices of depth-of-field, bloom, lens flares for light sources, film grain, letterboxing (black bars), anamoprhic camera lens emulation, and chromatic aberration. T
Instructions:
1. Download ReShade framework 4.0.2 from here: http://www.mediafire.com/file/0xoi37xedib2uc1/ReShade_Setup_4.0.2.exe/file?
2. Run the .exe, choose your Division 2 .exe, called "TheDivision2.exe", which is found in this subfolder path: "... Ubisoft Game Launcher\games\Tom Clancy's The Division 2"
Now choose the DirectX 10+ version when it asks which API to use.
3. Select yes when it ask if you want to download a collection of effects. Click "uncheck all" and just select "Border" (you'll be using the shaders and effects from my dropbox folder).
4. Download my zip file on the file page here on Nexus.
5. Open the zip folder and copy-paste the "reshade-shaders" folder, and the "My Little Apocalypse - Photorealistic Release 1.0.ini" file in your Division 2 folder, where you found your game's .exe, "... Ubisoft Game Launcher\games\Tom Clancy's The Division 2" folder. Overwrite all if it asks. Don't worry, you are only overwriting ReShade files, not any of your game's actual files.
6. Run your game and open the ReShade menu with Shift+Home and click the little arrow at the top of the reshade menu to open the drop-down menu. Select the preset "My Little Apocalypse - Photorealistic Release 1.0.ini" .ini file. (If you don't care about Depth of Field (DoF), then you can stop here and just delete all the DoF shaders from your reshade-shaders/shaders folder. If you want to use DoF, then please continue to step 8, it's not as intimidating as it looks, only takes about 10 seconds to do once in game).
7. In your in-game settings menu, under Gameplay, set your reticle opacity to 75 percent or lower to stop the lens flares from triggering when you aim. Don't worry, your reticle will still be plenty visible. I also set my reticle thickness to 0, which is still very visible, it doesn't make it disappear.
8. To get DoF working once you load into the game and can see your character model in D.C.,follow this guide. Basically, activate the Display Depth shader (press "+" on the numberpad) to see the depth buffer, then click the "dxll" tab and click the boxes until you see the image with your character displayed in one half and the other gray-scaled, as shown in the video. Then click the "reload" button on the bottom of the reshade "home" tab, as shown in the video: https://youtu.be/AbsLCo96ONY?
8. Profit?
- Last update: Thursday, May 2, 2019
- Genre: Action
- File size: 9.9 MB