LEGO Marvel Super Heroes: Stranger Danger Maps
Characters: Invisible Woman, Human Torch, Doctor Strange
True Believer Status: 45 000 studs
Location: Sanctum Sanctorum (Map of Important Locations [24])
Gold bricks required: 150
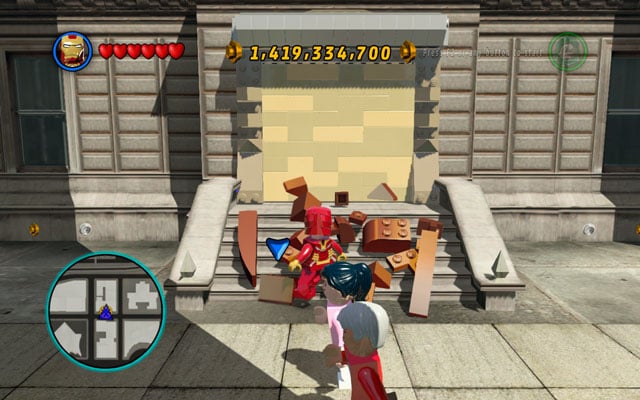
You must have collected 150 gold bricks to unlock this mission. If you have them, you can go to the Santum Sanctorum building and create an entrance for the next location.
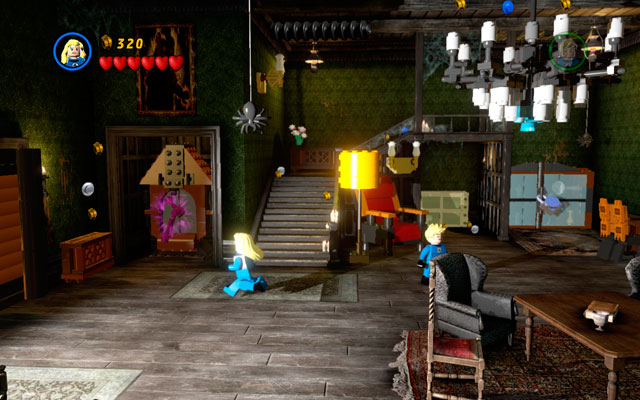
Choose Invisible Woman and go to the big clock placed on the left side of the room. Use telekinesis power to pull the hands of the clock twice. Wait for bricks to scatter, then use them to construct a door handle for the nearest door. Now you can visit second room.

Pull the curtain, discovering Dornammu location in that way - he will try to hurt you with some bricks. Destroy them and use broken pieces to build a pump. Then choose Invisible Woman, leading her to the pot standing on the left. Behind the pot, there is some chain, which you have to pull. After you do that, you will find a hammer on the floor. Use telekinesis ability to pick it up and smash wooden planks nailed to the wall.

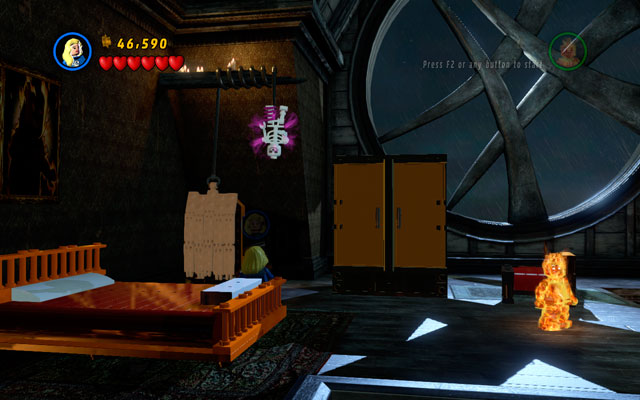
Now you will see a boiler - melt it with a fire beam. In this moment Dornammu will quickly finish his bath and you will be able to see a room at the opposite part of the house.

Go to the door placed on the right side of the hall - they will lead you to the library. Choose Human Torch to melt golden box standing on the cupboard on the right-side of the room. Then turn into Invisible Woman and put the piano keys on the right places. Then play piano to unlock a switch, which helps you to drive the demon out.
Go back to the hall and use stairs to go to the upper level. Choose Invisible Woman to pull the skeleton - when Doctor Strange appears, search the location for three golden balls (placed on the left, right and central part of the room).

Use Human Torch to melt three targets - now you can go downstairs and face the enemy.

It's time for conventional duel with Dornammu. Hit demon, and when he disappear, defeat all his skeletons. This scheme will be repeated six times, so be patient.
Hint: Dornammu can be hurt only during melee fight!

- LEGO Marvel Super Heroes Game Guide & Walkthrough
- LEGO Marvel Super Heroes: Game Guide
- LEGO Marvel Super Heroes: Maps
- LEGO Marvel Super Heroes: Important Locations Maps
- LEGO Marvel Super Heroes: Characters Maps
- LEGO Marvel Super Heroes: Vehicles Maps
- LEGO Marvel Super Heroes: Stan Lee in Peril Maps
- LEGO Marvel Super Heroes: Gold Bricks Maps
- LEGO Marvel Super Heroes: Events Maps
- LEGO Marvel Super Heroes: Races Maps
- LEGO Marvel Super Heroes: Deadpool Bonus Missions Maps
- LEGO Marvel Super Heroes: Tabloid Tidy Up Maps
- LEGO Marvel Super Heroes: A Shock Withdrawal Maps
- LEGO Marvel Super Heroes: House Party Protocol Maps
- LEGO Marvel Super Heroes: Nuff Said Maps
- LEGO Marvel Super Heroes: Feeling Fisky Maps
- LEGO Marvel Super Heroes: Put Up Your Dukes Maps
- LEGO Marvel Super Heroes: Stunt Show Surprise Maps
- LEGO Marvel Super Heroes: Reptilian Ruckus Maps
- LEGO Marvel Super Heroes: Stranger Danger Maps
- LEGO Marvel Super Heroes: The Thrill of the Chess Maps
- LEGO Marvel Super Heroes: Bro-tunheim Maps
- LEGO Marvel Super Heroes: Maps
- LEGO Marvel Super Heroes: Game Guide
You are not permitted to copy any image, text or info from this page. This site is not associated with and/or endorsed by the developers and the publishers. All logos and images are copyrighted by their respective owners.
Copyright © 2000 - 2026 Webedia Polska SA for gamepressure.com, unofficial game guides, walkthroughs, secrets, game tips, maps & strategies for top games.