LEGO The Lord of the Rings: Amon Hen - p. 2
Minikit #6
Needed: acrobatics
Instead of placing the pillars on the left side, place them on the right and jump onto them with Legolas. Grab onto the rail on the wall and jump towards the treasure.
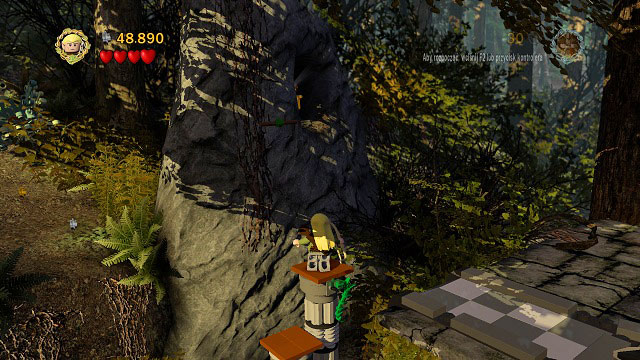
Minikit #7
Needed: phial
At the end of the hill, where the hook was, there is a dark cave. Illuminate it with the Phial of Galadriel and break the stone inside to get the Minikit.
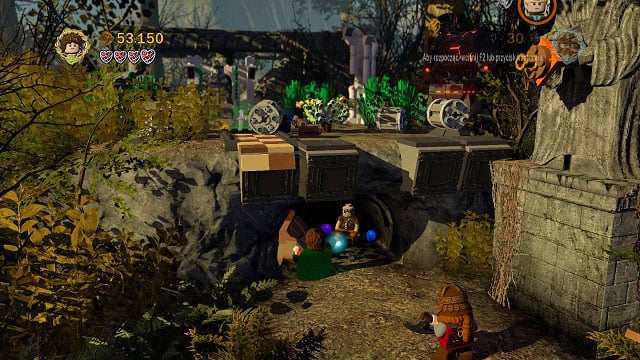
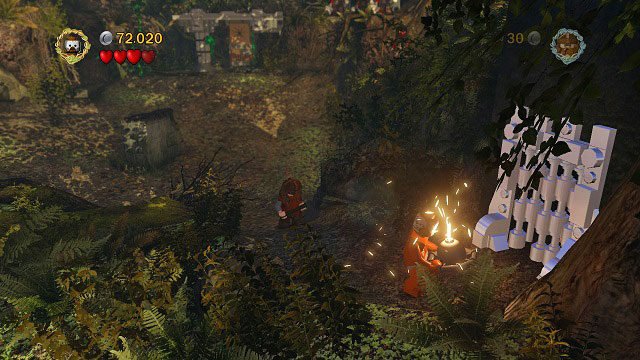
Treasure: Uruk Sword
Needed: explosive
During the fight with Uruk-hai in the second location to the left you will find two mithril pillars. Just destroy them with the Berserker's bomb and pick up the treasure.
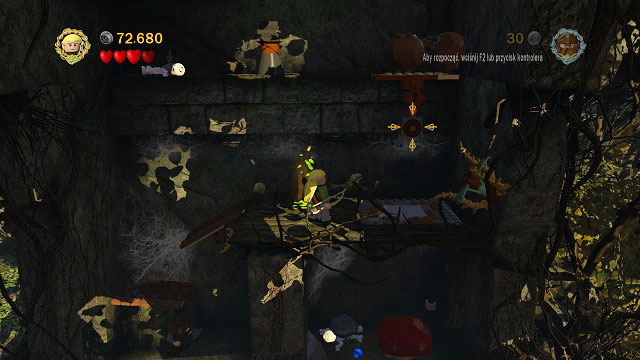
Minikit #8
Needed: spade
In the upper left corner of the third location during the fight with Uruk-hai you will find a place where you can place a plant. It will let you reach the Minikit.
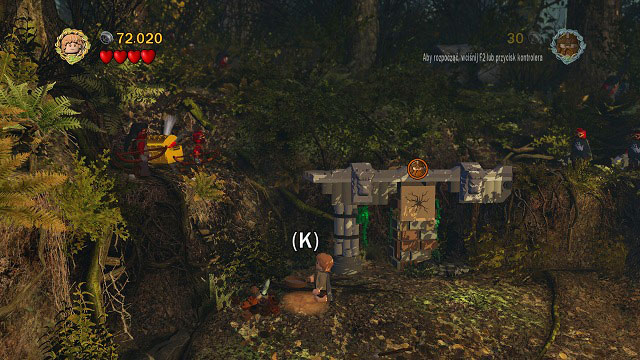
Minikit #9
Needed: explosive, elven rope, bow, acrobatics
In the third location during the fight with Uruk-hai you have to go to the lower right corner - there you will find a passage leading to a mithril gate. Destroy it with the Berserker's bomb and head inside.
Attach rope to the hook and head up along the platform. There, use your bow and build another step. Use the leaves to jump onto the new platform and afterwards to the next ledge.
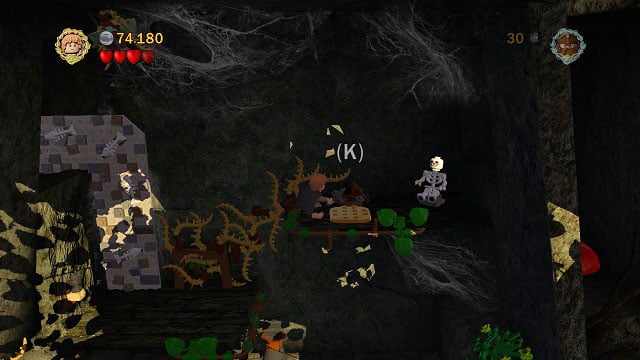
Grab onto the rail and jump to the very top where you can light a fire. It will unlock a narrow tunnel which you can use. Afterwards bounce off the mushroom to reach the Minikit. Other points in this location can only get you more studs.
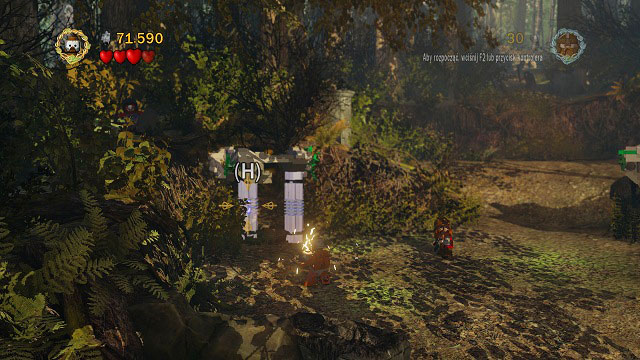
Minikit #10
Needed: elven rope, bow
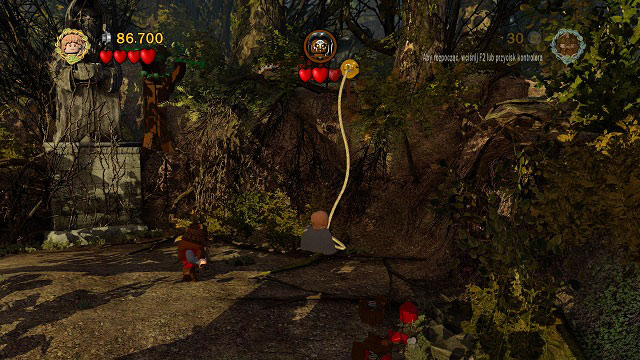
On the right side of the arena you should notice a hook to which you can attach a rope. 6 targets which you need to shoot from the bow should appear around the location. Hitting the last of them will give you the Minikit.
Design: Mithril Rope
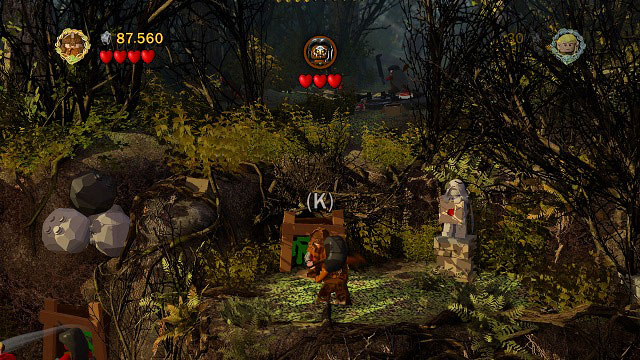
During the fight with Lurtz, just shoot the statue on the right an pick up the Diagram.
- LEGO The Lord of the Rings Game Guide & Walkthrough
- LEGO The Lord of the Rings: Game Guide
- LEGO The Lord of the Rings: Collectibles
- LEGO The Lord of the Rings: Introduction Collectibles
- LEGO The Lord of the Rings: Prologue
- LEGO The Lord of the Rings: The Black Rider
- LEGO The Lord of the Rings: Weathertop
- LEGO The Lord of the Rings: The Pass of Caradhras
- LEGO The Lord of the Rings: The Mines of Moria
- LEGO The Lord of the Rings: Amon Hen - p. 1
- LEGO The Lord of the Rings: Amon Hen - p. 2
- LEGO The Lord of the Rings: Taming Gollum
- LEGO The Lord of the Rings: The Dead Marshes
- LEGO The Lord of the Rings: Track Hobbits
- LEGO The Lord of the Rings: Warg Attack
- LEGO The Lord of the Rings: Helm's Deep
- LEGO The Lord of the Rings: Osgiliath
- LEGO The Lord of the Rings: Secret Stairs
- LEGO The Lord of the Rings: The Paths of the Dead
- LEGO The Lord of the Rings: Cirith Ungol
- LEGO The Lord of the Rings: Battle of Pelennor Fields
- LEGO The Lord of the Rings: The Black Gate
- LEGO The Lord of the Rings: Mount Doom
- LEGO The Lord of the Rings: Collectibles
- LEGO The Lord of the Rings: Game Guide
You are not permitted to copy any image, text or info from this page. This site is not associated with and/or endorsed by the developers and the publishers. All logos and images are copyrighted by their respective owners.
Copyright © 2000 - 2026 Webedia Polska SA for gamepressure.com, unofficial game guides, walkthroughs, secrets, game tips, maps & strategies for top games.