Lost Planet: Target Marks: Mission 11
Table of Contents
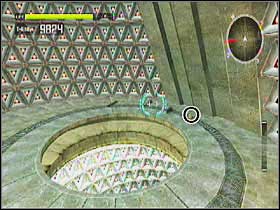
 | At the bottom of the tunnel. |
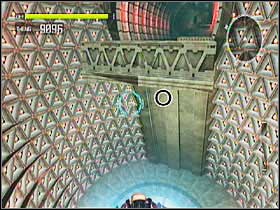 | A little bit higher. |
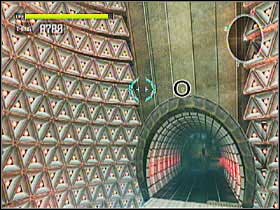 | ... and even higher. |
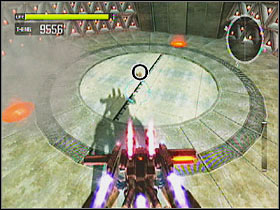
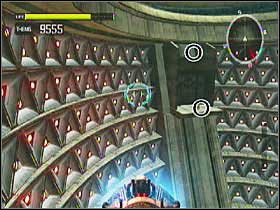
 | Below the first ring. |
 | Above the first ring. |
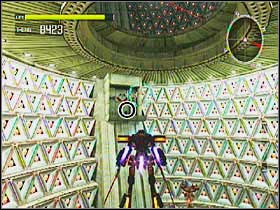
 | Below the second ring (there are 2 of them). |
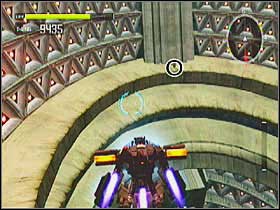 | Above the second ring. |

- Lost Planet: Extreme Condition Game Guide & Walkthrough
- Lost Planet: Game Guide
- Lost Planet: Target Marks
- Lost Planet: Target Marks: Mission 1
- Lost Planet: Target Marks: Mission 2
- Lost Planet: Target Marks: Mission 3
- Lost Planet: Target Marks: Mission 4
- Lost Planet: Target Marks: Mission 5
- Lost Planet: Target Marks: Mission 6
- Lost Planet: Target Marks: Mission 7
- Lost Planet: Target Marks: Mission 8
- Lost Planet: Target Marks: Mission 9
- Lost Planet: Target Marks: Mission 10
- Lost Planet: Target Marks: Mission 11
- Lost Planet: Target Marks
- Lost Planet: Game Guide
You are not permitted to copy any image, text or info from this page. This site is not associated with and/or endorsed by the developers and the publishers. All logos and images are copyrighted by their respective owners.
Copyright © 2000 - 2026 Webedia Polska SA for gamepressure.com, unofficial game guides, walkthroughs, secrets, game tips, maps & strategies for top games.