Rainbow Six Vegas: Mission 6.1 Nevada Dam - Tourist Center
Time and place: Nevada Dam, Nevada; July 3rd, 0547 Hours
This is the last chapter of the game. Thankfully, you won't have to worry about finishing the game too early, mostly because you will have to finish SEVEN different levels. This first mission is going to be fairly simple. You will have to take part in several fights, however you shouldn't have any major problems with the terrorists.
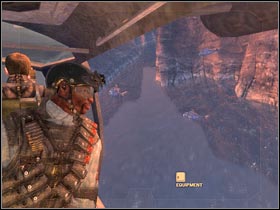
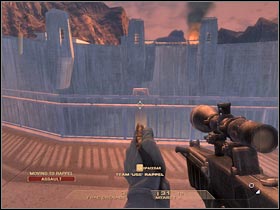
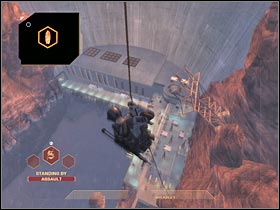
We'll start inside an allied gunship. Notice that you're heading towards Nevada Dam. There are also other air units in this area (#1). Furthermore, one of these gunships is going to be destroyed. Thankfully, you won't have to worry about that. Once the helicopter has reached its destination, you will have to use the rope (#2). Wait for the rest of the team to join you.
 | 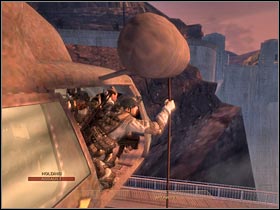 |
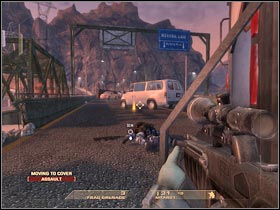
Start moving forward. You will come across one of the civilian workers (#1). It looks like that he's running away from the terrorists. You could listen to what he has to say, however this won't be necessary. Make a few stops forward. Order your men to hide behind a police truck (#2). You will have to be quick about it, because a large group of terrorists is heading this way.
 |  |
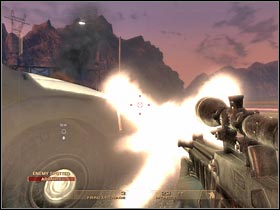
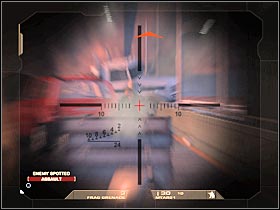
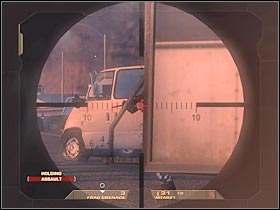
You will have to start shooting at the enemy soldiers. Most of them will appear on your right (#1). Make sure that no one gets closer to your position. Otherwise you would have to avoid several explosions (grenades). Start leaning out carefully. You should be able to take out at least 2-3 terrorists from a larger distance (#2). Order your teammates to stay here.
 |  |
Head on to your left. You should be able to locate a second there. Use it for cover. Make sure that you're using a tactical map (#1). You will also have to remember that some of the terrorists will be hiding behind other cars. You won't notice them at first glance. Thankfully, you should be able to surprise most of these thugs (#2). Order your men to proceed to a much larger truck.
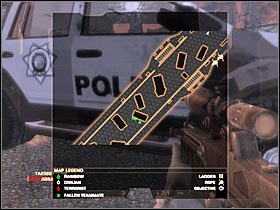 |  |
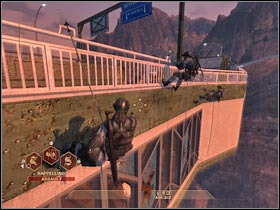
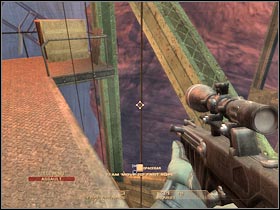
Keep heading towards your current destination. Make sure that you're using cars and other large objects for cover (#1). You shouldn't encounter any other terrorists. Take a closer look at the tactical view. As you've probably noticed, there are a lot of different paths leading to your next destination. I would recommend using rappel hooks. You should be able to find them on your left (#2). Choose the middle hook and wait for the rest of the squad to get here.
 |  |
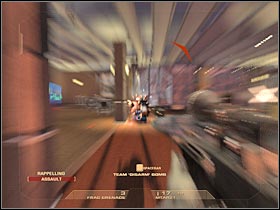
Just as before, you will have to activate a default action. Wait for your colleagues to do the same thing (#1). Once you're ready, proceed with a well known type of an assault (#2). You should be able to land near a cover, so it would be wise to use it right away. There are going to be several terrorists here, however you should be able to secure this room without any major problems.
 |  |
You should be able to find a bomb here. I'm sure that you know exactly what has to be done here. Order one of your squad members to disable this device (#1). It's going to take a few seconds, however you won't have to defend this room. Once this is done, head on to your left. A single terrorist will enter this room. Kill him quickly and head on to the new corridor (#2).
 | 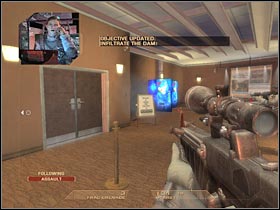 |
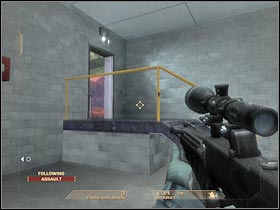
Go ahead and proceed to the next room. The area is safe, so you won't have to use any objects for cover. You will come across a few stairs. Head on to the next area of the map (#1). You will come across a small passageway. Keep going straight (#2).
 | 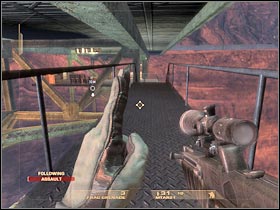 |
You should be able to reach several ropes (#1). Order your men to use these objects. Press the action key in order to slide down to the lower level (#2). That's all for the first mission of this chapter.
 |  |

- Tom Clancy's Rainbow Six: Vegas Game Guide & Walkthrough
- Rainbow Six Vegas: Walkthrough
- Rainbow Six Vegas: Mission 1.1 Mexican Border - Inbound
- Rainbow Six Vegas: Mission 1.2 Mexican Border - Trainyard
- Rainbow Six Vegas: Mission 1.3 Mexican Border - Mines
- Rainbow Six Vegas: Mission 1.4 Mexican Border - Escape
- Rainbow Six Vegas: Mission 2.1 Calypso Casino - The Strip
- Rainbow Six Vegas: Mission 2.2 Calypso Casino - Security
- Rainbow Six Vegas: Mission 2.3 Calypso Casino - Prime Time
- Rainbow Six Vegas: Mission 2.4 Calypso Casino - Dr. Smythe
- Rainbow Six Vegas: Mission 2.5 Calypso Casino - Extraction
- Rainbow Six Vegas: Mission 3.1 Downtown Vegas - Exclusive Gone Wrong
- Rainbow Six Vegas: Mission 3.2 Downtown Vegas - Fremont
- Rainbow Six Vegas: Mission 3.3 Downtown Vegas - Mafia House
- Rainbow Six Vegas: Mission 4.1 Vertigo Spire - Tower Assault
- Rainbow Six Vegas: Mission 4.2 Vertigo Spire - Tower Bar
- Rainbow Six Vegas: Mission 5.1 Dante's Casino - Hell's Gate
- Rainbow Six Vegas: Mission 5.2 Dante's Casino - Gabe
- Rainbow Six Vegas: Mission 5.3 Dante's Casino - Kan
- Rainbow Six Vegas: Mission 5.4 Dante's Casino - Data Hub
- Rainbow Six Vegas: Mission 6.1 Nevada Dam - Tourist Center
- Rainbow Six Vegas: Mission 6.2 Nevada Dam - The Dam
- Rainbow Six Vegas: Mission 6.3 Nevada Dam - Spillway
- Rainbow Six Vegas: Mission 6.4 Nevada Dam - Facility
- Rainbow Six Vegas: Mission 6.5 Nevada Dam - The Doctors
- Rainbow Six Vegas: Mission 6.6 Nevada Dam - Irena
- Rainbow Six Vegas: Mission 6.7 Nevada Dam - Top of the Dam
- Rainbow Six Vegas: Walkthrough
You are not permitted to copy any image, text or info from this page. This site is not associated with and/or endorsed by the developers and the publishers. All logos and images are copyrighted by their respective owners.
Copyright © 2000 - 2026 Webedia Polska SA for gamepressure.com, unofficial game guides, walkthroughs, secrets, game tips, maps & strategies for top games.