Quake 4: Construction Zone
Start with collecting precious items (you'll find them in the chests on the left and near dead soldier's bodies). When you are ready for the action, you can sit behind the steers of the robot, standing nearby (#99).
Locate the Dispersal Facility
The mech is more difficult in navigation than the Hovertank. He moves slowly and don't reacts immediately. The mech has also weaker armor - you'll notice it quickly during the fight with the same enemies as few levels earlier. The robot is armed with machine gun (infinite ammunition, no reloading) and rockets launcher. This weapon is significantly weaker from the cannon in the tank and you'll have to load rockets after six launched missiles. During the fight you'll mainly use machine gun (it is significantly more effective). Remember to renew armor and shield after every fight.
 |  |
After a few seconds of the march, first enemies will show up already. Infantry will attack you from the right side, there will be group of Hornets in the air too. Get rid of the threat and go under the bridge towards the tunnel. You don't have to worry about the way - only one route is leading to the factory (your destination target).
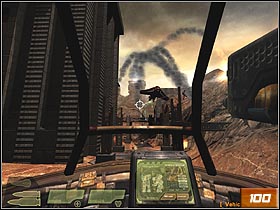
In the tunnel maneuver between obstacles and get rid of enemies. After short walk, you'll find yourself on the surface again - turrets falling off the sky will join your opponents. All the time go straight ahead and systematically eliminate enemies. When you'll pass the second tunnel, shoot at bombing aircraft (#100 - machine gun should be enough). Move until you'll notice small fault of the area in (#101). Save the game and jump down.
 |  |
 |  |
Harvester will show up nearby (#102), temporarily being blocked out by base construction's elements. Use machine gun to destroy Harvester's rockets and immediately concentrate fire on the top part of the robot. Hit him also with rockets, but return to ordinary bullets, while reloading missiles. When Harvester will stand with you face to face, he should be near death already. Continue the work of destruction until he won't fall finally.
Safe and sound, approach the main complex's building (#103). Jump out from the mech and now move on foot. After short walk, you'll see the hatch (#104) leading to the next stage.

- Quake 4 Game Guide & Walkthrough
- Quake 4: Game Guide
- Quake 4: Walkthrough
- Quake 4: Air Defense Bunker
- Quake 4: Air Defense Trenches
- Quake 4: Hangar Perimeter
- Quake 4: Interior Hangar
- Quake 4: MCC Landing Site
- Quake 4: Operation Advantage
- Quake 4: Canyon
- Quake 4: Perimeter Defense Station
- Quake 4: Aqueducts
- Quake 4: Aqueducts Annex
- Quake 4: Nexus Hub Tunnels
- Quake 4: Nexus Hub
- Quake 4: Strogg Medicial Facilities
- Quake 4: Construction Zone
- Quake 4: Dispersal Facility
- Quake 4: Recomposition Center
- Quake 4: Putrification Center
- Quake 4: Waste Processing Facility
- Quake 4: Operation Last Hope
- Quake 4: Data Storage Terminal
- Quake 4: Data Storage Security
- Quake 4: Data Storage Terminal - Return
- Quake 4: Tram Hub Station
- Quake 4: Tram Rail
- Quake 4: Data Processing Terminal
- Quake 4: Data Processing Security
- Quake 4: Data Processing Terminal - Return
- Quake 4: Data Networking Terminal
- Quake 4: Data Networking Security
- Quake 4: Nexus Core
- Quake 4: The Nexus
- Quake 4: Walkthrough
- Quake 4: Game Guide
You are not permitted to copy any image, text or info from this page. This site is not associated with and/or endorsed by the developers and the publishers. All logos and images are copyrighted by their respective owners.
Copyright © 2000 - 2026 Webedia Polska SA for gamepressure.com, unofficial game guides, walkthroughs, secrets, game tips, maps & strategies for top games.