Resistance 3: Chapter 7 - p. 1
![In the distance you'll notice some rebels defending the VTOL from the Chimeras' attack [1] - Chapter 7 - p. 1 - Walkthrough - Resistance 3 - Game Guide and Walkthrough](/resistance3/gfx/word/1851925828.jpg)
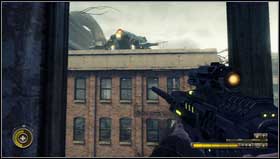
In the distance you'll notice some rebels defending the VTOL from the Chimeras' attack [1].
 | ![You have a very good shooting position, therefore eliminate the enemies from the other building [1] - Chapter 7 - p. 1 - Walkthrough - Resistance 3 - Game Guide and Walkthrough](/resistance3/gfx/word/1851925859.jpg) |
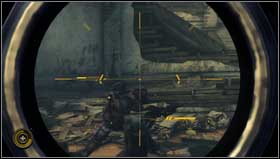
You have a very good shooting position, therefore eliminate the enemies from the other building [1]. The biggest threat are the Longlegs which can jump towards you and start shooting at you [2]. Eliminate them as the first ones.
 | ![The next target are the Steelheads with the Augers [1] - Chapter 7 - p. 1 - Walkthrough - Resistance 3 - Game Guide and Walkthrough](/resistance3/gfx/word/1851925890.jpg) |
The next target are the Steelheads with the Augers [1]. When you fight them eliminate also other enemies shooting at you. When you eliminate most of them you'll be able to use the rope [2] to get on the other building. But before that eliminate the second wave of the Chimeras brought by the dropship.

When only few enemies are alive, use the rope and finish them. After the fight search the building and corpses to replenish the health and ammo. When you're ready, go to the VTOL's defenders [1].
![After the short talk the Chimeras' group led by the Ravager carrying the Atomizer will land between the buildings [1] - Chapter 7 - p. 1 - Walkthrough - Resistance 3 - Game Guide and Walkthrough](/resistance3/gfx/word/1851925921.jpg)
After the short talk the Chimeras' group led by the Ravager carrying the Atomizer will land between the buildings [1]. It's very dangerous at the short range so you need to eliminate it from the distance. Its shield may be an obstacle but remove it using the EMP grenades or the Auger.

- Resistance 3 Game Guide & Walkthrough
- Resistance 3: Walkthrough
- Resistance 3: Chapter 1
- Resistance 3: Chapter 2
- Resistance 3: Chapter 3
- Resistance 3: Chapter 4
- Resistance 3: Chapter 5 - p. 1
- Resistance 3: Chapter 5 - p. 2
- Resistance 3: Chapter 6 - p. 1
- Resistance 3: Chapter 6 - p. 2
- Resistance 3: Chapter 6 - p. 3
- Resistance 3: Chapter 6 - p. 4
- Resistance 3: Chapter 7 - p. 1
- Resistance 3: Chapter 7 - p. 2
- Resistance 3: Chapter 8
- Resistance 3: Chapter 9 - p. 1
- Resistance 3: Chapter 9 - p. 2
- Resistance 3: Chapter 10 - p. 1
- Resistance 3: Chapter 10 - p. 2
- Resistance 3: Chapter 11 - p. 1
- Resistance 3: Chapter 11 - p. 2
- Resistance 3: Chapter 11 - p. 3
- Resistance 3: Chapter 12 - p. 1
- Resistance 3: Chapter 12 - p. 2
- Resistance 3: Chapter 12 - p. 3
- Resistance 3: Chapter 13
- Resistance 3: Chapter 14
- Resistance 3: Chapter 15 - p. 1
- Resistance 3: Chapter 15 - p. 2
- Resistance 3: Chapter 15 - p. 3
- Resistance 3: Chapter 16 - p. 1
- Resistance 3: Chapter 16 - p. 2
- Resistance 3: Chapter 17 - p. 1
- Resistance 3: Chapter 17 - p. 2
- Resistance 3: Chapter 18 - p. 1
- Resistance 3: Chapter 18 - p. 2
- Resistance 3: Chapter 19 - p. 1
- Resistance 3: Chapter 19 - p. 2
- Resistance 3: Chapter 20
- Resistance 3: Walkthrough
You are not permitted to copy any image, text or info from this page. This site is not associated with and/or endorsed by the developers and the publishers. All logos and images are copyrighted by their respective owners.
Copyright © 2000 - 2026 Webedia Polska SA for gamepressure.com, unofficial game guides, walkthroughs, secrets, game tips, maps & strategies for top games.