Sniper Contracts 2: Mount Kuamar - walkthrough
Last update:
On this page of the guide you will find detailed information on Mount Kuamar in Sniper Ghost Warrior Contracts 2. Here you will find a detailed walkthrough of the entire mission. Mount Kuamar is the second location in Sniper Ghost Warrior Contracts 2.
Contracts
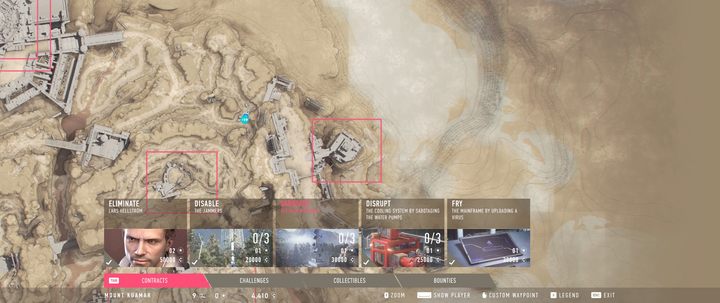
The following contracts are available at Mount Kuamar:
- Eliminate Lars Hellstrom,
- Disable jammers,
- Sabotage the main antenna,
- Disrupt the cooling system by sabotaging the water pumps,
- Fry the mainframe with a virus.
Challenges
You can take on additional challenges:
- Kill 10 snipers in melee combat,
- Kill 10 enemies with a headshot from a sniper rifle,
- Destroy 5 armored vehicles,
- Kill 10 opponents with a sniper turret,
- One shot 2 opponents,
- Kill 5 opponents by shooting the grenades on their belts,
- Eliminate Lars Hellstrom while he is riding the elevator,
- Disable each part of the antenna before the countdown ends,
- Eliminate everyone at the citadel entrance from more than 200 meters away,
- Disable all jammers within 5 minutes of disabling the first,
- Disable all water pumps without raising the alarm,
- Eliminate Lars Hellstrom using death from above,
- Complete all contracts with just the sniper rifle and standard bullets.
Disable jammers
Jammers is the first contract that you can take up in this location. You need to disable 3 jammers to complete this mission. If you are playing this mission for the first time, you will be given a surpressed sniper rifle, so you can shoot at enemies even at close range. Each of the jammers is surrounded by soldiers and protected by a sniper. Often, a bunker with turrets can also be found nearby.
You will find the first jammer to the left of your starting position. On the way there, watch out for patrols and snipers lurking near the jammers (they have a large field of view). Use the shrubs and the Mask mode (both normal mode and infrared).
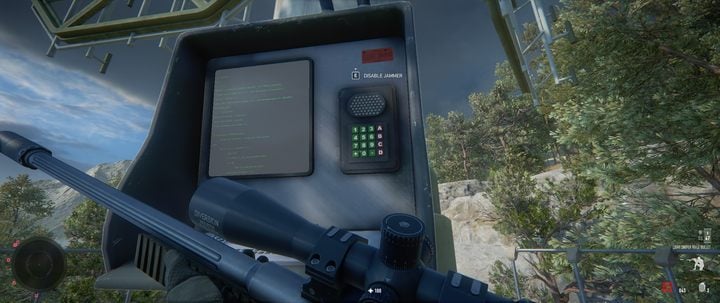
To disable the jammer, you need reach the top of the device and turn it off manually. In the middle of the bunker there is a ladder. To reach it, you just have to bypass the turrets, which shouldn't be too difficult.
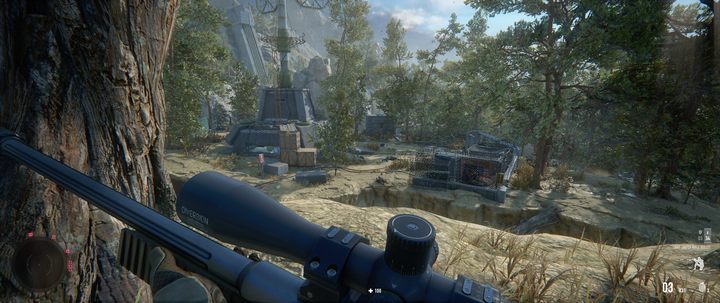
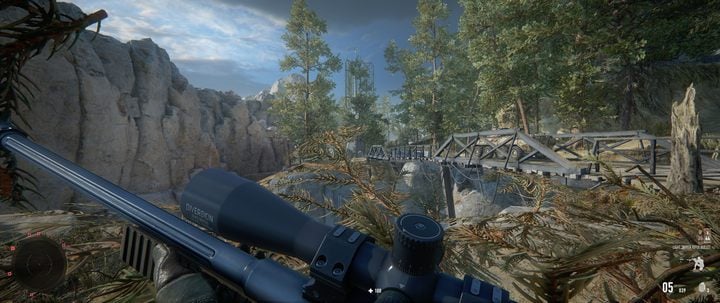
The next jammer is located near the bridge with an armored vehicle (pictured below). It's protected just like the previous jammer - start by eliminating the sniper on top of the device.
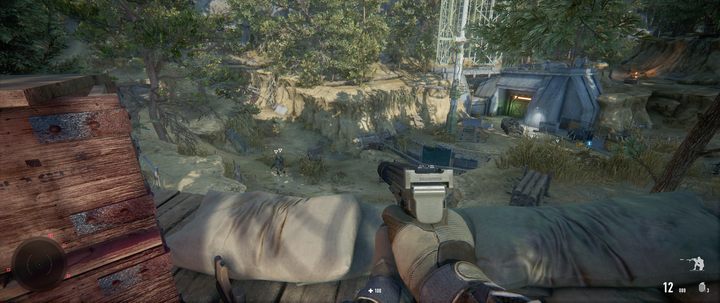
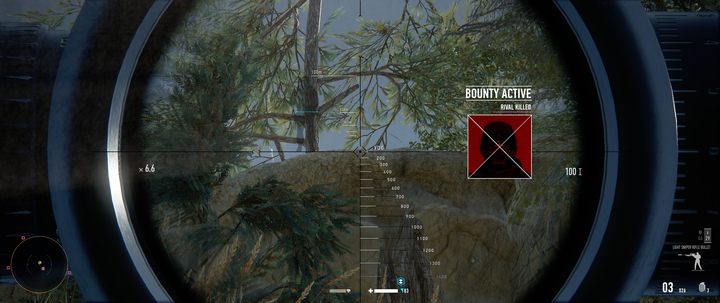
The last jammer is in the same place as the Bounty (an additional objective that will earn you a reward). Your target will be hovering near the jammer and is being guarded by several soldiers. In the location pictured below where the character is standing, you will also find several snipers and regular opponents - best to get rid of them first and then proceed to eliminate the patrol, which from time to time moves away from the jammer (on the left in the screenshot below).
If you want to do it quietly, use the elements of the environment and separate the opponents in any way possible (such as by throwing stones). The sniper turret, preferably with a silencer, will be a very useful tool here. If you have already eliminated your target, remember that there is still a rival in the area who is watching your target - they are located behind the hill (they shoot from roughly the same direction as the snipers you eliminated earlier near this jammer).
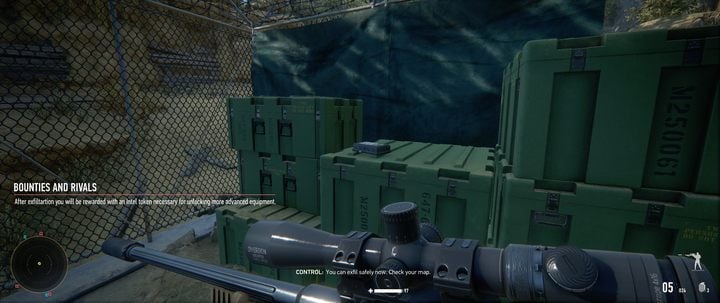
At the jammer, you will also find a collectible. It is located on the green crates. If you have any trouble locating this object, use the radar in the lower left corner of the screen (the yellow icon will show you where you will find the collectible).
Sabotage the main antenna
Sabotaging the main antenna is quite simple, especially since most of the opponents are in the open. The antenna is located to the east side of the location. You shouldn't have much trouble eliminating patrols - if you want to do it quietly, it's a good idea to use the tried and tested strategy and eliminate lone soldiers first.
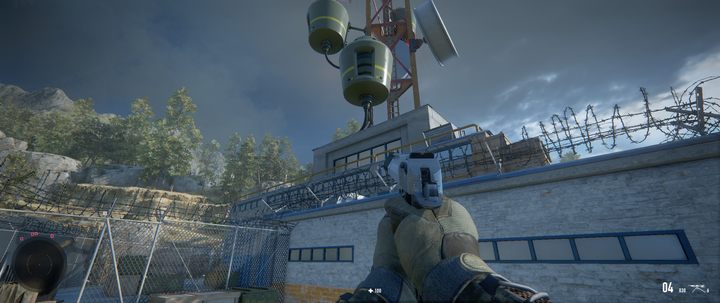
To disable the antenna, you need to shoot at the 3 booths on it (just like in the screenshot below). All you need to do is to shoot the 3 green lights in each booth.
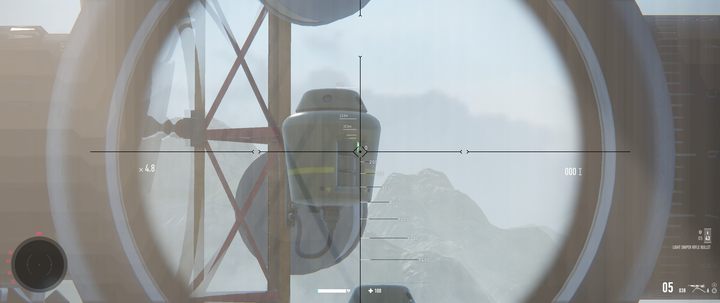
Unfortunately, you'll have to circle around the antenna to shoot the booth from both sides and then head to the back of the building where the antenna is located (as in the screenshot below) - from there you will be able to shoot at the last booth. It's possible that, at any time during the operation, enemies will appear in waves. However, since there isn't much cover in the area, they should be easy to deal with.

You are not permitted to copy any image, text or info from this page. This site is not associated with and/or endorsed by the developers and the publishers. All logos and images are copyrighted by their respective owners.
Copyright © 2000 - 2026 Webedia Polska SA for gamepressure.com, unofficial game guides, walkthroughs, secrets, game tips, maps & strategies for top games.