Splinter Cell Conviction: Merchant's Street Market
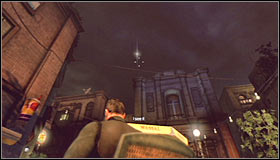 |  |
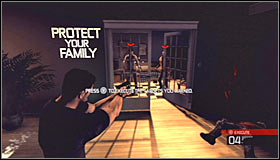
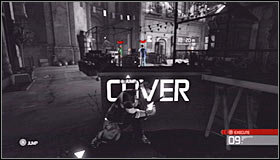
Walkthrough: Wait until Anna asks you to look up and comply to her wish to locate a drone stationed near one of the buildings #1. You'll soon hear gunshots. Ignore the crowd and instead proceed directly to a side alley found to your left #2.
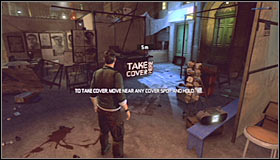 | 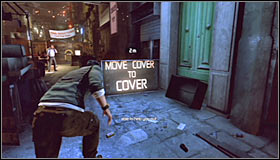 |
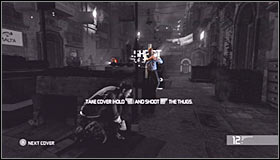
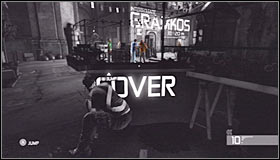
Notice that one of the nearby objects has been marked as a cover by the game #1. Hide there. You'll now have a chance to test a move which allows you to quickly move between certain objects used for cover. In this case you'll want to reach an object located to your right #2 (near the wall of the right building). Naturally it should be done when a nearby guard is not looking your way (he should eventually turn around).
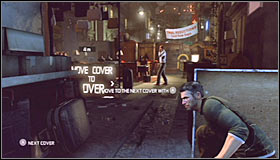 |  |
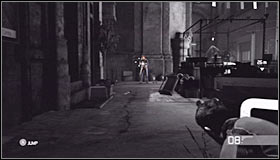
You must wait for the guard to turn around for the second time. This time you'll have to get to a cover located to your left #1. Once you're there you'll be rewarded with an interactive flashback scene. Approach the door leading to Sarah's room and open it #2.
 |  |
Approach the bed of Fisher's daughter and comply to Sarah's wish by turning on the light and then turning it off again. Naturally in both cases you'll have to use a switch located to the left of the bed #1. The flashback sequence will soon end. Make sure that Fisher is taking cover close to the guards #2.
 | 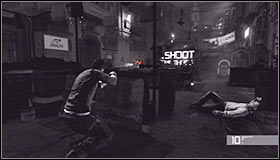 |
You'll now have to use your silenced pistol to take out two guards stationed close to your position #1 #2. Make sure to aim for their heads and a single shot will be more than enough to take them out. It would also be a good idea to eliminate the first guard when she's standing in a darker area so that his colleague won't notice his body.
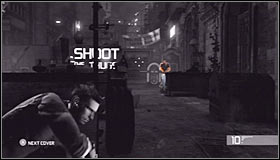 |  |
A third bandit will soon arrive here and he should take cover behind one of the objects located in front of you. Wait for him to leave cover and kill him with a headshot #1. A new flashback sequence will start and this time you'll have to neutralize the first thug by following the instructions seen on the screen #2.
 |  |
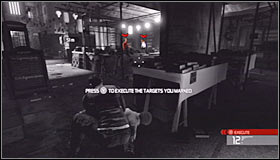
Notice that you've been given a chance to test a very useful system named Mark and Execute. Mark two opponents seen in the next room so that red icons will appear over their heads #1. Once it's been done you'll only have to press a single key to execute the action and Fisher will automatically take care of them for you #2.
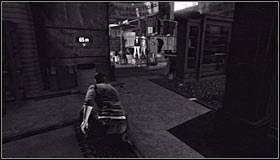 |  |
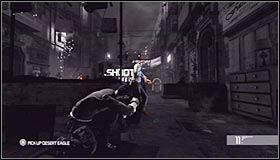
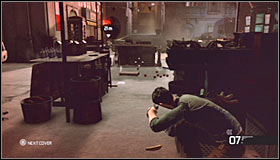
Wait for this sequence to end. Notice that you'll have a chance to examine bodies of fallen enemies (they were carrying Desert Eagle pistols), however it won't be necessary. Proceed to the next area of the street market #1. You'll soon notice a single guard and you'll have to start moving towards him SLOWLY #2.
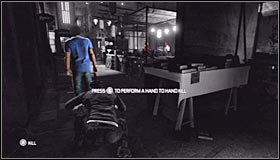 |  |
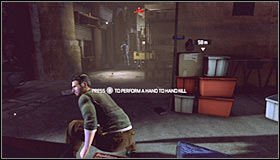
Follow the instructions seen on the screen to silently kill the guard with a melee move #1. Once he's dead mark two of his colleagues using Mark and Execute system #2 and then trigger the action to allow Fisher to kill them (sadly you won't be allowed to pass by them without eliminating them).
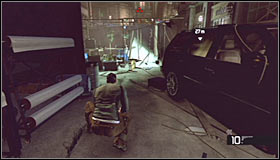 |  |
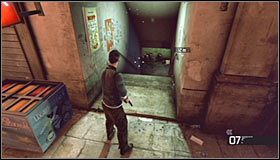
Head on to a small passageway located close to a parked SUV #1. You should be crouching here, because you're heading towards a new group of thugs. Ignore a chance to move between cover along the way. Instead you should immediately move to the last cover #2.
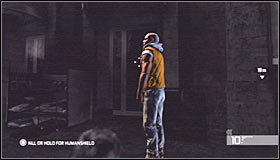 |  |
Wait until one of the bandits shows up here #1. You could use him as a human shield by holding the action key, but I would recommend killing him silently. Remain here and use Mark and Execute action to get rid of two of the closest guards #2.
 |  |
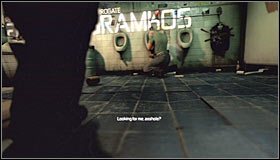
Keep hiding behind cover and wait for the third bandit to get closer to your position so that you'll have a chance to kill him with your pistol #1. Carefully proceed towards the market square #2. Make sure to move between cover so that Gramkos won't have a chance to kill you. Get closer to him and he should start running away.
 | 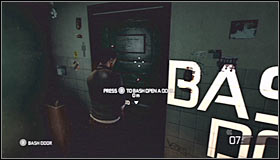 |
You may stand up and start chasing after Gramkos. Proceed to the area where you've last seen him and choose a narrow passageway to enter one of the buildings #1. Be careful, because he'll use a shotgun once you're close to the door. Approach his hiding place after he's fired his weapon #2 and bash the door to start your first interrogation.
 |  |
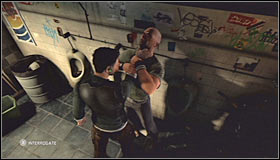
This is a very interesting moment of this mission #1. You'll have to interrogate Gramkos and this means beating him up so that he'll share the identity and whereabouts of the person who's hired him. You can use objects from the environment if you want to. This will make the interrogation more interesting and you'll also have a chance to complete one of the challenges. Start off by moving with him towards a cabin door #2 and then press a corresponding key.
 | 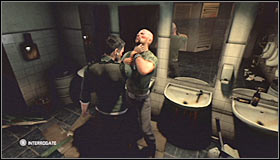 |
You can also move with Gramkos to one of the urinals #1 and to one of the mirrors located on the left wall #2. Keep questioning him until he tells you everything.

- Tom Clancy's Splinter Cell: Conviction Game Guide & Walkthrough
- Splinter Cell Conviction: Game Guide
- Splinter Cell Conviction: Walkthrough
- Splinter Cell Conviction: Hints
- Splinter Cell Conviction: Merchant's Street Market
- Splinter Cell Conviction: Kobin's Mansion
- Splinter Cell Conviction: Price Airfield
- Splinter Cell Conviction: Diwaniya, Iraq
- Splinter Cell Conviction: Washington Monument
- Splinter Cell Conviction: White Box Laboratories - part 1
- Splinter Cell Conviction: White Box Laboratories - part 2
- Splinter Cell Conviction: Lincoln Memorial
- Splinter Cell Conviction: Third Echelon HQ - part 1
- Splinter Cell Conviction: Third Echelon HQ - part 2
- Splinter Cell Conviction: Third Echelon HQ - part 3
- Splinter Cell Conviction: Michigan Ave. Reservoir - part 1
- Splinter Cell Conviction: Michigan Ave. Reservoir - part 2
- Splinter Cell Conviction: Downtown District
- Splinter Cell Conviction: The White House
- Splinter Cell Conviction: Walkthrough
- Splinter Cell Conviction: Game Guide
You are not permitted to copy any image, text or info from this page. This site is not associated with and/or endorsed by the developers and the publishers. All logos and images are copyrighted by their respective owners.
Copyright © 2000 - 2026 Webedia Polska SA for gamepressure.com, unofficial game guides, walkthroughs, secrets, game tips, maps & strategies for top games.