WoW Warlords of Draenor: Auchindoun

Your next destination is the holy Draenea Sanctuary. This location is meant for characters at levels 95-97. There are 4 challenging opponents to fight, after which you can obtain items at level 570 in the case of the normal difficulty mode, and 630 in the case of the Heroic difficulty level.

Auchindoun is in the very center of Talador. It is the holy place of all the Draenas, a sanctuary with the souls of all of the ancestors rested. It is these souls that are the reason for the Burning Legion, led by Teron'gor to have appeared.
1. Vigilant Kaathar

After you enter thus dungeon, you should go left, at the intersection. You will reach the place, where you fight your first opponent. After you see the cutscene, you will have to eliminate three groups of enemies. Thanks to this, your main opponent will activate - Kaathar. He is both the most difficult and the easiest opponent in this dungeon. If you do not know how to react to his attacks, you can die within several seconds. If, however, you learn the functioning of the attacks, the battle should be no challenge to you.

Kaathar uses three main abilities. The first one is [Hallowed Ground], where the boss launches an orb of light towards you. After a while, the orb explodes and damages you for around 20k health. The best way to avoid taking damage is to walk some 10 meters away. The second ability is the [Sanctified Strike], which forms a series of cracks on the ground, and damages you if you step on them. The obvious defense against this attack is avoiding these cracks. The last, and the most lethal one is [Consecrated Light], where the boss forms several waves of light that deal damage to you. Fortunately, Kaathar throws his shield in your direction sufficiently early. To avoid taking damage, you need to hide behind it. If you fail to do this, you will, most probably, die within 3-4 seconds.
2. Soulbinder Nyami

The way back into the center of the complex is not going to be that easy. Along your path, you will have to deal with several groups of enemies. In the very center of Auchindoun you encounter Soulbinder Nyami. Fighting her does not require any special tactic but, there is a lot of things happening in the battlefield. You can expect lots of creatures summoned by the boss, which it is best to deal with, when they are still few in number. AoE attacks are perfect for this. As for special abilities, you need to watch out for [Arcane Bomb] and [Soul Vessel]. During the former, Nyami forms several orbs of energy that deal lots of damage if you touch them. [Soul Vessel] on the other hand, is an unique AoE attack. The area of its effect is very big but, in this case, the safest spot is in the very center. The entire party needs to gather in the center to avoid taking damage. Then, you scatter again.
3. Azzakel

After you defeat Nyami and reach the other end of the sanctuary, you will face Azzakel. There are two phases to this battle. The first one is direct fight with Azzakel, where you need to deal as much damage as possible. Your tank needs to be the most careful here, because it is him that [Fel Lash] is used on, and which pushes him away from the opponent. At the same time Azzakel may change targets and use [Curtain of Flame], which causes an explosion of fire and deals to you, and the party members, lots of damage.
After you have dealt enough damage, the battle enters phase 2, where Azzakel summons allies. You should not attack Azzakel himself, at this point, because he is invulnerable. You need to focus on eliminating the summoned opponents, one after another. The most difficult task here is that of the tank, who needs to attract the attention of all the creatures. Your priority in this case is to kill the Pyromaniac, then the Trickster. Felguard can be left for the end. After you have defeated all of the opponents, you fight Azzakel again. The entire cycle may occur several times, up until you kill the boss.
4. Teron'gor
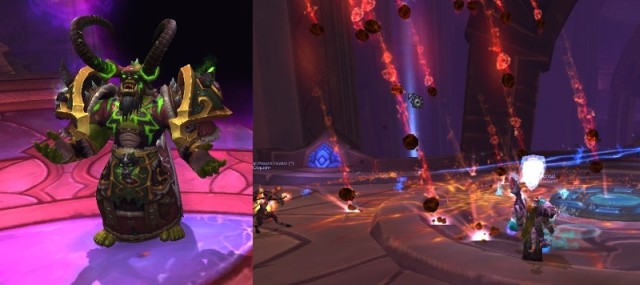
Now, you are going to fight the final opponent. Before that, however, you will see a short cutscene and fight three minibosses. I am not going to describe them here, because they are not too demanding and fighting them should be a mere formality. As soon as you deal with them, you will face Teron'gor.
Also in this case, the battle can be divided into two phases. The first one is inarguably easier, as long as Teron'gor has more than 75% health. He then uses simple spells available for Warlock. The most dangerous one, in this case, is [Rain of Fire], which summons a hail of fireballs that you should avoid.
As soon as his health drops below 75%, Teron'gor absorbs one of the souls of Draenea, which provides him with unique abilities. For each individual battle, they are random. Which ability he has absorbed becomes apparent by what he says to you. It may be: Demonology, Destruction and Affliction. Regardless of which ability he absorbs, he now wields new unique powers. You should especially watch out for AoE attacks and interrupt his attacks as often as possible, by casting, e.g. Counterspell.

- World of Warcraft: Warlords of Draenor Game Guide
- WoW Warlords of Draenor: Detailed guide
- WoW Warlords of Draenor: Detailed guide to WOW Warlords of Draenor
- WoW Warlords of Draenor: Markings in this guide
- WoW Warlords of Draenor: The garrison
- WoW Warlords of Draenor: The purpose and functions of the garrison
- WoW Warlords of Draenor: Garrison management
- WoW Warlords of Draenor: The suggested order to expand your garrison
- WoW Warlords of Draenor: How to obtain new resources
- WoW Warlords of Draenor: Buildings (big)
- WoW Warlords of Draenor: Buildings (medium)
- WoW Warlords of Draenor: Buildings (small)
- WoW Warlords of Draenor: Miscellaneous buildings
- WoW Warlords of Draenor: Outposts
- WoW Warlords of Draenor: The system of followers
- WoW Warlords of Draenor: Picking and dispatching followers on missions
- WoW Warlords of Draenor: Recruiting new allies
- WoW Warlords of Draenor: Dungeons
- WoW Warlords of Draenor: Bloodmaul Slag Mines
- WoW Warlords of Draenor: Iron Docks
- WoW Warlords of Draenor: Auchindoun
- WoW Warlords of Draenor: Skyreach
- WoW Warlords of Draenor: Grimrail Depot
- WoW Warlords of Draenor: Shadowmoon Burial Grounds
- WoW Warlords of Draenor: The Everbloom
- WoW Warlords of Draenor: Upper Blackrock Spire
- WoW Warlords of Draenor: Mounts
- WoW Warlords of Draenor: Achievement-related mounts
- WoW Warlords of Draenor: Garrison-related mounts
- WoW Warlords of Draenor: Profession-related mounts
- WoW Warlords of Draenor: Reputation-related mounts
- WoW Warlords of Draenor: Mounts that you obtain after you defeat an opponent
- WoW Warlords of Draenor: Mounts that you obtain from PvP duels
- WoW Warlords of Draenor: Remaining mounts
- WoW Warlords of Draenor: Fieldcane Add-ons
- WoW Warlords of Draenor: Curse
- WoW Warlords of Draenor: Garrison Mission Manager + Master Plan
- WoW Warlords of Draenor: HandyNotes
- WoW Warlords of Draenor: Bagnon
- WoW Warlords of Draenor: System requirements
- WoW Warlords of Draenor: Detailed guide
You are not permitted to copy any image, text or info from this page. This site is not associated with and/or endorsed by the developers and the publishers. All logos and images are copyrighted by their respective owners.
Copyright © 2000 - 2026 Webedia Polska SA for gamepressure.com, unofficial game guides, walkthroughs, secrets, game tips, maps & strategies for top games.