
Desperados 3: Mission 6 - map, badges
Last update:
On this page of our world atlas for Desperados 3 you can find a high quality map of Mission 6 - The Bridge at Eagle Falls. Apart from the title railway bridge, we have marked all important locations like the quarry, shooting range or sawmill. Our walkthrough also describes all challenges (badges) of the 6th mission. You will find out, among other things, how to kill opponents by arranging some accidents.
The full description of Mission 6 can be found on the following pages of this chapter. Our walkthrough also contains links and indications that refer to the map. For example, the marked point (M6,5) indicates that you should find blue point no. 5 on the map of mission 6.
Mission 6: Markings on the map
- The red dots symbolize opponents that can be encountered on the bridge and in its vicinity. By default they are hostile. However, you may deceive many enemies after acquiring and equipping Kate's disguise.
- The white dots symbolize animals and civilians. Bystanders can alert your enemies if they spot you.
- We have marked all important locations (worth visiting) with blue points. Descriptions of these areas can be found just below the map.
Mission 6: General information
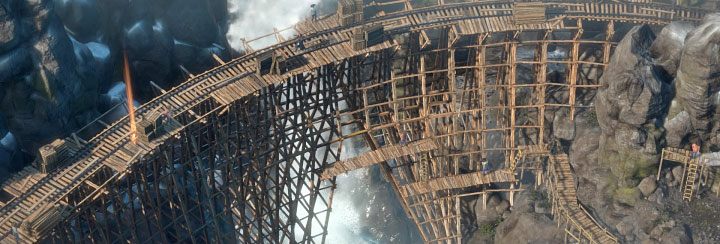
Mission 6 (The Bridge at Eagle Falls) takes place in an area where the title railroad bridge is located. Your main objective is to destroy the bridge. In the first part of the mission, heroes must make their way to the other side of the ravine. In the initial part of the mission there is an opportunity to acquire a disguise for Kate and this ability can make it significantly easier to eliminate many regular enemies.
In the central part of the map you will have to choose a place from which you can collect the dynamite needed to blow up the bridge. Dynamite is stored in two different locations on the map - the quarry and the shooting range. In order to complete the most important part of the mission, you only have to reach one of these locations. Unfortunately, both locations will be heavily guarded. Also, in both cases Doc has to break into the building where the Dynamite is being stored.
Blowing up the bridge will allow you to advance to the final part of the mission. In the last part of the mission Sanchez will appear on the map. He will help heroes reach the railway platform as team members have to use the train to leave the mission area.
Playable characters:
- Cooper - he is available from the very beginning of the mission.
- McCoy - he is available from the very beginning of the mission.
- Kate - she is available from the very beginning of the mission. After you reach the small train station (M7,6) you can also find a disguise for her.
- Sanchez - he will appear on the map if you blow up the bridge by using dynamite. Hector will appear on a large platform (M7,13). He will be able to assist other team members in leaving the mission area.
Mission 6: Badges / Challenges
In Mission 6 there are 8 Badges to earn and unlock. We have described all of them below. Challenges are initially hidden, although you can complete them during the first playthrough of the mission.
Challenges are unavailable if you play on the Beginner difficulty level. In order to access the challenges, you need to choose at least the normal difficulty level. The same goes for replaying missions to get the remaining challenges.
- Get the dynamite from the quarry
- Get the dynamite from the shooting range
- Don't use firearms
- Kill 3 guards with rolling logs
- Kill 3 guards at the same time in a quarry explosion
- Kill 5 guards when destroying the bridge
- Speedrun: Complete the mission in under 13:20 minutes
- Complete the mission on Hard difficulty
Get the dynamite from the quarry
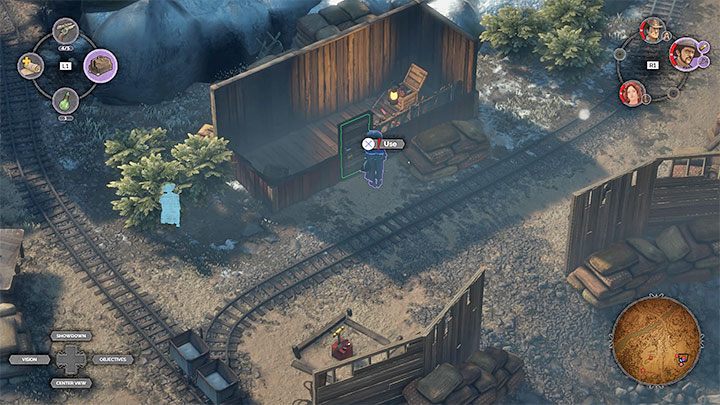
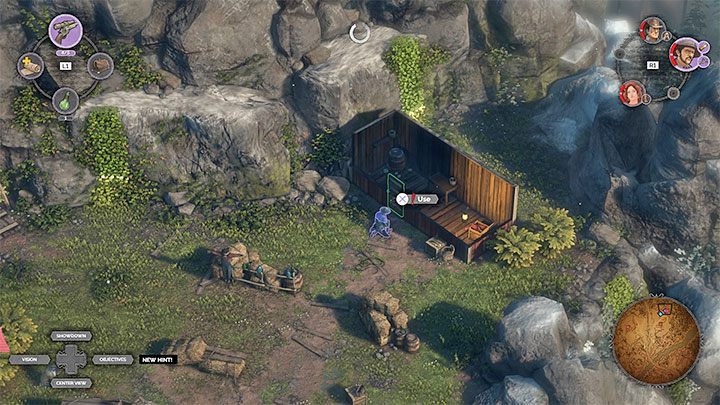
This and the next challenge are mutually exclusive, as once you have taken the dynamite from one of the 2 possible locations, you will automatically receive the next mission objective. Dynamite available in the quarry (M7,2) is stored in a small building adjacent to the area where the rocks are blown up. You need to get rid of as many nearby enemies as possible (the detonator can help you with this) and then use McCoy's lockpick skill. For more information please check our walkthrough.
Get the dynamite from the shooting range
Dynamite available in the shooting range (M7,3) is also stored in a small building. In this case, eliminating opponents is even more important, especially since several of them are always facing the building. As in case of the quarry, Doc McCoy has to use his lockpicking skills. A detailed description of stealing the dynamite from the shooting range can be found in our walkthrough.
Don't use firearms
This is a difficult challenge and it's best to complete it when you replay the mission on easy difficulty level. Eliminating snipers can be troublesome because you can't use McCoy's sniper rifle to complete this challenge. You must avoid them completely or approach them in order to defeat them in melee combat. Long Coat opponents will also cause you a lot of problems - you have to weaken them without using any firearms or simply bypass them.
Kill 3 guards with rolling logs
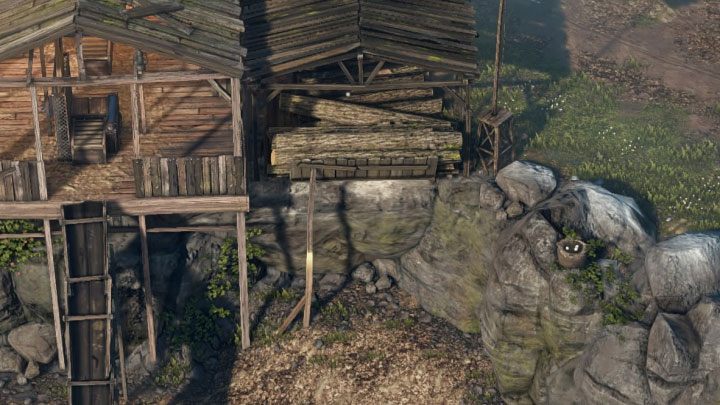
The opportunity to get this Badge appears in front of the sawmill (M7,12). The screenshot above shows a support - damage it to drop logs of wood onto your opponents. A good idea is to stun at least three enemies and drag their bodies into the area where the logs will roll down. Only then try to sabotage the support.
Kill 3 guards at the same time in a quarry explosion
It is not a difficult challenge, but it does force you to perform stealth kills on most of the enemies that reside in part of the quarry where you can get the dynamite (M7,2). The most important thing is to safely reach the detonator in the quarry. Use the detonator when Long Coat stops by the rocks along with two quarry workers. The explosion will kill all three characters.
Kill 5 guards when destroying the bridge
The requirements of this challenge can be fulfilled in a clever way. Before you detonate the dynamite planted in the lower part of the bridge (M7,19), stun 5 of any opponents and move their unconscious bodies to the upper part of the bridge. Put their bodies right above the spot in which the dynamite was planted. This ensures that the unconscious enemies will get killed after the middle section of the bridge collapses as a result of dynamite explosions.
Speedrun: Complete the mission in under 13:20 minutes
Be sure to play on the easy difficulty level so you can perform the most important activities faster, that is, go to the other side of the bridge, reach one of the locations with dynamite, plant dynamite and escape from the map. Don't waste any time on getting a disguise for Kate, cause by using her flirting ability you will lose lots of valuable seconds. Play riskier and take advantage of the fact that you can often save the game. It will make it easier for you to repeat those parts of the mission where you needlessly wasted too much time.
Complete the mission on Hard difficulty
This is the best choice to complete the mission for the first time. However, obtaining dynamite on a high level of difficulty will be much more demanding. This is not only due to the more sensitive opponents, but also other people who were not present on the map on lower levels of difficulty. Fortunately, this challenge doesn't have a time limit, and you can save your progress freely.

- Desperados 3 Guide
- Desperados 3: Walktrough
- Desperados 3: Mission 6 - The Bridge at Eagle Falls
- Desperados 3: Mission 6 - map, badges
- Desperados 6: Walk over the bridge and get a disguise - mission 6, walkthrough
- Desperados 3: Find the dynamite, option 1 - mission 6, walkthrough
- Desperados 3: Find the dynamite, option 2 - mission 6, walkthrough
- Desperados 3: Plant dynamite and detonate the bridge - mission 6, walkthrough
- Desperados 3: Meet the heroes on the train - mission 6, walkthrough
- Desperados 3: Mission 6 - The Bridge at Eagle Falls
- Desperados 3: Walktrough
You are not permitted to copy any image, text or info from this page. This site is not associated with and/or endorsed by the developers and the publishers. All logos and images are copyrighted by their respective owners.
Copyright © 2000 - 2026 Webedia Polska SA for gamepressure.com, unofficial game guides, walkthroughs, secrets, game tips, maps & strategies for top games.