Trek to Yomi: Chapter 2 - list of all secrets and collectibles
This page of the Trek to Yomi guide lists the secrets to find in Chapter 2 - 6 artifacts, shuriken and hero upgrades.
This page of the guide to Trek to Yomi contains information on the secrets of Chapter 2, which will allow you to complete this stage in 100%. You can read about the locations of 6 artifacts, as well as various upgrades available in level two - health, stamina and shurikens.
- Bo-Shuriken Upgrade
- Stamina Upgrade
- Artifact #1 - Discarded Kami Carving
- Artifact #2 - Crude Tekko
- Stamina Upgrade
- Artifact #3 - The Three Monkeys
- Stamina Upgrade
- Artifact #4 - Ema
- Health Upgrade
- Artifact #5 - Lost Love Letter; Stamina Upgrade
- Artifact #6 - Mori Shio
Bo-Shuriken Upgrade
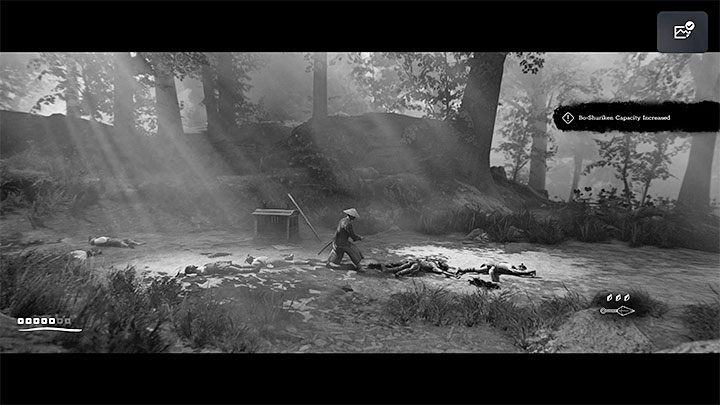
This upgrade is a reward for defeating the first group of bandits at the very beginning of the stage. You can't miss it.
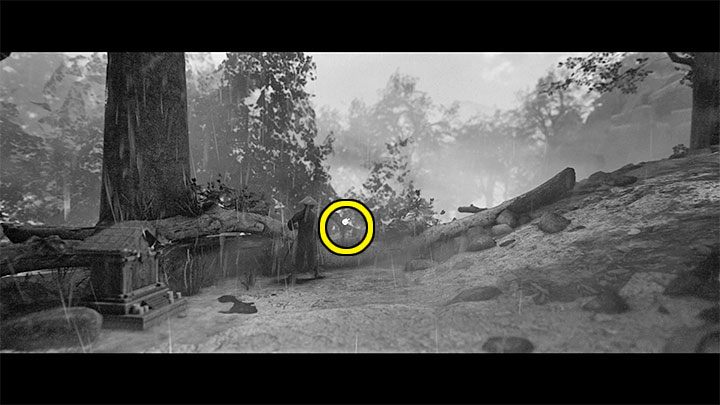
Stamina Upgrade
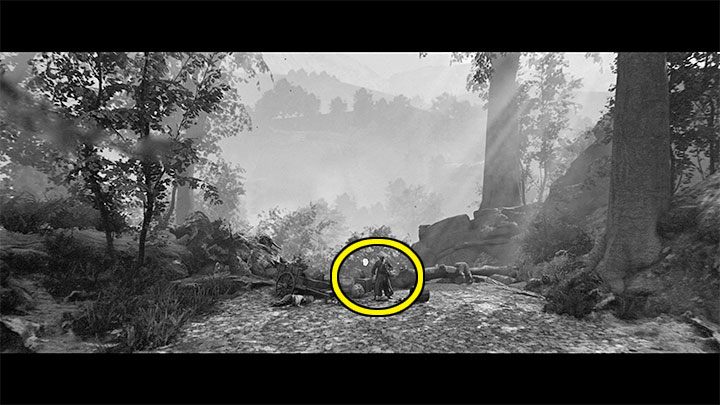
You can obtain this upgrade at the very beginning of the chapter as well. Go left after you defeat the first group of enemies. You will reach the viewpoint shown in the picture above.
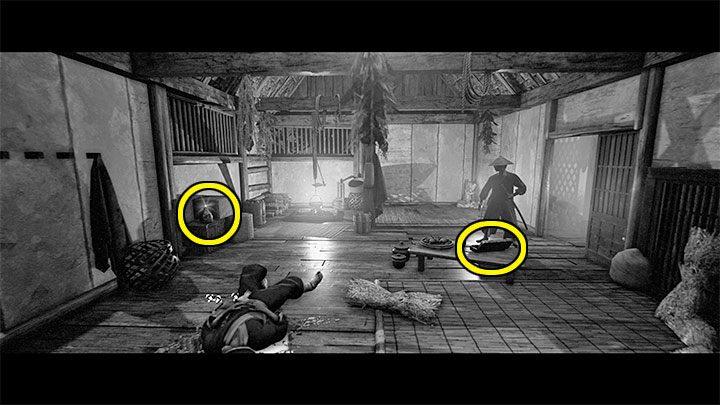
Artifact #1 - Discarded Kami Carving
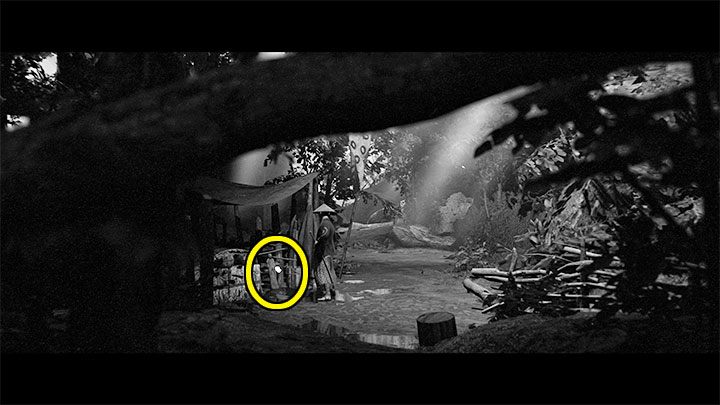
You can find this secret shortly after defeating the first armored opponent (testing the finisher). Soon after this fight you will reach a shrine. Head towards the bottom of the screen, and the side location shown in the picture above will load. You will easily find the artifact here.
Artifact #2 - Crude Tekko
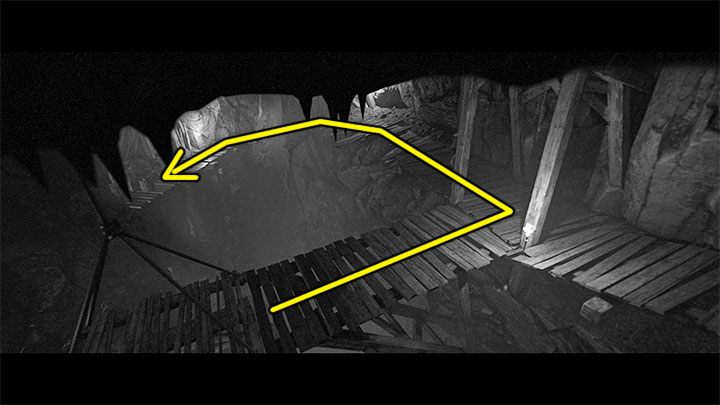

You can find this secret while crossing the mine, i.e. right after you deal with a group of bandits and use the elevator. Follow the upper path shown in picture 1, where you have to push a big object to unlock your way further.
The artifact is at the end of the path, in the place marked in picture 2.
Stamina Upgrade
This secret is very hard to miss. You will find it next to the shrine that you will come across shortly after leaving the mine.
Artifact #3 - The Three Monkeys
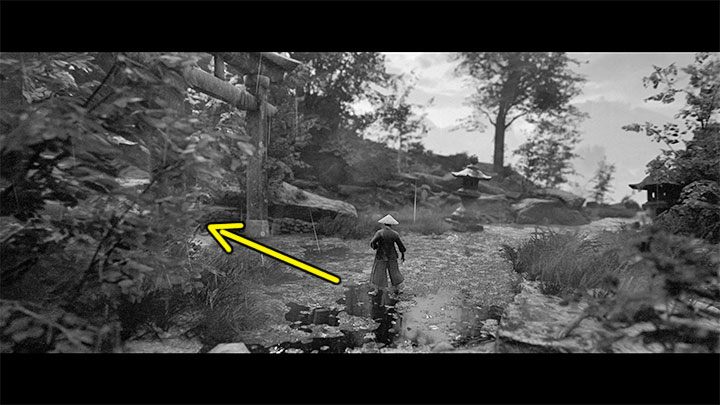
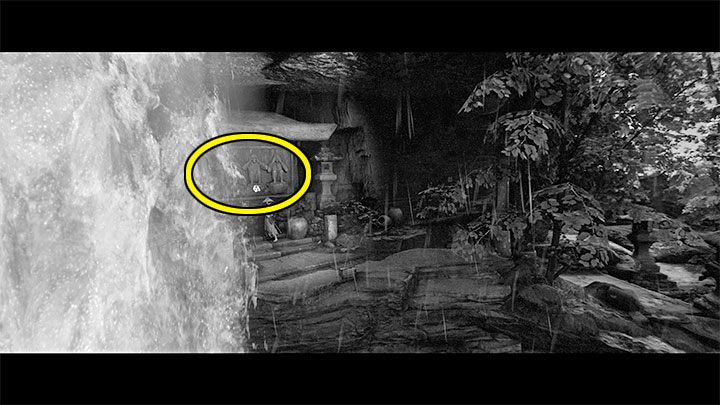
You can find this artifact shortly after dealing with the bandits on the fallen tree. You will reach the fork in picture 1, and you have to choose the left path first.
Examine the three monkeys next to the waterfall - this place is marked in picture 2.
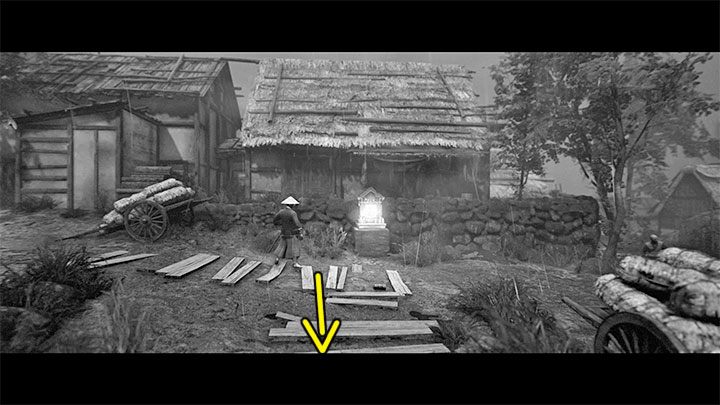
Stamina Upgrade
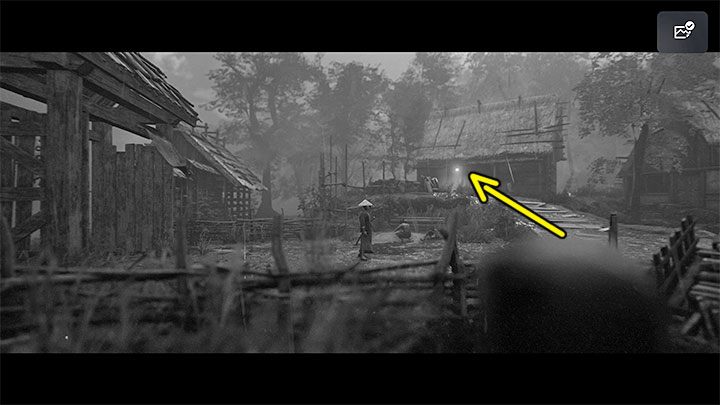
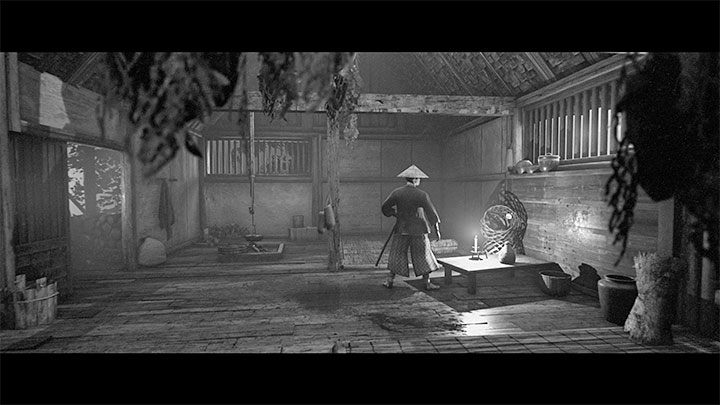
You can find the upgrade right after entering the village and receiving the quest to save its inhabitants. Explore the first side path from picture 1 that leads to a small hill with one of the huts.
Enter the building and take the secret visible in picture 2.
Artifact #4 - Ema

This secret is in the village; you'll find it right after pushing the cart. You will reach the location shown in the picture above. Check out the secret on the left first, before using the ladder on the right.
Health Upgrade
You can acquire this secret while going through the village. After reaching the area shown in picture 1, don't follow the upper path immediately, but rather destroy the left gate first.
Explore the area on the left. The collectible is on the pier shown in picture 2.
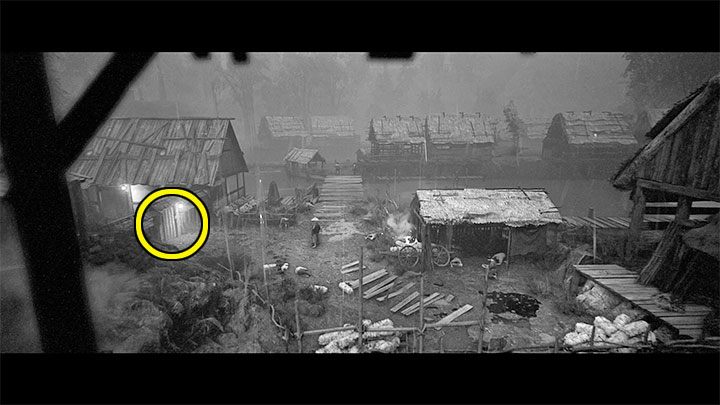
Artifact #5 - Lost Love Letter; Stamina Upgrade
Both secrets can be found in the same building in the village. Follow the main path through the village, but when you reach the area shown in picture one, take the (less obvious) left path.
You will reach a side area. Look inside the building on the left. The locations of the collectibles are marked in picture 2.
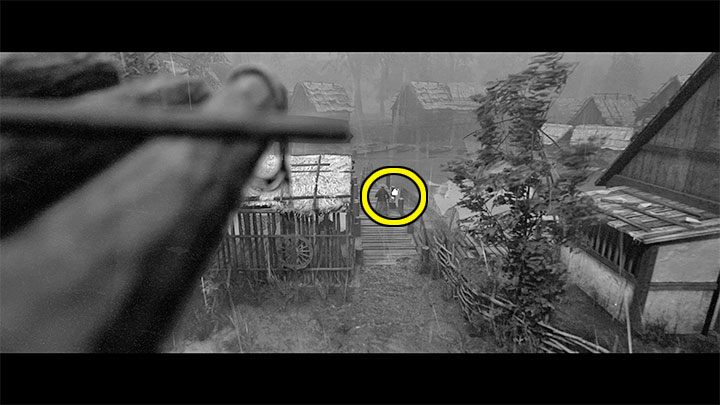
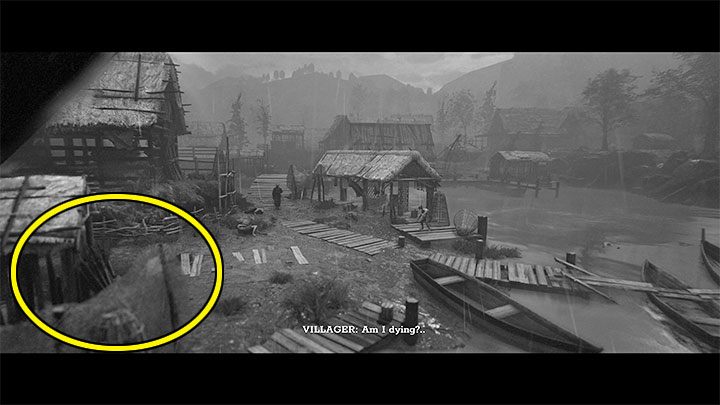
Artifact #6 - Mori Shio
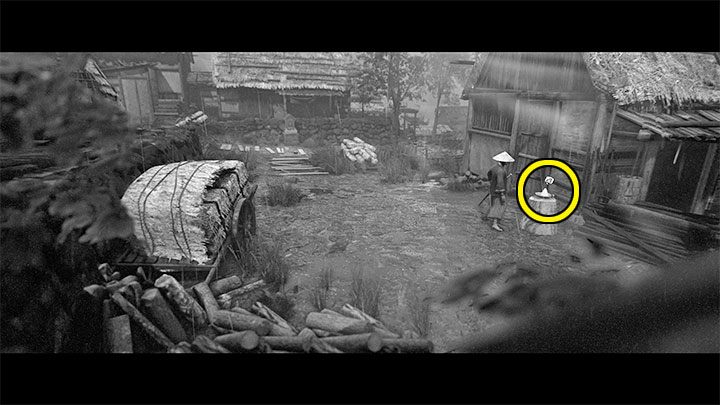
You'll find this artifact further down your route through the village. You have to get to the shrine from picture 1. Don't go any further right, but take the bottom path instead.
The game will load a separate area shown in picture 2. The secret is hidden on the right side.

- Trek to Yomi Guide
- Trek to Yomi: Game guide
- Trek to Yomi: Secrets & Collectibles
- Trek to Yomi: List of secrets - all artifacts and upgrades
- Trek to Yomi: Chapter 1 - all secrets and collectibles
- Trek to Yomi: Chapter 2 - list of all secrets and collectibles
- Trek to Yomi: Chapter 3 - list of all secrets and collectibles
- Trek to Yomi: Chapter 4 - list of all secrets and collectibles
- Trek to Yomi: Chapter 5 - all secrets and collectibles
- Trek to Yomi: Chapter 6 - all secrets and collectibles
- Trek to Yomi: Chapter 7 - all secrets and collectibles
- Trek to Yomi: Secrets & Collectibles
- Trek to Yomi: Game guide
You are not permitted to copy any image, text or info from this page. This site is not associated with and/or endorsed by the developers and the publishers. All logos and images are copyrighted by their respective owners.
Copyright © 2000 - 2026 Webedia Polska SA for gamepressure.com, unofficial game guides, walkthroughs, secrets, game tips, maps & strategies for top games.