Uncharted 3: Chapter 11 - As Above, So Below part 1 walkthrough
This page of the guide contains the walkthrough of the first part of chapter 11 of Uncharted 3 Drake's Deception. The chapter is titled As Above, So Below and during it we will be exploring vast catacombs. In the first part of the mission, Nate must solve the puzzle with the drawing of pillars, the puzzle with gears and the puzzle with the shadows of the statues.
The puzzle with pillars
![After opening the well in the middle of the room, go down the ladder [1] - Uncharted 3: Chapter 11 - As Above, So Below part 1 walkthrough - Walkthrough - Uncharted 3 Drakes Deception Guide](/uncharted-3-drakes-deception/gfx/word/113942750.jpg)
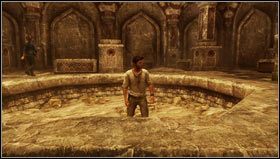
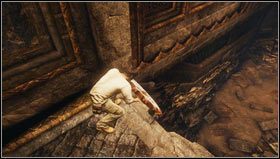
After opening the well in the middle of the room, go down the ladder [1].
 | ![We enter a spacious room with pillars [1] - Uncharted 3: Chapter 11 - As Above, So Below part 1 walkthrough - Walkthrough - Uncharted 3 Drakes Deception Guide](/uncharted-3-drakes-deception/gfx/word/113942781.jpg) |
We enter a spacious room with pillars [1]. We need to solve the puzzle to get out of the area. After looking at the map with the drawings of the pillars, we find the wall on which the clue was engraved [2]. We learn from it that the moon symbol is the correct one.
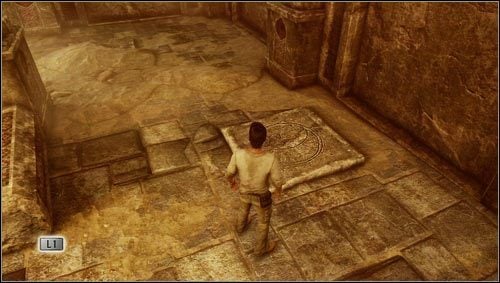
We need to examine the stone slabs lying on the ground. On one of them we will find the sign we are looking for (the symbol of the moon) [1].
![We stand on it and, holding the map in our hands (or to be more precise the drawing on the back of the map), we look around the room, trying to locate the three pillars drawn from the place where we stand [1] - Uncharted 3: Chapter 11 - As Above, So Below part 1 walkthrough - Walkthrough - Uncharted 3 Drakes Deception Guide](/uncharted-3-drakes-deception/gfx/word/113942812.jpg)
We stand on it and, holding the map in our hands (or to be more precise the drawing on the back of the map), we look around the room, trying to locate the three pillars drawn from the place where we stand [1].
 | ![After finding them with our companions, we approach the pillars and pull the levers inside them [1] - Uncharted 3: Chapter 11 - As Above, So Below part 1 walkthrough - Walkthrough - Uncharted 3 Drakes Deception Guide](/uncharted-3-drakes-deception/gfx/word/113942843.jpg) |
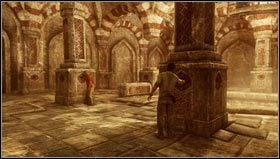
After finding them with our companions, we approach the pillars and pull the levers inside them [1]. This will open a hidden passage [2].
The cog wheels puzzle
![After passing through a long corridor, we enter a room with two statues that guard the middle door [1] - Uncharted 3: Chapter 11 - As Above, So Below part 1 walkthrough - Walkthrough - Uncharted 3 Drakes Deception Guide](/uncharted-3-drakes-deception/gfx/word/113942859.jpg)
After passing through a long corridor, we enter a room with two statues that guard the middle door [1]. To open them, we need to solve two puzzles contained behind the open doors to the left and right of the statues.
 | ![When we enter the room on the left, the door will close behind us and we will stand in front of the mechanism with gears [1] - Uncharted 3: Chapter 11 - As Above, So Below part 1 walkthrough - Walkthrough - Uncharted 3 Drakes Deception Guide](/uncharted-3-drakes-deception/gfx/word/113942890.jpg) |
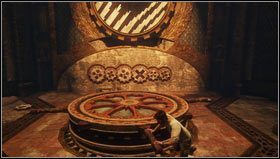
When we enter the room on the left, the door will close behind us and we will stand in front of the mechanism with gears [1]. We need to fill the gaps with the gears scattered around the room (you can find hints about it in the notebook). First we go after the gear lying on the stone ledge [2].
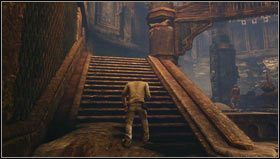 | ![In order to get to it, we need to go up the stairs located on the opposite side of the room and climb up the pillar [1] - Uncharted 3: Chapter 11 - As Above, So Below part 1 walkthrough - Walkthrough - Uncharted 3 Drakes Deception Guide](/uncharted-3-drakes-deception/gfx/word/113942921.jpg) |
In order to get to it, we need to go up the stairs located on the opposite side of the room and climb up the pillar [1]. While heading towards the rack, we will move through a wooden beam [2] - from there we will see symbols hidden on the wall, similar to the ones found on gears, and the direction of their rotation. We conclude from them that we only need gears with a cross and four circles. In addition, they must rotate in the opposite direction, so we must arrange them alternately.
 | ![Go to the end of the beam and descent down to knock down the gear we are looking for [1] - Uncharted 3: Chapter 11 - As Above, So Below part 1 walkthrough - Walkthrough - Uncharted 3 Drakes Deception Guide](/uncharted-3-drakes-deception/gfx/word/113942953.jpg) |
Go to the end of the beam and descent down to knock down the gear we are looking for [1]. With the help of tips and the wheels on the ground, we complete the chain of gears - as shown in the above screenshot [2].
 | ![All we need to do now is to turn the treadmill [1] - Uncharted 3: Chapter 11 - As Above, So Below part 1 walkthrough - Walkthrough - Uncharted 3 Drakes Deception Guide](/uncharted-3-drakes-deception/gfx/word/113942984.jpg) |
All we need to do now is to turn the treadmill [1]. Once that is done, we will be able to return to the main room and head through the doors on the right side. We will enter a spacious hall with fragments of statues placed on pillars [2].
The statue shadows puzzle
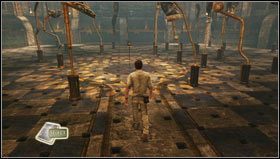 | ![We go down the stairs and approach the cane placed in the middle of the room [1] - Uncharted 3: Chapter 11 - As Above, So Below part 1 walkthrough - Walkthrough - Uncharted 3 Drakes Deception Guide](/uncharted-3-drakes-deception/gfx/word/113943015.jpg) |
We go down the stairs and approach the cane placed in the middle of the room [1]. After lighting it, we look into the notebook. In it we will find a drawing [2] similar to the one found at the end of the room.
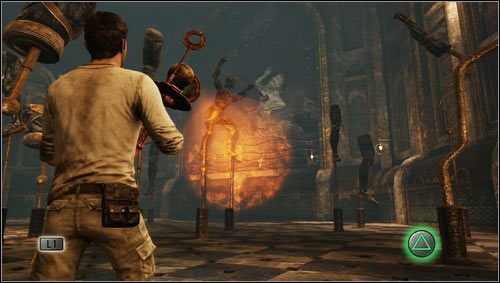
Now we have to set up lanterns so that the shadows of the fragments of the statues complement the drawing on the wall so that it looks like the one in the notebook (i.e. so that they form a man with a spear). In order to do this, we go to the right side of the room, simultaneously looking at the picture on the wall. Soon we will find the fragments we are looking for [1]. Now all you have to do is stick the lanterns into the floor and return to the room with the statues guarding the door.

- Uncharted 3 Drake's Deception Guide
- Uncharted 3: Game Guide
- Uncharted 3: Walkthrough
- Uncharted 3: Chapter 1 - Prologue walkthrough
- Uncharted 3: Chapter 2 - Greatness from Small Beginnings walkthrough
- Uncharted 3: Chapter 3 - Second-Story Work walkthrough
- Uncharted 3: Chapter 4 - Run to Ground walkthrough
- Uncharted 3: Chapter 5 - London Underground walkthrough
- Uncharted 3: Chapter 6 - The Chateau part 1 walkthrough
- Uncharted 3: Chapter 6 - The Chateau part 2 walkthrough
- Uncharted 3: Chapter 7 - Stay in the Light walkthrough
- Uncharted 3: Chapter 8 - The Citadel part 1 walkthrough
- Uncharted 3: Chapter 8 - The Citadel part 2 walkthrough
- Uncharted 3: Chapter 9 - The Middle Way walkthrough
- Uncharted 3: Chapter 10 - Historical Research walkthrough
- Uncharted 3: Chapter 11 - As Above, So Below part 1 walkthrough
- Uncharted 3: Chapter 11 - As Above, So Below part 2 walkthrough
- Uncharted 3: Chapter 12 - Abducted part 1 walkthrough
- Uncharted 3: Chapter 12 - Abducted part 2 walkthrough
- Uncharted 3: Chapter 13 - Rough Seas walkthrough
- Uncharted 3: Chapter 14 - Cruisin for a Bruisin walkthrough
- Uncharted 3: Chapter 15 - Sink or Swim walkthrough
- Uncharted 3: Chapter 16 - One Shot at This walkthrough
- Uncharted 3: Chapter 17 - Stowaway walkthrough
- Uncharted 3: Chapter 18 - The Rub al Khali walkthrough
- Uncharted 3: Chapter 19 - The Settlement walkthrough
- Uncharted 3: Chapter 20 - Caravan walkthrough
- Uncharted 3: Chapter 21 - The Atlantis of the Sands walkthrough
- Uncharted 3: Chapter 22 - The Dreamers of the Day walkthrough, Talbot boss fight
- Uncharted 3: Walkthrough
- Uncharted 3: Game Guide
You are not permitted to copy any image, text or info from this page. This site is not associated with and/or endorsed by the developers and the publishers. All logos and images are copyrighted by their respective owners.
Copyright © 2000 - 2026 Webedia Polska SA for gamepressure.com, unofficial game guides, walkthroughs, secrets, game tips, maps & strategies for top games.