Uncharted 3: Chapter 11 - As Above, So Below part 2 walkthrough
This page of the guide contains the walkthrough of the second part of chapter 11 of Uncharted 3 Drake's Deception. This chapter is titled As Above, So Below. In the latter part of this stage, a new escape sequence from insects awaits Nate, as well as a pursuit of Talbot. There will be plenty of encounters with mercenaries, some of which will be equipped with strong automatic rifles.
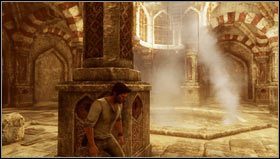
 | ![The central gate will be open to us [1] - Uncharted 3: Chapter 11 - As Above, So Below part 2 walkthrough - Walkthrough - Uncharted 3 Drakes Deception Guide](/uncharted-3-drakes-deception/gfx/word/113977781.jpg) |
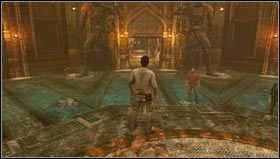
The central gate will be open to us [1]. We move along the corridors and enter the room with a decorative brazier [2].
 | ![We go back to the corridor to take a torch [1] and light up the brazier to admire the starry sky map [2] - Uncharted 3: Chapter 11 - As Above, So Below part 2 walkthrough - Walkthrough - Uncharted 3 Drakes Deception Guide](/uncharted-3-drakes-deception/gfx/word/113977812.jpg) |
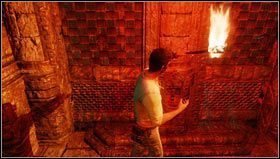
We go back to the corridor to take a torch [1] and light up the brazier to admire the starry sky map [2].
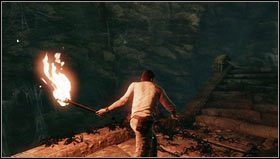 |  |
Our attention will be drawn to the disturbing reliefs on the walls. After a while, they swarms of spiders will pour out of them. Chasing the little beasts off with a torch [1], we return to the room with the statues guarding the gate. We try to move forward, waving the torch and trying not to fall into the abyss from the stone shelf. Once we reach a lighted corridor [2], we run to the door and try to open it.
 | 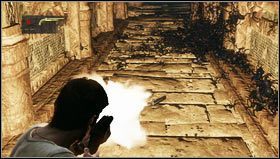 |
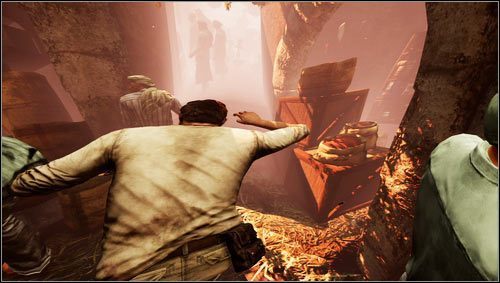
Unfortunately, the gate will be blocked. Our companion will squeeze underneath it and we will be given a shotgun to repel spiders [1]. Shooting at the small beasts will cause us to quickly run out of ammo, fortunately a second shotgun, which needs to be acquired to replenish the ammo, will appear next to us [2]. Bravely defending ourselves to the last bullet from the little beasts, we wait until we can pass through the door.
 | 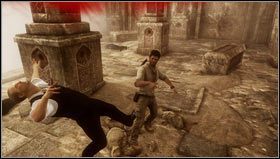 |
After a short conversation with our comrades, we go to the well which we have used to descend into the underground. As soon as we reach it, several smoke grenades will drop to us [1], together with some enemies. The first wave is a group of standard enemies, after which a muscle head will appear [2]. If we see him early enough, we can kill him with a firearm.
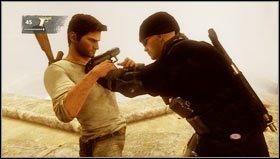 | ![Afterwards, we will be facing against heavily armored opponents [1], armed with SAS-12 automatic shotguns, differing from the sawn-offs in term of magazine capacity - Uncharted 3: Chapter 11 - As Above, So Below part 2 walkthrough - Walkthrough - Uncharted 3 Drakes Deception Guide](/uncharted-3-drakes-deception/gfx/word/113977937.jpg) |
Afterwards, we will be facing against heavily armored opponents [1], armed with "SAS-12" automatic shotguns, differing from the sawn-offs in term of magazine capacity. Keeping in mind that our opponents are particularly dangerous at a short distance, we take them out from a long range, going into close combat only in extreme cases and only with the last opponent. Once the encounter is over, we climb with the help of Sullivan [2] and go up.
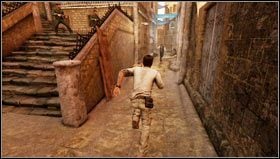
After leaving the room with the well, we follow our companions. As we ascend the stairs, we will be treated with the same drug as Charlie in the citadel. This will start a run through the narrow streets in a narcotic trance [1]. It will end with a meeting with Marlo.
 | ![When we are done talking, we will be chasing Talbot [1] - Uncharted 3: Chapter 11 - As Above, So Below part 2 walkthrough - Walkthrough - Uncharted 3 Drakes Deception Guide](/uncharted-3-drakes-deception/gfx/word/113977984.jpg) |
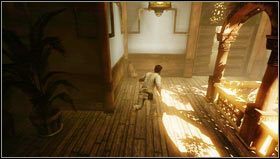
When we are done talking, we will be chasing Talbot [1]. The most important rule of the chase is not to get caught by the police, alerted by suspicious behavior. The second rule is to constantly follow Talbot, who will try to break away from us in different ways. One of these ways is to close the door. Once that happens, we will usually find another door next to us or an open window [2].
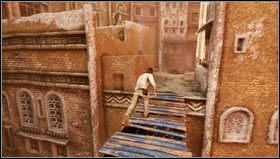 |  |
At some point, Talbot will jump onto a building and knock over the ladder behind him. Ignoring that fact, we run across the buildings on the right side until we can move into Talbot's surroundings [1]. Another important event of the chase is lunging at Talbot when we are running almost in parallel to him to the top of the residential building [2].
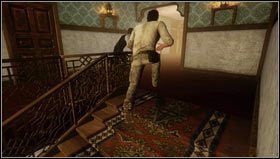
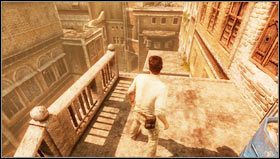
 | ![Eventually we will lose track of Talbot after running through the wooden gate [1] - Uncharted 3: Chapter 11 - As Above, So Below part 2 walkthrough - Walkthrough - Uncharted 3 Drakes Deception Guide](/uncharted-3-drakes-deception/gfx/word/113978046.jpg) |
Eventually we will lose track of Talbot after running through the wooden gate [1]. Moving forward, we will get into a crowd of people. While squeezing through it, our target will flash before our eyes [2].
![Squeeze through the crowd and approach the rail to see Talbot located below [1] - Uncharted 3: Chapter 11 - As Above, So Below part 2 walkthrough - Walkthrough - Uncharted 3 Drakes Deception Guide](/uncharted-3-drakes-deception/gfx/word/113978062.jpg)
Squeeze through the crowd and approach the rail to see Talbot located below [1].
 | ![Now we have to jump across the buildings on the right side [1] and then get to our enemy by jumping to the left [2] - Uncharted 3: Chapter 11 - As Above, So Below part 2 walkthrough - Walkthrough - Uncharted 3 Drakes Deception Guide](/uncharted-3-drakes-deception/gfx/word/113978093.jpg) |
Now we have to jump across the buildings on the right side [1] and then get to our enemy by jumping to the left [2].
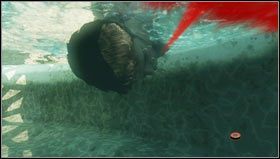
 | ![We will again be chasing after the target, while simultaneously avoiding fire from the gendarmerie [1] - Uncharted 3: Chapter 11 - As Above, So Below part 2 walkthrough - Walkthrough - Uncharted 3 Drakes Deception Guide](/uncharted-3-drakes-deception/gfx/word/113978125.jpg) |
We will again be chasing after the target, while simultaneously avoiding fire from the gendarmerie [1]. After climbing to the top of the small building, we ride down the rope towards Talbot [2].
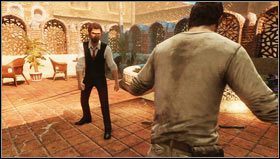 |  |
Now you have the opportunity to fight our hated enemy with bare hands. [1] Using counterattacks will yet again yield the best results. Any attempt to grab Talbot will fail and at the same time we will have to constantly break free from the enemy's grasp. Especially when he starts drowning us in the fountain [2]. Unfortunately, victory in this fight will end with serious problems.

- Uncharted 3 Drake's Deception Guide
- Uncharted 3: Game Guide
- Uncharted 3: Walkthrough
- Uncharted 3: Chapter 1 - Prologue walkthrough
- Uncharted 3: Chapter 2 - Greatness from Small Beginnings walkthrough
- Uncharted 3: Chapter 3 - Second-Story Work walkthrough
- Uncharted 3: Chapter 4 - Run to Ground walkthrough
- Uncharted 3: Chapter 5 - London Underground walkthrough
- Uncharted 3: Chapter 6 - The Chateau part 1 walkthrough
- Uncharted 3: Chapter 6 - The Chateau part 2 walkthrough
- Uncharted 3: Chapter 7 - Stay in the Light walkthrough
- Uncharted 3: Chapter 8 - The Citadel part 1 walkthrough
- Uncharted 3: Chapter 8 - The Citadel part 2 walkthrough
- Uncharted 3: Chapter 9 - The Middle Way walkthrough
- Uncharted 3: Chapter 10 - Historical Research walkthrough
- Uncharted 3: Chapter 11 - As Above, So Below part 1 walkthrough
- Uncharted 3: Chapter 11 - As Above, So Below part 2 walkthrough
- Uncharted 3: Chapter 12 - Abducted part 1 walkthrough
- Uncharted 3: Chapter 12 - Abducted part 2 walkthrough
- Uncharted 3: Chapter 13 - Rough Seas walkthrough
- Uncharted 3: Chapter 14 - Cruisin for a Bruisin walkthrough
- Uncharted 3: Chapter 15 - Sink or Swim walkthrough
- Uncharted 3: Chapter 16 - One Shot at This walkthrough
- Uncharted 3: Chapter 17 - Stowaway walkthrough
- Uncharted 3: Chapter 18 - The Rub al Khali walkthrough
- Uncharted 3: Chapter 19 - The Settlement walkthrough
- Uncharted 3: Chapter 20 - Caravan walkthrough
- Uncharted 3: Chapter 21 - The Atlantis of the Sands walkthrough
- Uncharted 3: Chapter 22 - The Dreamers of the Day walkthrough, Talbot boss fight
- Uncharted 3: Walkthrough
- Uncharted 3: Game Guide
You are not permitted to copy any image, text or info from this page. This site is not associated with and/or endorsed by the developers and the publishers. All logos and images are copyrighted by their respective owners.
Copyright © 2000 - 2026 Webedia Polska SA for gamepressure.com, unofficial game guides, walkthroughs, secrets, game tips, maps & strategies for top games.