Kane & Lynch Dead Men: Chapter 11 - part 2
Try moving closer to a large church. Obviously you should stay close to the left building, instead of choosing the main passageway. You still have to avoid sustaining injuries from a nearby mortar explosions. Get ready to proceed with the assault. Once a mortar strike has ended, start running towards the stairs. MAKE SURE your colleagues are following you.
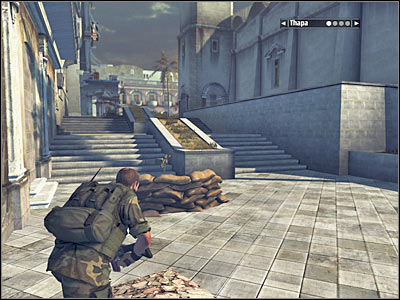
You will have to be ready to act quickly. You are going to be attacked by a larger group once you're close enough to the top of the stairs. Start off by securing an upper balcony. One of the enemy soldiers will be standing there. Kill him yourself or destroy a nearby explosive barrel. Once he's gone, focus your attention on other opponents. Obviously your team should take part in these fights.
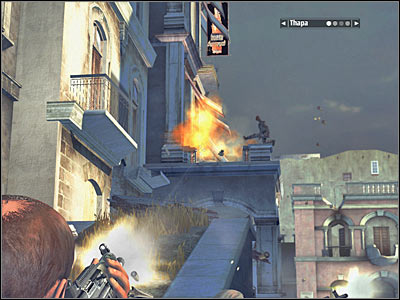
If you don't want to risk sustaining major injuries, you may consider going back to the stairs. You would be able to hide behind a small brick wall (screen). Don't worry about your colleagues, because they should be fine on their own. Order them to stay here once they've successfully eliminated all enemy units.
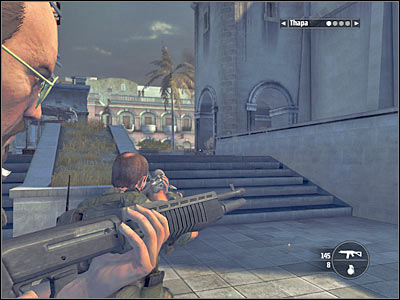
New objective: Meet Up With The Other Men
Now you will have to deal with a new type of problem. An armored vehicle is guarding a nearby street. As a result, you will have to destroy it in order to be able to proceed to a rebel hideout. It's very important that your men stay behind. Head on to your right and find a rocket launcher (screen). Take it.
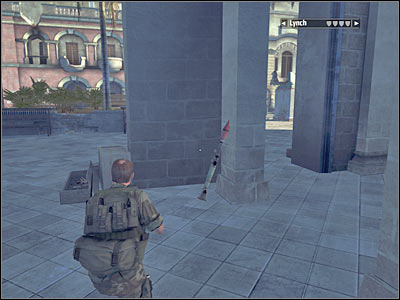
Don't go to your right, because it would be much more difficult to destroy the vehicle from there. Instead, start moving forward. Look at the screen, because that's where you should be hiding. One missile hit should be more than enough to destroy the vehicle. Go back to your team and pick up your original weapon while you're there.
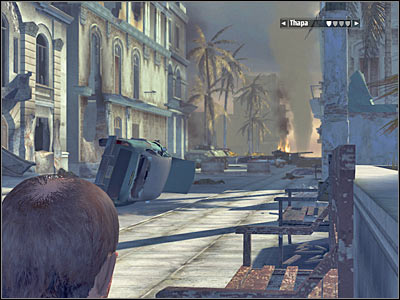
You may proceed to the new area of the map. Thankfully, there aren't any enemies out there, so you won't have any problems reaching a rebel hideout. It's going to be one of the left buildings. Rebel units will automatically join you. Each of your teammates will have three rebel soldier assigned to him, so you won't issue any orders directly.
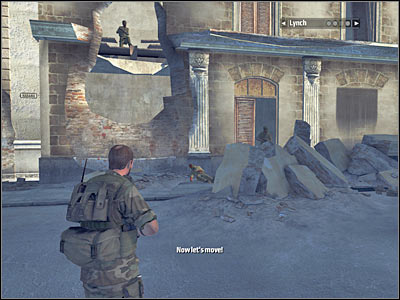
New objective: Proceed To El Capitolio
This is going to be the most difficult challenge of the mission. Before we'll go into details, there a few important things for you to know about:
1) Avoid the enemy gunship at all costs. You should be able to familiarize yourself with its flight route, so you'll know where and when to duck in order to avoid being hit. Thankfully, you will be allowed to destroy the helicopter, however you'll probably achieve this later on during the course of the battle.
2) I'd strongly recommend leaving the entire team behind, because your allies have a very bad tendency of leaving their original posts and going into battle when it's not needed. This mostly concerns rebel soldiers. Thankfully, you won't be punished in any way for losing them.
3) Don't even think about storming through this square quickly, because you'll die and you'll have to repeat everything from the beginning. Your each move should be thought out, so you won't risk lives of your teammates.
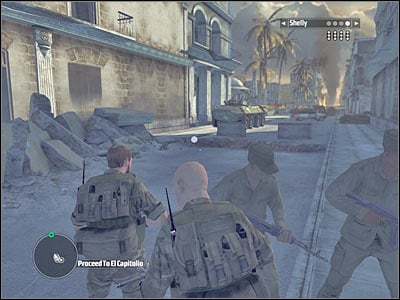
Like I've already said, you should order your men to stay near a destroyed armored vehicle (screen). They should be safe here, so you won't have to worry about them getting into trouble. Don't worry, because you will be able to secure the first section of the square by yourself.
- Kane & Lynch: Dead Men Game Guide & Walkthrough
- Kane & Lynch Dead Men: Walkthrough
- Kane & Lynch Dead Men: Walkthrough - Chapter 1 - Impact
- Kane & Lynch Dead Men: Chapter 1 - part 1
- Kane & Lynch Dead Men: Chapter 1 - part 2
- Kane & Lynch Dead Men: Chapter 1 - part 3
- Kane & Lynch Dead Men: Chapter 1 - part 4
- Kane & Lynch Dead Men: Chapter 2 - Trial
- Kane & Lynch Dead Men: Chapter 2 - part 1
- Kane & Lynch Dead Men: Chapter 2 - part 2
- Kane & Lynch Dead Men: Chapter 3 - Withdrawal
- Kane & Lynch Dead Men: Chapter 3 - part 1
- Kane & Lynch Dead Men: Chapter 3 - part 2
- Kane & Lynch Dead Men: Chapter 3 - part 3
- Kane & Lynch Dead Men: Chapter 3 - part 4
- Kane & Lynch Dead Men: Chapter 4 - Cracking Up
- Kane & Lynch Dead Men: Chapter 4 - part 1
- Kane & Lynch Dead Men: Chapter 4 - part 2
- Kane & Lynch Dead Men: Chapter 4 - part 3
- Kane & Lynch Dead Men: Chapter 4 - part 4
- Kane & Lynch Dead Men: Chapter 5 - The Mizuki
- Kane & Lynch Dead Men: Chapter 5 - part 1
- Kane & Lynch Dead Men: Chapter 5 - part 2
- Kane & Lynch Dead Men: Chapter 5 - part 3
- Kane & Lynch Dead Men: Chapter 5 - part 4
- Kane & Lynch Dead Men: Chapter 5 - part 5
- Kane & Lynch Dead Men: Chapter 6 - Exchange
- Kane & Lynch Dead Men: Chapter 6 - part 1
- Kane & Lynch Dead Men: Chapter 6 - part 2
- Kane & Lynch Dead Men: Chapter 7 - Reunion
- Kane & Lynch Dead Men: Chapter 7 - part 1
- Kane & Lynch Dead Men: Chapter 7 - part 2
- Kane & Lynch Dead Men: Chapter 8 - Breakout
- Kane & Lynch Dead Men: Chapter 8 - part 1
- Kane & Lynch Dead Men: Chapter 8 - part 2
- Kane & Lynch Dead Men: Chapter 8 - part 3
- Kane & Lynch Dead Men: Chapter 8 - part 4
- Kane & Lynch Dead Men: Chapter 8 - part 5
- Kane & Lynch Dead Men: Chapter 9 - Retomoto Tower
- Kane & Lynch Dead Men: Chapter 9 - part 1
- Kane & Lynch Dead Men: Chapter 9 - part 2
- Kane & Lynch Dead Men: Chapter 10 - Tokyo Streets
- Kane & Lynch Dead Men: Chapter 10 - part 1
- Kane & Lynch Dead Men: Chapter 10 - part 2
- Kane & Lynch Dead Men: Chapter 10 - part 3
- Kane & Lynch Dead Men: Chapter 11 - Freedom Fighters
- Kane & Lynch Dead Men: Chapter 11 - part 1
- Kane & Lynch Dead Men: Chapter 11 - part 2
- Kane & Lynch Dead Men: Chapter 11 - part 3
- Kane & Lynch Dead Men: Chapter 11 - part 4
- Kane & Lynch Dead Men: Chapter 11 - part 5
- Kane & Lynch Dead Men: Chapter 12 - El Capitol
- Kane & Lynch Dead Men: Chapter 12 - part 1
- Kane & Lynch Dead Men: Chapter 12 - part 2
- Kane & Lynch Dead Men: Chapter 12 - part 3
- Kane & Lynch Dead Men: Chapter 12 - part 4
- Kane & Lynch Dead Men: Chapter 13 - Bird's Eye View
- Kane & Lynch Dead Men: Chapter 13 - part 1
- Kane & Lynch Dead Men: Chapter 13 - part 2
- Kane & Lynch Dead Men: Chapter 13 - part 3
- Kane & Lynch Dead Men: Chapter 13 - part 4
- Kane & Lynch Dead Men: Chapter 13 - part 5
- Kane & Lynch Dead Men: Chapter 14 - Within The Walls
- Kane & Lynch Dead Men: Chapter 14 - part 1
- Kane & Lynch Dead Men: Chapter 14 - part 2
- Kane & Lynch Dead Men: Chapter 14 - part 3
- Kane & Lynch Dead Men: Chapter 14 - part 4
- Kane & Lynch Dead Men: Chapter 14 - part 5
- Kane & Lynch Dead Men: Chapter 14 - part 6
- Kane & Lynch Dead Men: Chapter 15 - Choice
- Kane & Lynch Dead Men: Chapter 15 - part 1
- Kane & Lynch Dead Men: Chapter 15 - part 2
- Kane & Lynch Dead Men: Chapter 16 - Consequence
- Kane & Lynch Dead Men: Chapter 16 - part 1
- Kane & Lynch Dead Men: Chapter 16 - part 2
- Kane & Lynch Dead Men: Chapter 16 - part 3
- Kane & Lynch Dead Men: Walkthrough
You are not permitted to copy any image, text or info from this page. This site is not associated with and/or endorsed by the developers and the publishers. All logos and images are copyrighted by their respective owners.
Copyright © 2000 - 2026 Webedia Polska SA for gamepressure.com, unofficial game guides, walkthroughs, secrets, game tips, maps & strategies for top games.
