Kane & Lynch Dead Men: Chapter 3 - part 3
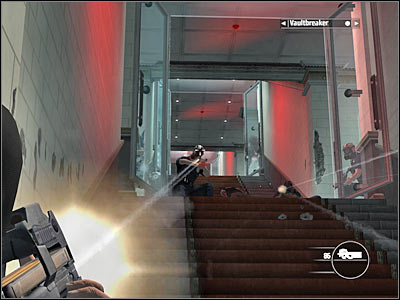
I would recommend hiding behind the left wall, near the stairs (screen). You should be able to neutralize incoming threats from there. At first you'll only be dealing with poorly equipped security guards, however make sure that no one gets close enough to attack the vaultbreaker.

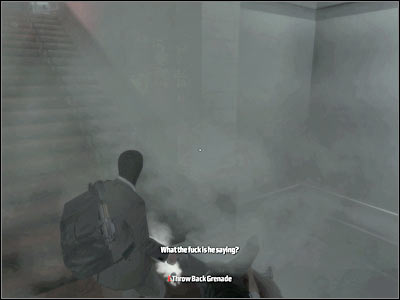
The vaultbreaker will have to disable a total of five mechanisms. Once he's dealt with 2-3 mechanisms, new enemy units will appear near your position. They're carrying assault rifles and bulletproof vests, so you will have to be extra careful. You will also notice that they're throwing gas grenades at you. Throw them back by approaching the grenades and pressing the E key. Just as before, prevent enemy units from getting too close to the vault.
It shouldn't take too long for the vault to be opened. Don't enter the vault area right away, because enemy units will proceed with the final assault. Order your teammate to hide behind the right wall or somewhere near your position. You're going to need his help to eliminate all security guards.
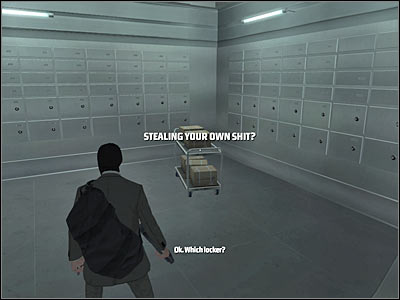
Make sure that no one else is heading your way. Order your team member to follow you and enter the opened vault. You will have to be standing in the central area of the vault. As a result, you will be rewarded with a new cut-scene.
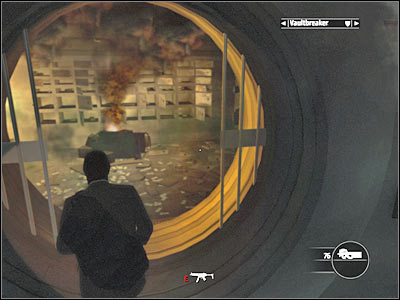
Your current mission objective won't change, however you will have to perform an important task. Exit the vault and allow your teammate to place an explosive charge. Deal with a new group of enemy units in the meantime. Make sure that you're throwing back gas grenades, so nothing will obstruct your field of view. The vaultbreaker should warn you about an explosion. Start running towards the upper level and hide to your right (screen).
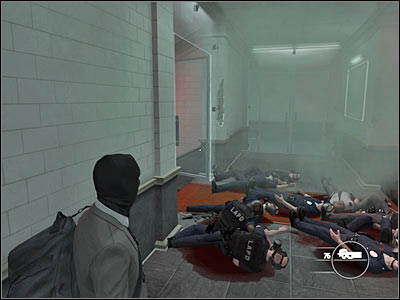
Some of the security guards are probably running towards the vault entrance. Ignore them, because they will die as a result of a huge explosion. Go back to the vault and enter it. Once again, you will have to watch a cut-scene.

- Kane & Lynch: Dead Men Game Guide & Walkthrough
- Kane & Lynch Dead Men: Walkthrough
- Kane & Lynch Dead Men: Walkthrough - Chapter 1 - Impact
- Kane & Lynch Dead Men: Chapter 1 - part 1
- Kane & Lynch Dead Men: Chapter 1 - part 2
- Kane & Lynch Dead Men: Chapter 1 - part 3
- Kane & Lynch Dead Men: Chapter 1 - part 4
- Kane & Lynch Dead Men: Chapter 2 - Trial
- Kane & Lynch Dead Men: Chapter 2 - part 1
- Kane & Lynch Dead Men: Chapter 2 - part 2
- Kane & Lynch Dead Men: Chapter 3 - Withdrawal
- Kane & Lynch Dead Men: Chapter 3 - part 1
- Kane & Lynch Dead Men: Chapter 3 - part 2
- Kane & Lynch Dead Men: Chapter 3 - part 3
- Kane & Lynch Dead Men: Chapter 3 - part 4
- Kane & Lynch Dead Men: Chapter 4 - Cracking Up
- Kane & Lynch Dead Men: Chapter 4 - part 1
- Kane & Lynch Dead Men: Chapter 4 - part 2
- Kane & Lynch Dead Men: Chapter 4 - part 3
- Kane & Lynch Dead Men: Chapter 4 - part 4
- Kane & Lynch Dead Men: Chapter 5 - The Mizuki
- Kane & Lynch Dead Men: Chapter 5 - part 1
- Kane & Lynch Dead Men: Chapter 5 - part 2
- Kane & Lynch Dead Men: Chapter 5 - part 3
- Kane & Lynch Dead Men: Chapter 5 - part 4
- Kane & Lynch Dead Men: Chapter 5 - part 5
- Kane & Lynch Dead Men: Chapter 6 - Exchange
- Kane & Lynch Dead Men: Chapter 6 - part 1
- Kane & Lynch Dead Men: Chapter 6 - part 2
- Kane & Lynch Dead Men: Chapter 7 - Reunion
- Kane & Lynch Dead Men: Chapter 7 - part 1
- Kane & Lynch Dead Men: Chapter 7 - part 2
- Kane & Lynch Dead Men: Chapter 8 - Breakout
- Kane & Lynch Dead Men: Chapter 8 - part 1
- Kane & Lynch Dead Men: Chapter 8 - part 2
- Kane & Lynch Dead Men: Chapter 8 - part 3
- Kane & Lynch Dead Men: Chapter 8 - part 4
- Kane & Lynch Dead Men: Chapter 8 - part 5
- Kane & Lynch Dead Men: Chapter 9 - Retomoto Tower
- Kane & Lynch Dead Men: Chapter 9 - part 1
- Kane & Lynch Dead Men: Chapter 9 - part 2
- Kane & Lynch Dead Men: Chapter 10 - Tokyo Streets
- Kane & Lynch Dead Men: Chapter 10 - part 1
- Kane & Lynch Dead Men: Chapter 10 - part 2
- Kane & Lynch Dead Men: Chapter 10 - part 3
- Kane & Lynch Dead Men: Chapter 11 - Freedom Fighters
- Kane & Lynch Dead Men: Chapter 11 - part 1
- Kane & Lynch Dead Men: Chapter 11 - part 2
- Kane & Lynch Dead Men: Chapter 11 - part 3
- Kane & Lynch Dead Men: Chapter 11 - part 4
- Kane & Lynch Dead Men: Chapter 11 - part 5
- Kane & Lynch Dead Men: Chapter 12 - El Capitol
- Kane & Lynch Dead Men: Chapter 12 - part 1
- Kane & Lynch Dead Men: Chapter 12 - part 2
- Kane & Lynch Dead Men: Chapter 12 - part 3
- Kane & Lynch Dead Men: Chapter 12 - part 4
- Kane & Lynch Dead Men: Chapter 13 - Bird's Eye View
- Kane & Lynch Dead Men: Chapter 13 - part 1
- Kane & Lynch Dead Men: Chapter 13 - part 2
- Kane & Lynch Dead Men: Chapter 13 - part 3
- Kane & Lynch Dead Men: Chapter 13 - part 4
- Kane & Lynch Dead Men: Chapter 13 - part 5
- Kane & Lynch Dead Men: Chapter 14 - Within The Walls
- Kane & Lynch Dead Men: Chapter 14 - part 1
- Kane & Lynch Dead Men: Chapter 14 - part 2
- Kane & Lynch Dead Men: Chapter 14 - part 3
- Kane & Lynch Dead Men: Chapter 14 - part 4
- Kane & Lynch Dead Men: Chapter 14 - part 5
- Kane & Lynch Dead Men: Chapter 14 - part 6
- Kane & Lynch Dead Men: Chapter 15 - Choice
- Kane & Lynch Dead Men: Chapter 15 - part 1
- Kane & Lynch Dead Men: Chapter 15 - part 2
- Kane & Lynch Dead Men: Chapter 16 - Consequence
- Kane & Lynch Dead Men: Chapter 16 - part 1
- Kane & Lynch Dead Men: Chapter 16 - part 2
- Kane & Lynch Dead Men: Chapter 16 - part 3
- Kane & Lynch Dead Men: Walkthrough
You are not permitted to copy any image, text or info from this page. This site is not associated with and/or endorsed by the developers and the publishers. All logos and images are copyrighted by their respective owners.
Copyright © 2000 - 2026 Webedia Polska SA for gamepressure.com, unofficial game guides, walkthroughs, secrets, game tips, maps & strategies for top games.