Kane & Lynch Dead Men: Chapter 13 - part 5
Proceed to your right. You should be able to notice that there's a large hole in the brick wall. I would recommend using it, however you should also secure the roof of the right building. There's a heavy machine gun nest there. Kill anyone who decides to use it.
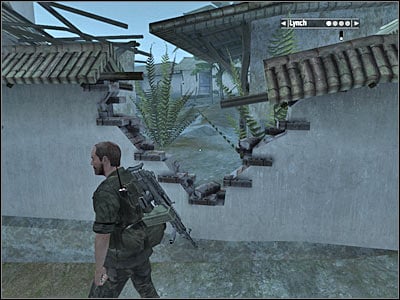
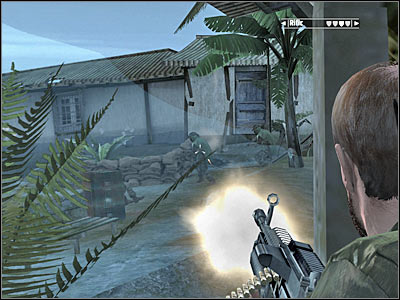
Going through a destroyed section of the wall will allow you to get closer to enemy positions. Hide behind the wall of the right building (screen). Enemy soldiers will be running towards a destroyed jeep. Attack them by a surprise. Obviously you won't kill everyone, however your teammates will have less problems to worry about.
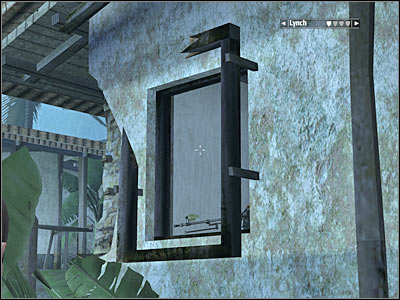
Now you've got two choices. You can go back to your team and try to advance towards enemy positions through the passageway located near the jeep or you can stay here a little while longer. You should consider disabling a heavy machine gun nest which can be found inside the nearest building (screen). Throw a grenade there or take out the gunner with your primary weapon.
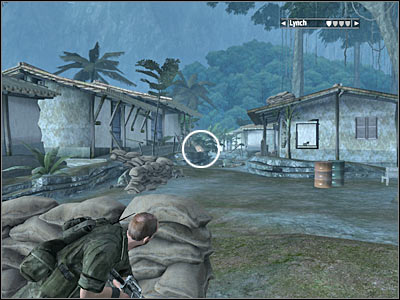
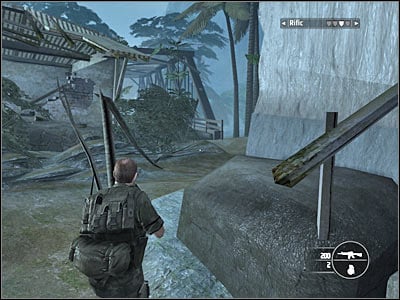
Now you will have to find a good cover. Your objective will be to secure a road which leads directly to a nearby bridge. As a result, you will have to take out one more heavy machine gun nest (screen). Hunting down other enemy soldiers won't be difficult and you should be able to receive your final objective.
New objective: Get To The Bridge With All Your Men
You won't have to do anything out of the ordinary. Gather the rest of them around your position and proceed towards a new bridge (screen). You shouldn't encounter any additional troops along the way. Watch a short cut-scene and get ready to proceed with the next mission of the game.

- Kane & Lynch: Dead Men Game Guide & Walkthrough
- Kane & Lynch Dead Men: Walkthrough
- Kane & Lynch Dead Men: Walkthrough - Chapter 1 - Impact
- Kane & Lynch Dead Men: Chapter 1 - part 1
- Kane & Lynch Dead Men: Chapter 1 - part 2
- Kane & Lynch Dead Men: Chapter 1 - part 3
- Kane & Lynch Dead Men: Chapter 1 - part 4
- Kane & Lynch Dead Men: Chapter 2 - Trial
- Kane & Lynch Dead Men: Chapter 2 - part 1
- Kane & Lynch Dead Men: Chapter 2 - part 2
- Kane & Lynch Dead Men: Chapter 3 - Withdrawal
- Kane & Lynch Dead Men: Chapter 3 - part 1
- Kane & Lynch Dead Men: Chapter 3 - part 2
- Kane & Lynch Dead Men: Chapter 3 - part 3
- Kane & Lynch Dead Men: Chapter 3 - part 4
- Kane & Lynch Dead Men: Chapter 4 - Cracking Up
- Kane & Lynch Dead Men: Chapter 4 - part 1
- Kane & Lynch Dead Men: Chapter 4 - part 2
- Kane & Lynch Dead Men: Chapter 4 - part 3
- Kane & Lynch Dead Men: Chapter 4 - part 4
- Kane & Lynch Dead Men: Chapter 5 - The Mizuki
- Kane & Lynch Dead Men: Chapter 5 - part 1
- Kane & Lynch Dead Men: Chapter 5 - part 2
- Kane & Lynch Dead Men: Chapter 5 - part 3
- Kane & Lynch Dead Men: Chapter 5 - part 4
- Kane & Lynch Dead Men: Chapter 5 - part 5
- Kane & Lynch Dead Men: Chapter 6 - Exchange
- Kane & Lynch Dead Men: Chapter 6 - part 1
- Kane & Lynch Dead Men: Chapter 6 - part 2
- Kane & Lynch Dead Men: Chapter 7 - Reunion
- Kane & Lynch Dead Men: Chapter 7 - part 1
- Kane & Lynch Dead Men: Chapter 7 - part 2
- Kane & Lynch Dead Men: Chapter 8 - Breakout
- Kane & Lynch Dead Men: Chapter 8 - part 1
- Kane & Lynch Dead Men: Chapter 8 - part 2
- Kane & Lynch Dead Men: Chapter 8 - part 3
- Kane & Lynch Dead Men: Chapter 8 - part 4
- Kane & Lynch Dead Men: Chapter 8 - part 5
- Kane & Lynch Dead Men: Chapter 9 - Retomoto Tower
- Kane & Lynch Dead Men: Chapter 9 - part 1
- Kane & Lynch Dead Men: Chapter 9 - part 2
- Kane & Lynch Dead Men: Chapter 10 - Tokyo Streets
- Kane & Lynch Dead Men: Chapter 10 - part 1
- Kane & Lynch Dead Men: Chapter 10 - part 2
- Kane & Lynch Dead Men: Chapter 10 - part 3
- Kane & Lynch Dead Men: Chapter 11 - Freedom Fighters
- Kane & Lynch Dead Men: Chapter 11 - part 1
- Kane & Lynch Dead Men: Chapter 11 - part 2
- Kane & Lynch Dead Men: Chapter 11 - part 3
- Kane & Lynch Dead Men: Chapter 11 - part 4
- Kane & Lynch Dead Men: Chapter 11 - part 5
- Kane & Lynch Dead Men: Chapter 12 - El Capitol
- Kane & Lynch Dead Men: Chapter 12 - part 1
- Kane & Lynch Dead Men: Chapter 12 - part 2
- Kane & Lynch Dead Men: Chapter 12 - part 3
- Kane & Lynch Dead Men: Chapter 12 - part 4
- Kane & Lynch Dead Men: Chapter 13 - Bird's Eye View
- Kane & Lynch Dead Men: Chapter 13 - part 1
- Kane & Lynch Dead Men: Chapter 13 - part 2
- Kane & Lynch Dead Men: Chapter 13 - part 3
- Kane & Lynch Dead Men: Chapter 13 - part 4
- Kane & Lynch Dead Men: Chapter 13 - part 5
- Kane & Lynch Dead Men: Chapter 14 - Within The Walls
- Kane & Lynch Dead Men: Chapter 14 - part 1
- Kane & Lynch Dead Men: Chapter 14 - part 2
- Kane & Lynch Dead Men: Chapter 14 - part 3
- Kane & Lynch Dead Men: Chapter 14 - part 4
- Kane & Lynch Dead Men: Chapter 14 - part 5
- Kane & Lynch Dead Men: Chapter 14 - part 6
- Kane & Lynch Dead Men: Chapter 15 - Choice
- Kane & Lynch Dead Men: Chapter 15 - part 1
- Kane & Lynch Dead Men: Chapter 15 - part 2
- Kane & Lynch Dead Men: Chapter 16 - Consequence
- Kane & Lynch Dead Men: Chapter 16 - part 1
- Kane & Lynch Dead Men: Chapter 16 - part 2
- Kane & Lynch Dead Men: Chapter 16 - part 3
- Kane & Lynch Dead Men: Walkthrough
You are not permitted to copy any image, text or info from this page. This site is not associated with and/or endorsed by the developers and the publishers. All logos and images are copyrighted by their respective owners.
Copyright © 2000 - 2026 Webedia Polska SA for gamepressure.com, unofficial game guides, walkthroughs, secrets, game tips, maps & strategies for top games.