Locations to Photograph Celestial Phenomena in FF7 Rebirth
Check our Final Fantasy 7 Rebirth guide on How to Find All 3 Locations to Photograph Celestial Phenomena and take a sneaky shot of Aerith.

Absence of a Sign is one of many side quests in Final Fantasy 7 Rebirth. Tasked by the Planetology Assembly, you’ll become a photographer, capturing mysterious cosmic wonders. This guide will help you find all 3 locations to photograph Celestial Phenomena in Cosmo Canyon and snap a picture of Aerith.
- FF7 Rebirth – Celestial Phenomena #1
- FF7 Rebirth – Celestial Phenomena sneaking a photo of Aerith
- FF7 Rebirth – Celestial Phenomena #2
- FF7 Rebirth – Celestial Phenomena #3
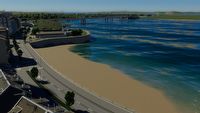
FF7 Rebirth – Celestial Phenomena #1

Photograph Celestial Phenomena LocationsFinal Fantasy VII Rebirth; developer: Square Enix
- Start from the Gliding Range No. 6 in southern part of Cosmo Canyon. Follow the path and use Gliding Range No. 7.
- Turn right and go up the stairs to Gliding Range No. 13, then go left and use Gliding Range No. 14.
- Go forward and when you see some cacti, follow the path straight. At the end of the path, turn left and go up until you reach Gliding Range No. 16.
- Get off the platform and follow the path northeast. Use a big fan, to get to the top of the hill. After you defeat all enemies, you can take the photo.
To match the image in your notes, look for photo number 2. Press left on your controller to check your location whenever needed. Zoom in and move the camera slightly to get the right angle. Aim for at least 80% accuracy to get a good picture.
Remember that this location will not be accessible without the Cosmo Canyon Chocobo.
FF7 Rebirth – Celestial Phenomena sneaking a photo of Aerith
All photos can be taken in a random order. However, at your selected second Celestial Phenomena location, you can snap a sneaky shot of Aerith. Wait for her to stand still while gazing upon the starts and get your camera ready.
FF7 Rebirth – Celestial Phenomena #2
This location is pretty easy to access. Start at the Cosmo Canyon Air Strip and follow the path leading upwards by the cliff wall. Match your picture with note no. 3.
FF7 Rebirth – Celestial Phenomena #3
The final location is a short distance south of the previous one. Go up by the cliff and check the note no. 1.
Read our other guides featuring Final Fantasy 7 Rebirth:
- FF7 Rebirth – How to Cheese 3D Brawler Guide
- FF7 Rebirth – Measure Mako Frequency Locations
- FF7 Rebirth – How to Beat Fort Condor Stage 3

0

Author: Olga Racinowska
Been with gamepressure.com since 2019, mostly writing game guides but you can also find me geeking out about LEGO (huge collection, btw). Love RPGs and classic RTSs, also adore quirky indie games. Even with a ton of games, sometimes I just gotta fire up Harvest Moon, Stardew Valley, KOTOR, or Baldur's Gate 2 (Shadows of Amn, the OG, not that Throne of Bhaal stuff). When I'm not gaming, I'm probably painting miniatures or admiring my collection of retro consoles.
Latest News
- Original War: Sand of Siberia now with new mode called Nuclear War
- Someone has remastered Medieval 2: Total War and Rome: Total War so well that the AI's moves are now calculated in a matter of seconds
- 15 years after releease the PC version of Alice: Madness Returns has been fixed by a fan
- Dark Souls 2: SOTFS Ascended Mod RPG with a new version and improved AI
- A free MMO game set in the Fallout universe gets a new version, offering exciting improvements