
You begin the exploration of the lair here. You won't encounter any sticha until you open the "door".
You can visit these locations to try and acquire sticha eggs for the "Shaky Foundations" side quest. Pass the tests to collect the eggs without destroying them.
You can activate the statue by using one of the skills. The sounds will distract the sticha from the nest.
It connect the Sticha Lair and the Buried Crossroads.
Avoid this part of the nest so you won't get injured.
Examine the light source to get XP and to find shins and a usable item.
Use one of the skills to obtain tendrils (oddity).
You can choose various options after interacting with the mirrors. It may help you in getting XP and rewards, but you may also be attacked by monsters or die right away.
You can shut it down after advancing in the "Ashen Imitation" side quest.
You can use Anamnesis to obtain a book.
They contain a book needed for the "Borrowed and Lost" side quest and other treasures - shins, weapons and a usable item.
You can visit these locations to try and acquire sticha eggs for the "Shaky Foundations" side quest. Pass the tests to collect the eggs without destroying them.
You can visit these locations to try and acquire sticha eggs for the "Shaky Foundations" side quest. Pass the tests to collect the eggs without destroying them.
It connect the Sticha Lair and the Buried Crossroads.
Torment Tides of Numenera: Sticha Lair / Buried Crossroads Map
The above map shows two "hidden" locations in the Sagus Cliffs city, namely the Sticha Lair and the Buried Crossroads. You must pay a visit to these zones while completing the main quest The Cold, Calculating Jack, but you can also choose to do that earlier, after you begin the Shaky Foundations side mission.
There is no way you can find the passage to the lair or the secret sanctuary on your own. In order to unlock access to these locations you must first start one of the quests mentioned above, which will mark the appearance of a new robot in the Underbelly - Stichus Automaton (M4.3). You can then move on to interacting with the Automaton, which will allow you to order him to drill a tunnel to the lair. After you arrive in the Sticha Lair, you can reach its south-western part, where you will find the passage to the Buried Crossroads (M11.4).
Key locations in the Sticha Lair and in the Buried Crossroads
1. The starting area. The place from which you begin to explore the Lair. The first sticha will appear only after you open the "door" and if you want you can try to conceal your team members before that. You can also find the way out of the Lair here. If you are required to return to this location in the later stages of the game, you should talk to Stichus Automaton in the Underbelly again.
2. Sticha egg clusters. In these spots you can try to steal the eggs for the Shaky Foundations side mission. You need to pass skill checks, in order to extract the eggs without cracking them. Important - If you skilfully choose from the available behaviour choices next to one of the clusters, you can acquire the Stichus Amniotic Fluid cypher.
4. The passageway. You can use this pathway to travel between the Sticha Lair and the Buried Crossroads (the secret sanctuary).
8. The mirror. You can choose different options of behaviour after interacting with the mirror. These actions have been described below.
9. The probability machine. You can turn it on after you progress enough through the Ashen Imitation side quest.
11. Chests. They contain a book from the side mission Borrowed and Lost, as well as other treasures - shins, weapons and a single-use item.
Mirror interaction options
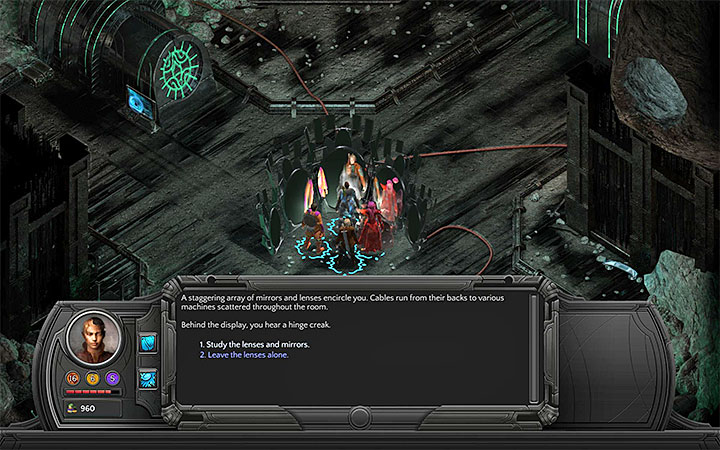
The magic mirror can be found in the Buried Crossroads, otherwise known as the secret lair (M11.8). You can interact with it in various ways:
- Do not touch the mirror showing a red band around a person's neck, as the main hero will instantly die and teleport to The Calm.
- Viewing the mirrors with the purple glow twice will result in the entire team being teleported to Circus Minor.
- Looking into the small, oval mirror will allow you to acquire a Bronze Sphere. It's a very valuable artifact that enables you to summon companions that are currently out of the active roster. It will prove especially useful after leaving Sagus Cliffs, as further into the game you'll no longer be able to return to the city in order to switch the party's composition.
- Looking at the large, central mirror will result in powerful Abykos monsters spawning in the sanctuary.

- Torment: Tides of Numenera Game Guide
- Torment Tides of Numenera: Torment Tides of Numenera Walkthrough
- Torment Tides of Numenera: Sagus Cliffs Underbelly
- Torment Tides of Numenera: Underbelly Map
- Torment Tides of Numenera: Sticha Lair / Buried Crossroads Map
- Torment Tides of Numenera: The Cold, Calculating Jack - main quest walkthrough
- Torment Tides of Numenera: Shaky Foundations - side quest walkthrough
- Torment Tides of Numenera: Foreman's Brood - side quest walkthrough
- Torment Tides of Numenera: Circles in Red - side quest walkthrough
- Torment Tides of Numenera: Sagus Cliffs Underbelly
- Torment Tides of Numenera: Torment Tides of Numenera Walkthrough
You are not permitted to copy any image, text or info from this page. This site is not associated with and/or endorsed by the developers and the publishers. All logos and images are copyrighted by their respective owners.
Copyright © 2000 - 2026 Webedia Polska SA for gamepressure.com, unofficial game guides, walkthroughs, secrets, game tips, maps & strategies for top games.