Rage: Defibrillator Upgrade - p. 3
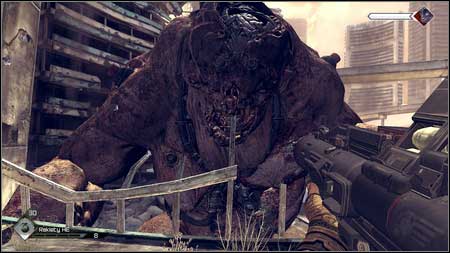
A moment later you'll be attacked by the Giant Mutant.

Your opponent has two types of attack, which he uses alternatively. In the first phase he rips off chunks of buildings and tosses them at you. Avoid them by moving to the sides and try to hit him with the rocket at the blue spot on his belly. It is exposed only for a moment when the creature raises his arm to throw so try to shoot a rocket a little earlier (so it can reach him).

After being hit the Mutant will approach you and start pounding with his fists. A hit point is indicated by the red laser so just avoid these points. A moment later the monster will scream showing a blue point on his head. You must hit it with the rocket.
Repeat all these actions several times and you'll kill the giant. Rockets can be replenished at the same place where you found the Rocket Launcher.

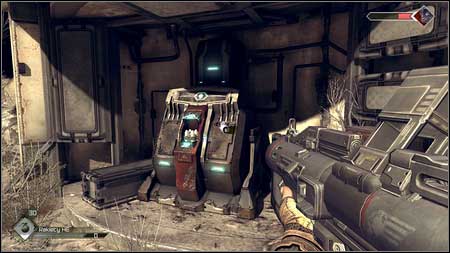
When the fight is over, move to the left. Collect ammo from the cabinet and then go down the stairs to the ground floor.

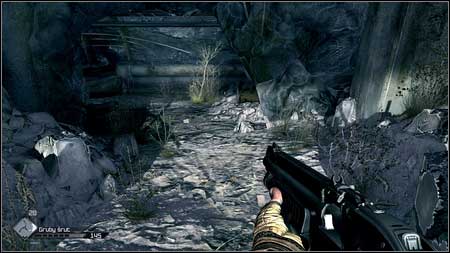
Prepare for the fight with regular mutants. Move forward killing them. Eventually you'll reach an out of order escalator.

At the top of it you'll meet other creatures and one Mutant throwing fire bottles at you. I suggest going back to the lower floor, killing charging enemies and then getting rid of "thrower".

After clearing the area you can go to the upper floor using the stairs on the left.

It will lead you to the hospital. Follow the corridor. At its end you'll get to the room with many useful items and the Defibrillator Upgrade you need.

Pick it up and prepare for the mutants' attack. They will charge at you from the room to the left.
After you kill all enemies go down the stairs and run straight forward until you reach the exit leading to the Wasteland.

You can now return to Kvasir who will install you the upgrade and give you back the Feltrite Sample.

Just take the sample back to the Mayor and the quest will be completed.

- Rage Game Guide & Walkthrough
- Rage: Walkthrough
- Rage: Main missions
- Rage: Prologue
- Rage: Quell the Bandit Threat - p. 1
- Rage: Quell the Bandit Threat - p. 2
- Rage: Medical Supplies
- Rage: Where's Juno, Radio Tower Repair
- Rage: The Missing Parts, Find the Buggy Parts - p. 1
- Rage: The Missing Parts, Find the Buggy Parts - p. 2
- Rage: Destroy the Barricade
- Rage: Dan's Message
- Rage: Changing Clothes
- Rage: Renting a Garage
- Rage: Arming Your Buggy
- Rage: Sally's Offer
- Rage: Resupply Dan Hagar
- Rage: Visit the Sheriff, Cuprino Needed
- Rage: Dusty 8 Sponsorship, Mutant Bash TV
- Rage: Resupply the Watchtower
- Rage: Destroy the Bomb Caches - p. 1
- Rage: Destroy the Bomb Caches - p. 2
- Rage: The Mayor Calls, Feltrite Crater
- Rage: Feltrite Sample
- Rage: Defibrillator Upgrade - p. 1
- Rage: Defibrillator Upgrade - p. 2
- Rage: Defibrillator Upgrade - p. 3
- Rage: The Wellmaster, Hijacked Well - p. 1
- Rage: The Wellmaster, Hijacked Well - p. 2
- Rage: Deadly Delivery, Secret Delivery
- Rage: Liberate Captain Marshall - p. 1
- Rage: Liberate Captain Marshall - p. 2
- Rage: Liberate Captain Marshall - p. 3
- Rage: Recover ID Drive
- Rage: Lost Research Data - p. 1
- Rage: Lost Research Data - p. 2
- Rage: Subway Town
- Rage: Gaining Influence
- Rage: Foreman Jones, Mutant Expansion - p. 1
- Rage: Foreman Jones, Mutant Expansion - p. 2
- Rage: Gearhead Vault - p. 1
- Rage: Gearhead Vault - p. 2
- Rage: Monarch Needed, Starky's Monarch
- Rage: The Price of Power - p. 1
- Rage: The Price of Power - p. 2
- Rage: Ark Equipment - p. 1
- Rage: Ark Equipment - p. 2
- Rage: Assault The Authority Bridge
- Rage: Assault Capital Prime - p. 1
- Rage: Assault Capital Prime - p. 2
- Rage: Main missions
- Rage: Walkthrough
You are not permitted to copy any image, text or info from this page. This site is not associated with and/or endorsed by the developers and the publishers. All logos and images are copyrighted by their respective owners.
Copyright © 2000 - 2026 Webedia Polska SA for gamepressure.com, unofficial game guides, walkthroughs, secrets, game tips, maps & strategies for top games.