Rage: Quell the Bandit Threat - p. 1
On this page of the Rage game guide you will find a detailed walkthrough of the task that requires you to eliminate bandits. You will learn how to get to the bandits, how to survive their ambush and how to leave their hideout.
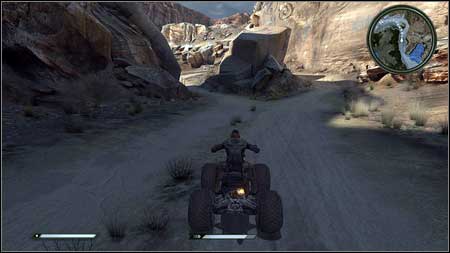
First go to the garage and sit behind the wheel of the ATV standing near. You need to drive it to the place marked on the map (white dots indicate the route). You'll get there much faster if you use a boost (SHIFT).

After getting to the destination brake (SPACJA) and get off the ATV (E). Wooden bridge to the right will lead you to the Ghost Hideout.

Once you're inside, you'll receive information about possibility of looting opponents' corpses. Remember to exactly search all corpses encountered in the game. Also explore carefully all visited rooms - you can find many valuable items inside. First of them can be found in a crate standing on the left of the entrance.
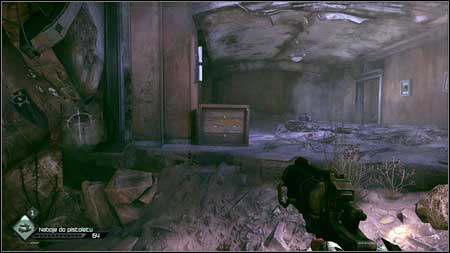
Jump to the top by pressing SPACE and then take Devar's Travels Vol.1-6 and three cans of food. You can sell them later.

Further way leads to the right. In order to go under wooden barricade, press C key. Your character will crouch and you'll be able to get to the other side.
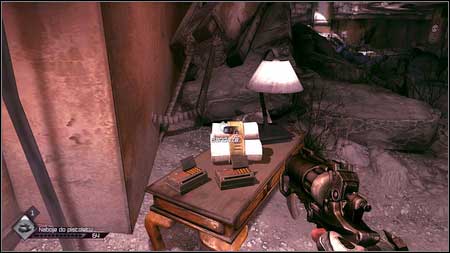
Jump over another rumble and then continue to the right. There will be one of bandits waiting for you on the left side. Zoom your view with RMB and kill him. Additional ammo and bandages can be found on the nearby table. Do not forget to search the corpse.
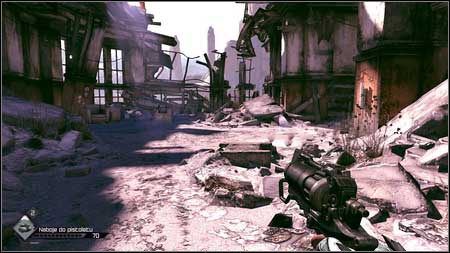
Going straight ahead you'll be attacked by another enemy.

Once he is dead, examine a box on the left. You'll find electronic parts inside, which will be useful when you create your own items.
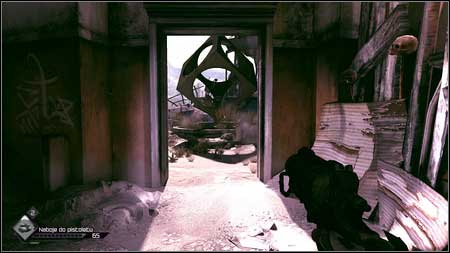
Move forward. You'll reach a small square with an odd sculpture. There is a corridor to the right, where two more bandits will attack you.

Kill them and then approach the huge statue. You'll fall into a trap there and come round in a Kill Room.
- Rage Game Guide & Walkthrough
- Rage: Walkthrough
- Rage: Main missions
- Rage: Prologue
- Rage: Quell the Bandit Threat - p. 1
- Rage: Quell the Bandit Threat - p. 2
- Rage: Medical Supplies
- Rage: Where's Juno, Radio Tower Repair
- Rage: The Missing Parts, Find the Buggy Parts - p. 1
- Rage: The Missing Parts, Find the Buggy Parts - p. 2
- Rage: Destroy the Barricade
- Rage: Dan's Message
- Rage: Changing Clothes
- Rage: Renting a Garage
- Rage: Arming Your Buggy
- Rage: Sally's Offer
- Rage: Resupply Dan Hagar
- Rage: Visit the Sheriff, Cuprino Needed
- Rage: Dusty 8 Sponsorship, Mutant Bash TV
- Rage: Resupply the Watchtower
- Rage: Destroy the Bomb Caches - p. 1
- Rage: Destroy the Bomb Caches - p. 2
- Rage: The Mayor Calls, Feltrite Crater
- Rage: Feltrite Sample
- Rage: Defibrillator Upgrade - p. 1
- Rage: Defibrillator Upgrade - p. 2
- Rage: Defibrillator Upgrade - p. 3
- Rage: The Wellmaster, Hijacked Well - p. 1
- Rage: The Wellmaster, Hijacked Well - p. 2
- Rage: Deadly Delivery, Secret Delivery
- Rage: Liberate Captain Marshall - p. 1
- Rage: Liberate Captain Marshall - p. 2
- Rage: Liberate Captain Marshall - p. 3
- Rage: Recover ID Drive
- Rage: Lost Research Data - p. 1
- Rage: Lost Research Data - p. 2
- Rage: Subway Town
- Rage: Gaining Influence
- Rage: Foreman Jones, Mutant Expansion - p. 1
- Rage: Foreman Jones, Mutant Expansion - p. 2
- Rage: Gearhead Vault - p. 1
- Rage: Gearhead Vault - p. 2
- Rage: Monarch Needed, Starky's Monarch
- Rage: The Price of Power - p. 1
- Rage: The Price of Power - p. 2
- Rage: Ark Equipment - p. 1
- Rage: Ark Equipment - p. 2
- Rage: Assault The Authority Bridge
- Rage: Assault Capital Prime - p. 1
- Rage: Assault Capital Prime - p. 2
- Rage: Main missions
- Rage: Walkthrough
You are not permitted to copy any image, text or info from this page. This site is not associated with and/or endorsed by the developers and the publishers. All logos and images are copyrighted by their respective owners.
Copyright © 2000 - 2026 Webedia Polska SA for gamepressure.com, unofficial game guides, walkthroughs, secrets, game tips, maps & strategies for top games.