Star Wars Outlaws: Jet Kordo's Legacy
Jet Kordo's Legacy is an optional vault finding quest in Star Wars Outlaws. From the guide you will learn how to use the Holotracker and how to reach the locations Jet's Vault, Jet's Vault, Sheltered Vault, Buried Vault, Perched Vault, Overgrown Vault and Forgotten Vault.
In the side quest Jet Kordo's Legacy in Star Wars Outlaws you must find holodiscs and use the Holotracker to reach secret vaults. On this page, we show you how to start the quest, how to take out the Holotracker from the inventory, how to catch the frequency and how to follow its instructions, how to obtain elements of the Scoundrel outfit and where are all the secret locations - Jet's Vault, Sheltered Vault, Buried Vault, Perched Vault, Overgrown Vault and Forgotten Vault.
- Unlocking the side quest
- #1 Jet's Vault (Toshara)
- #2 Sheltered Vault (Kijimi) - getting the holodisc
- #2 Sheltered Vault (Kijimi) - reaching the vault
- #3 Buried Vault (Tatooine) - getting the holodisc
- #3 Buried Vault (Tatooine) - reaching the vault
- #4 Perched Vault (Tatooine) - getting the holodisc
- #4 Perched Vault (Tatooine) - reaching the vault
- #5 Overgrown Vault (Akiva) - getting the holodisc
- #5 Overgrown Vault (Akiva) - reaching the vault
- #6 Forgotten Vault (Akiva) - getting the holodisc
- #6 Forgotten Vault (Akiva) - reaching the vault
- #7 Return to Jet's Vault (Toshara)
- Quest rewards
Unlocking the side quest
Related map marker: Jet Kordo's Legacy - Trailblazer @ Toshara
- Jet Kordo's Legacy is the biggest side quest in the game and you can unlock it at the earliest after repairing the hyperdrive in the main storyline, i.e. when you are ready to explore the galaxy.
- Approach the workbench aboard the team's ship. You will find a holotracker which can be used to find vaults associated with Jet Kordo.
#1 Jet's Vault (Toshara)
Related map marker: Jet Kordo's vault - Isolate frequency @ Toshara
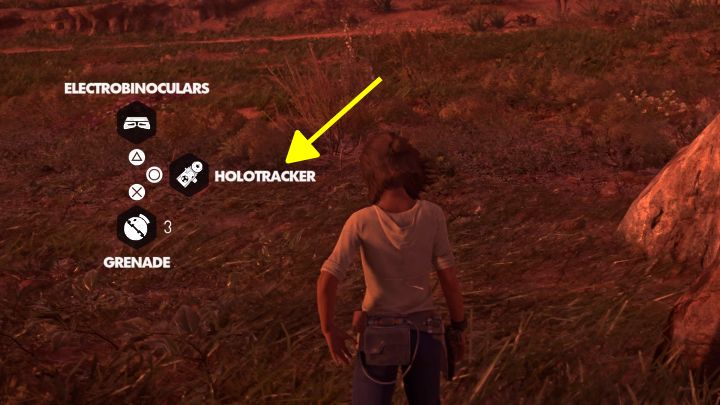
- The holotracker must be manually selected from the inventory drop-down menu - first press left on the d-pad and then Circle/Y. This gadget can only function if it currently has a holodisc inserted. Jet Kordo's first holodisc is already in the device. You must also always be on the same planet as the vault you are currently looking for - the first vault is on Toshara.
- After activating the holotracker, a hologram will appear with a hint regarding the location you are looking for. By using our guide, you can skip this step and go straight to the locations.
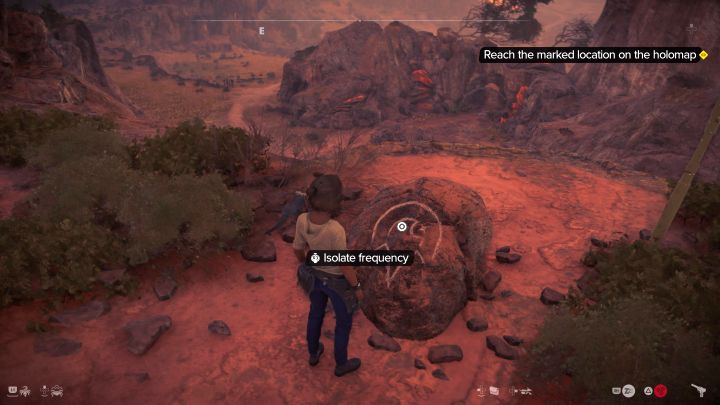
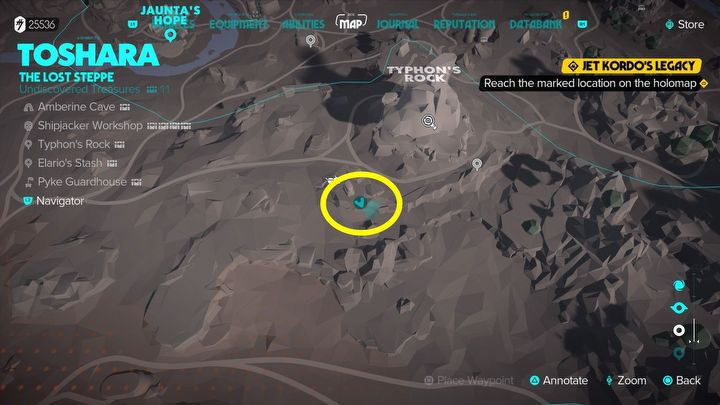
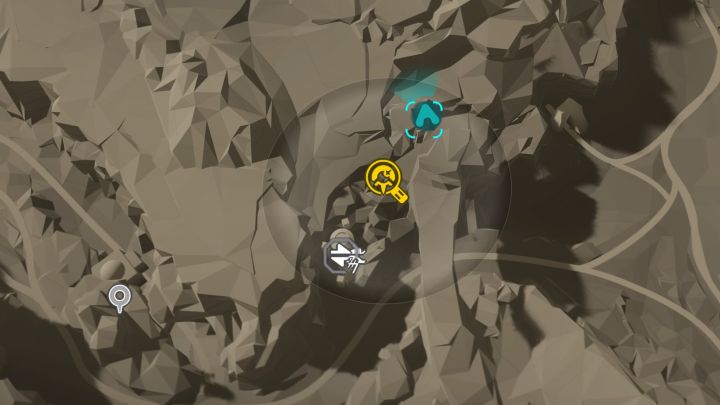
- Reach the central part of the Toshara map. In the place in the pictures you will find a boulder, and the option to search for the correct frequency will appear.
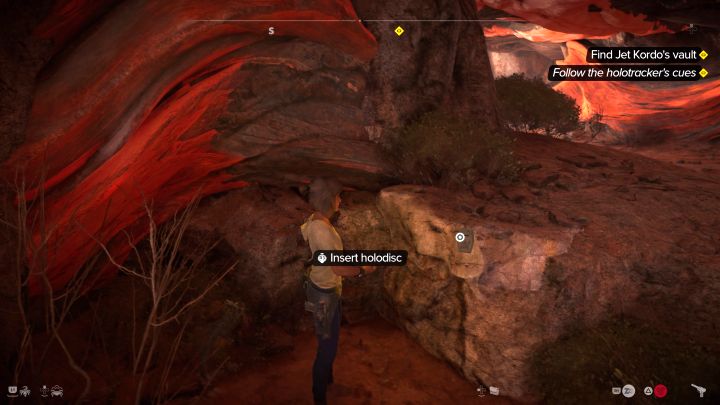
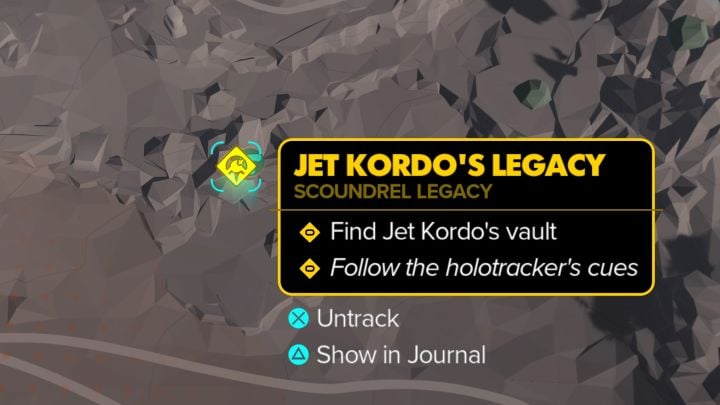
- From this point on, the holotracker may flash yellow - this happens if you have the camera pointed towards the place to which the found frequency is supposed to lead you (regardless of the direction your character is facing). The more frequent the beeping, the closer you are to your objective.
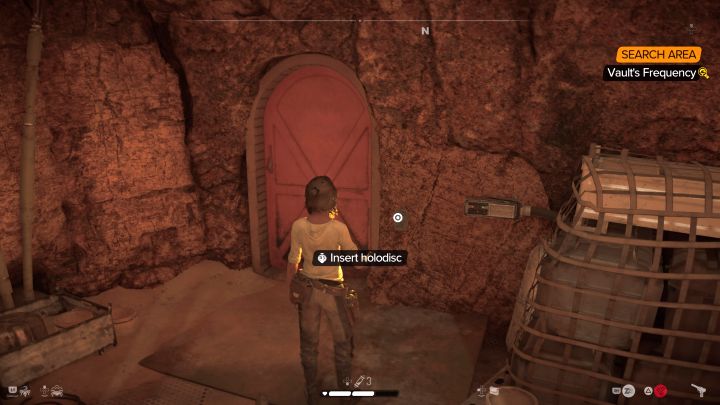
- Your destination is a nearby cave - in the place shown in picture 1 you can place the holodisc in the slot to lower the ladder. Use it to get into the vault.
- Use the data spike to open the door to the vault. The most important thing is a treasure chest - you will find an audio journal and the Scoundrel Belt in it (increases limit of medicines and grenades, faster regeneration of stun shot).
#2 Sheltered Vault (Kijimi) - getting the holodisc
Related map marker: Sheltered Vault - Kijimi Holodisc intel @ Kijimi
- You will not automatically receive directions to this vault in Kijimi city. You must discover the data associated with it and obtain a new holodisc.
- Get to the north-eastern part of the city. In the place marked in the picture you can join the conversation between 2 NPCs and unlock Kijimi Holodisc Intel (start tracking it in your journal).
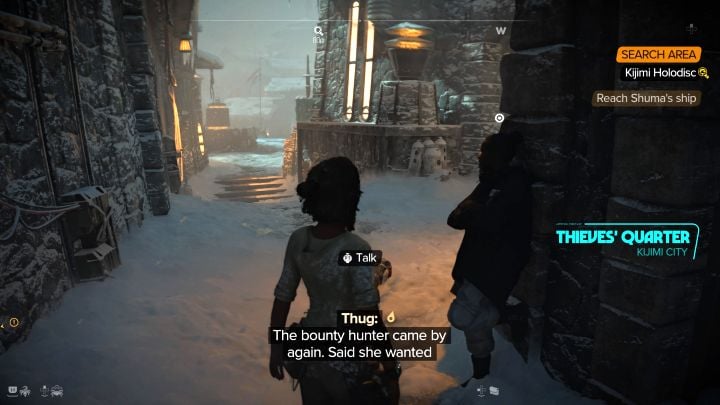
- Go to the western alley marked on the map - you can talk to the criminals in the alley and learn how to win the holodisc.
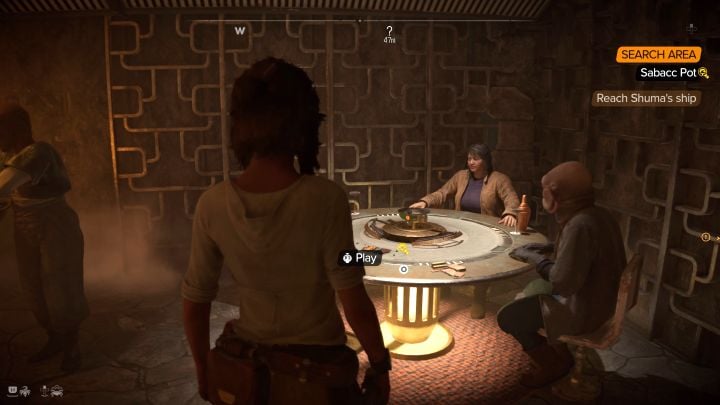
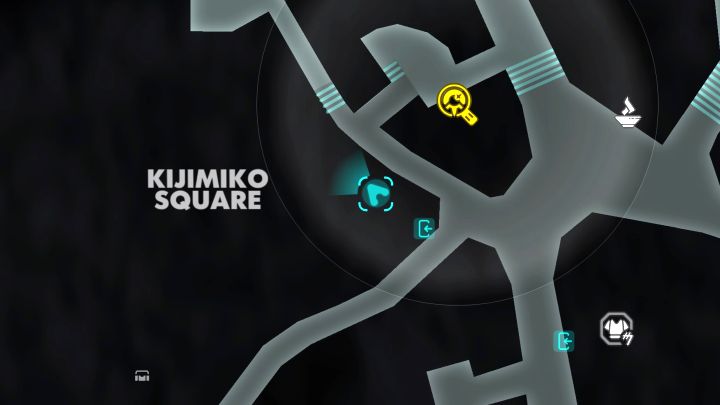
- You have to join and win the Kessel Sabacc card game. It takes place in the unmarked building shown in the pictures above.
- There are 3 rounds to play and at the end you must be the winner. You can use unlocked special cards and cheat with the help of Nix. Once you win the game, you will receive Gambled Holodisc.
#2 Sheltered Vault (Kijimi) - reaching the vault
Related map marker: Sheltered Vault - Isolate frequency @ Kijimi
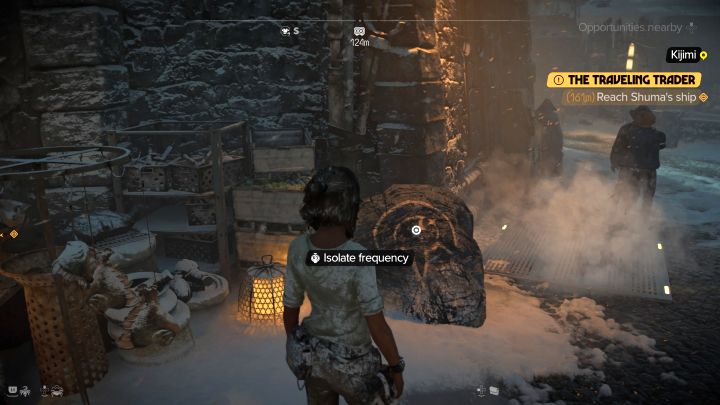
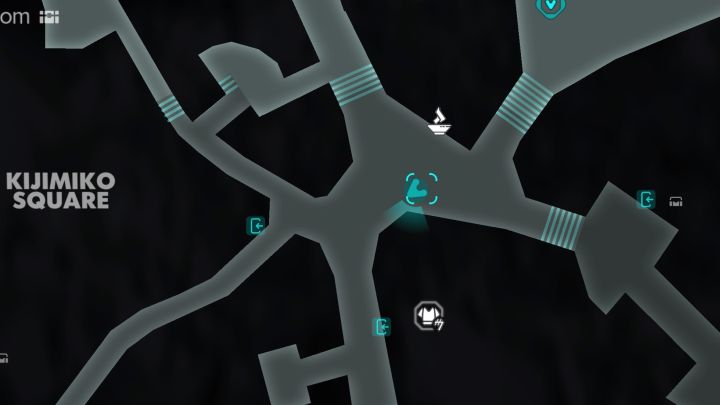
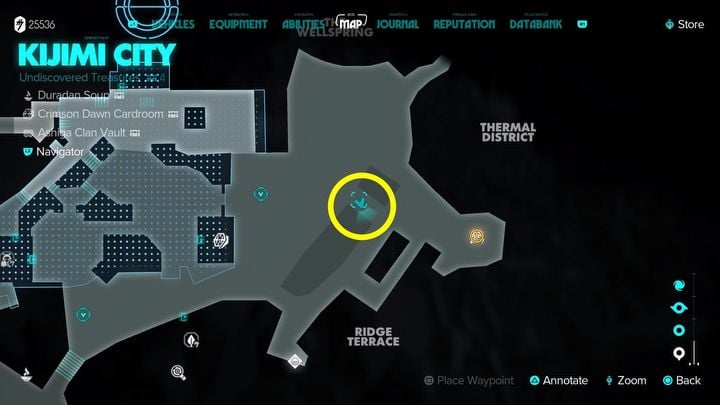
- Exit the building and take a few steps to the east. In the same location there is a boulder to examine. You also will find the frequency.
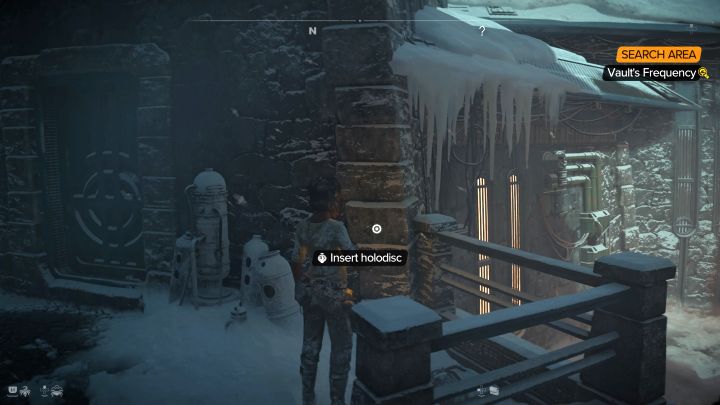
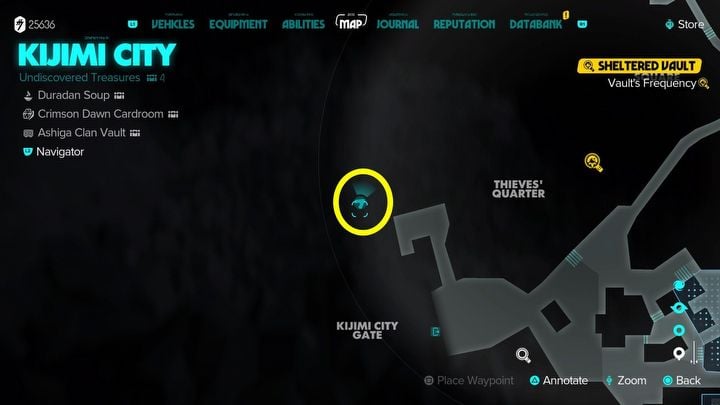
- Go to the southwest part of the city. You need to climb up a small wall and reach a closed door, next to which you can place the holodisc in the slot (it is outside the map, but it is an accessible area). The nearby entrance to the vault will open.
- In the vault, look for the treasure chest - you will obtain an audio recording and a collectible - the Kessel Sabacc card.
#3 Buried Vault (Tatooine) - getting the holodisc
Related map marker: Buried Vault - Treasure Hunter Trail intel @ Tatooine
- You will not automatically receive directions to the first vault on Tatooine. You must discover the data associated with it and obtain a new holodisc.
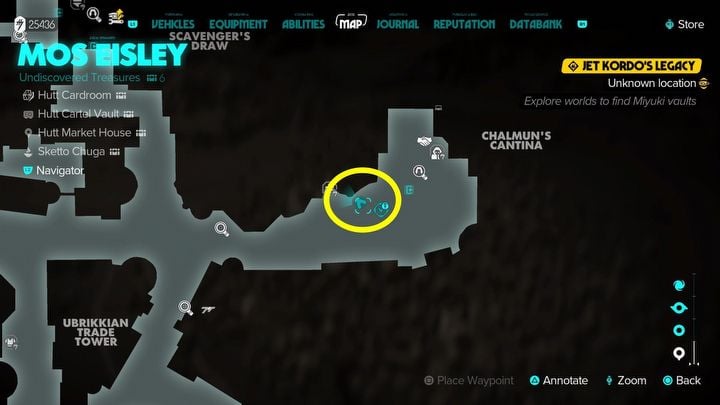
- Visit the cantina area in Mos Eisley. There you can talk to two characters and unlock the Treasure Hunter Trail Intel (start tracking it in your journal).
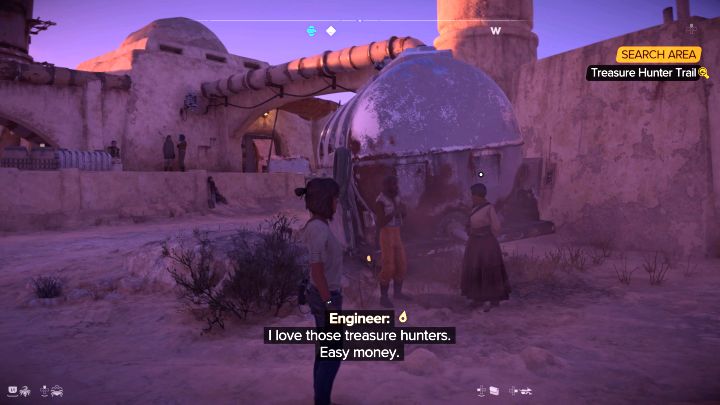
- The second location to visit is Wayfar - find a couple of NPCs from the picture there and talk to them to receive more information about the treasure hunter (pay 50 credits or mention the Hutt Cartel).
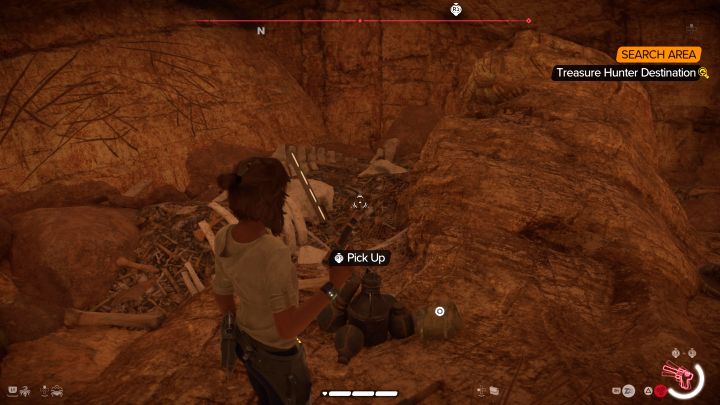
- Now head to the northwestern part of the Tatooine map. In the area marked on the map, find the cave with monsters. Eliminate the creatures and examine the equipment left behind by the treasure hunter. Among it will be the Treasure Hunter's Holodisc.
#3 Buried Vault (Tatooine) - reaching the vault
Related map marker: Buried Vault - Isolate frequency @ Tatooine
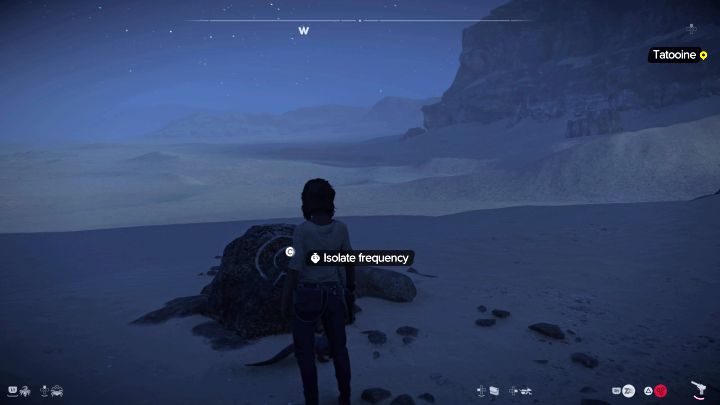
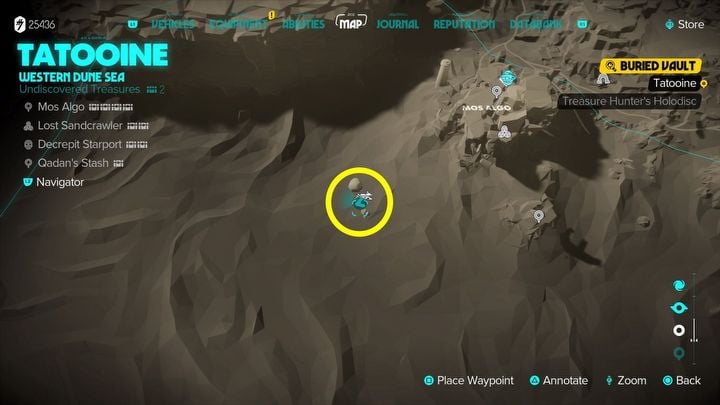
- Reach the 3 rocks in the western desert. One of the boulders here can be examined. This also let's you search for the correct frequency.
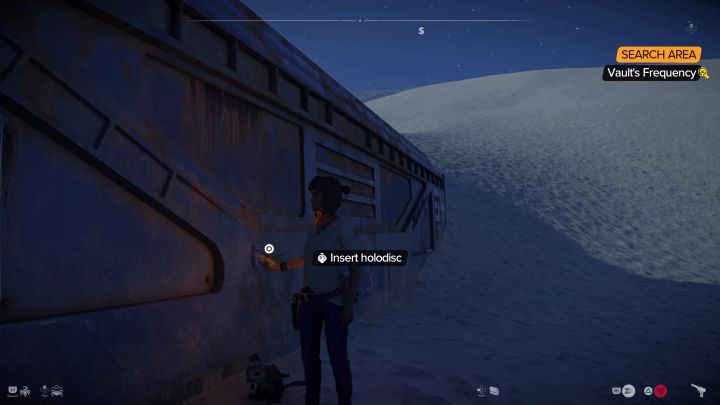
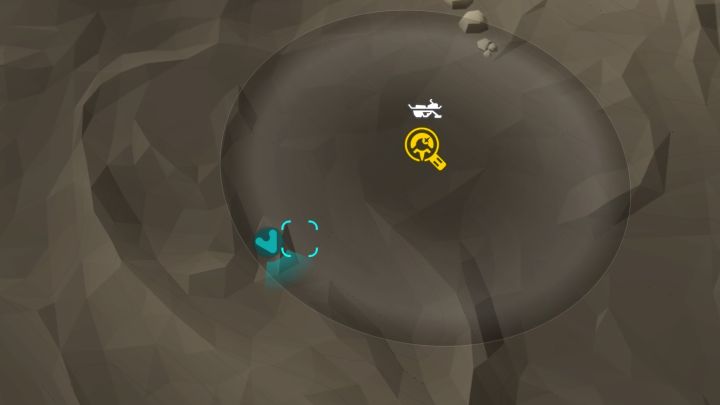
- The holotracker's signal will lead you to a partially buried vault in the desert. You need to place the holodisc in the slot here.
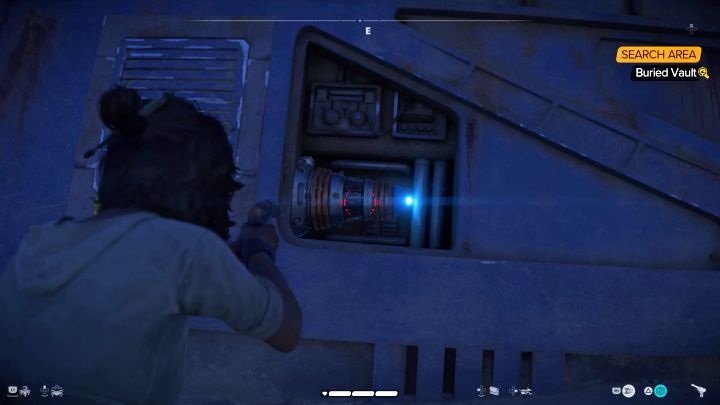
- Use the ion missile on the generator shown in the picture. This will unlock access to the ventilation shaft, which you can go through and reach the vault.
- Examine the treasure chest - inside are the audio diary and the Scoundrel Jacket (increased ammo limit, less bolt damage). You will also gain data to begin the search for the second vault on Tatooine.
#4 Perched Vault (Tatooine) - getting the holodisc
Related map marker: Perched Vault - Tatooine's Second Vault intel @ Tatooine
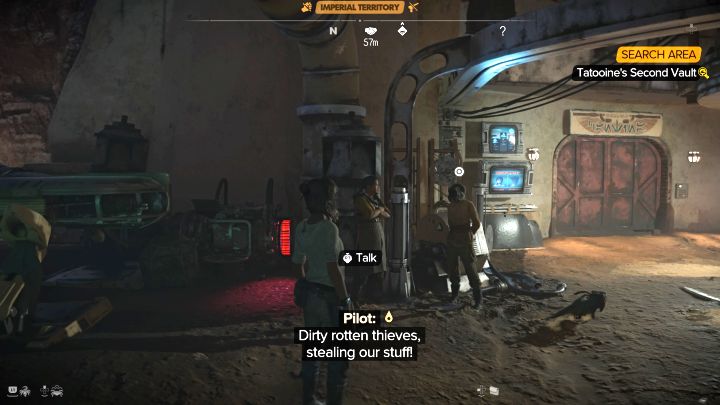
- After exploring the Buried Vault you should be able to unlock Tatooine's Second Vault Intel - this is the first trace to reach the new vault (it is worth setting the Intel as an active quest).
- Move to Bestine settlement. There are two NPCs talking near the landing site (western part of the village).
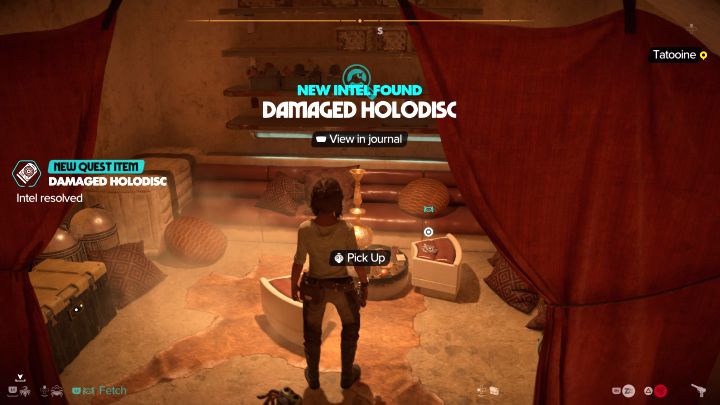
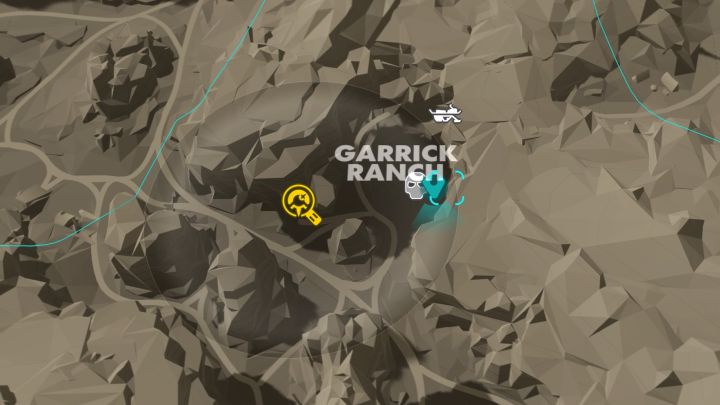
- The new Intel will direct you to the bandits' hideout in the central part of the map. Once you get there, you'll need to complete a hacking mini-game and unlock the entrance to the eastern building. Inside, apart from one of the chests, you will find a damaged holodisc (it will work in the holotracker, but the image will be distorted).
#4 Perched Vault (Tatooine) - reaching the vault
Related map marker: Perched Vault - Isolate frequency @ Tatooine
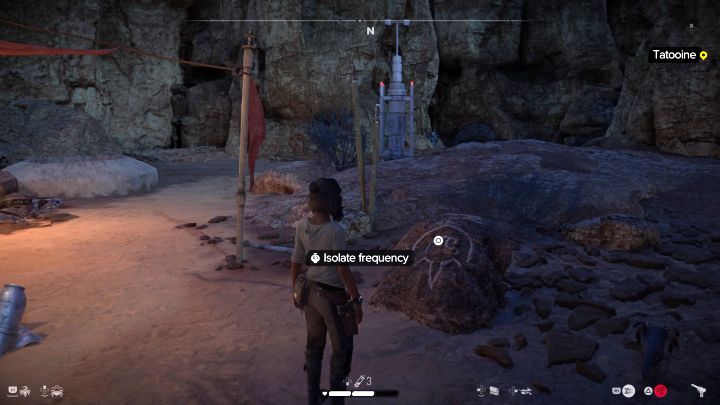
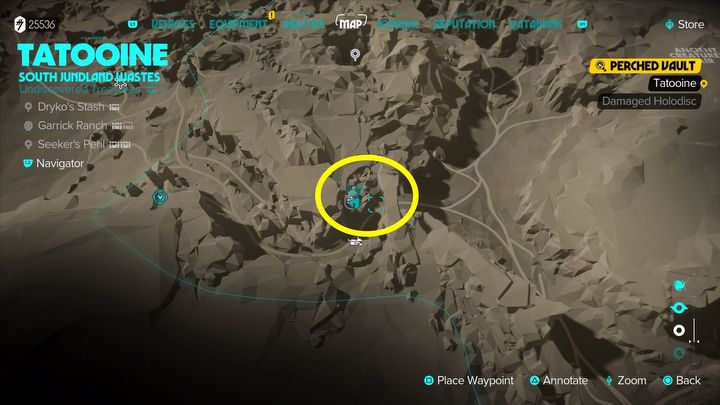
- Reach the southwest part of Tatooine. In this area there is a large stone arch and the camp of the mechant Tretet Zadiket. You will also find a boulder here to examine.
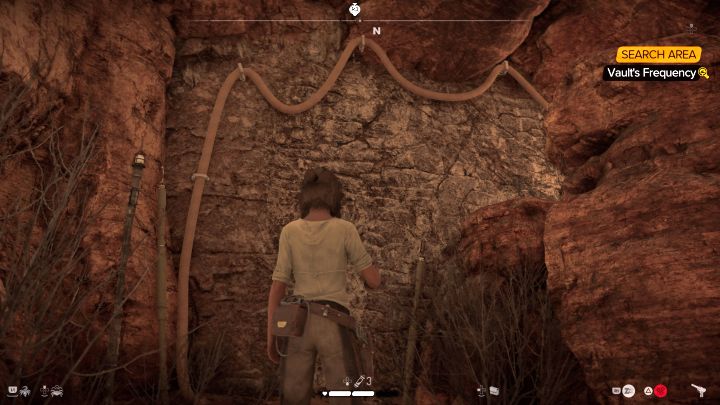
- Start using the holotracker. You must enter the small northern canyon. Follow it until you reach the climbing wall from the picture. You have to complete a long climb - first move to the right, then up and finally left.
- Climb to the higher ledge. Here you will find a door and a slot for the holodisc, which will open the vault.
- Open the treasure chest - it contains an audio recording and a new paint job for the speeder.
#5 Overgrown Vault (Akiva) - getting the holodisc
Related map marker: Overgrown Vault - Mysterious Holodisc @ Akiva
- You will not automatically receive directions to the first vault on planet Akiva. You must discover the data associated with it and obtain a new holodisc.
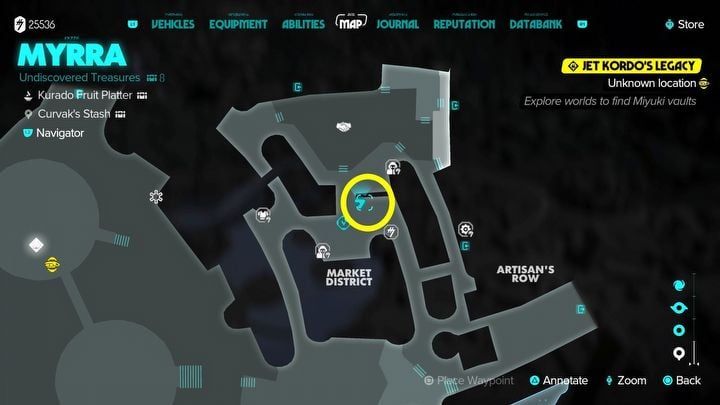
- Visit the market district in Myrra city. In the place marked in the picture there is a scrap dealer who sells a mysterious holodisc for 100 credits - buy it.
#5 Overgrown Vault (Akiva) - reaching the vault
Related map marker: Overgrown Vault - Isolate frequency @ Akiva
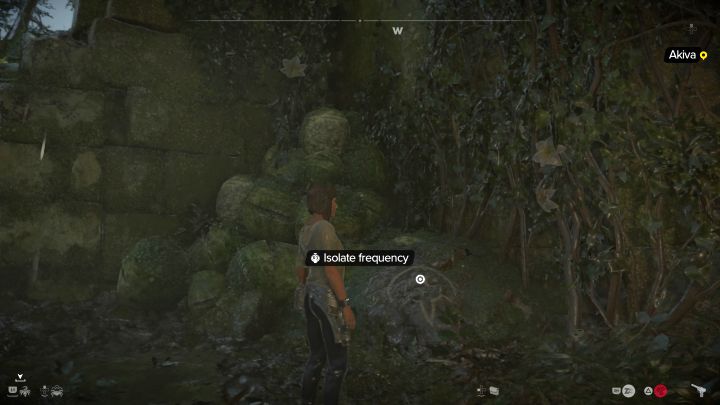
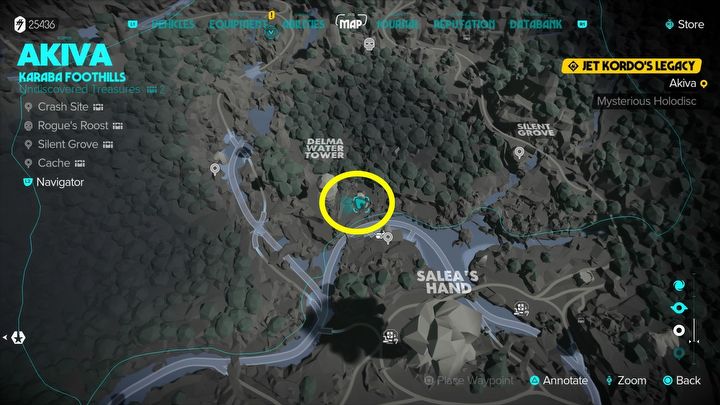
- Head along the river north of Myrra. You need to get to the place shown in the pictures - it is adjacent to the stone tower and you can get there by walking over a fallen tree above the river. Find and examine the boulder.
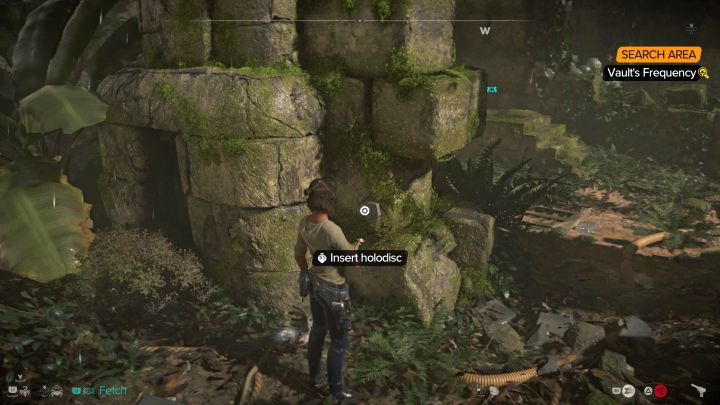
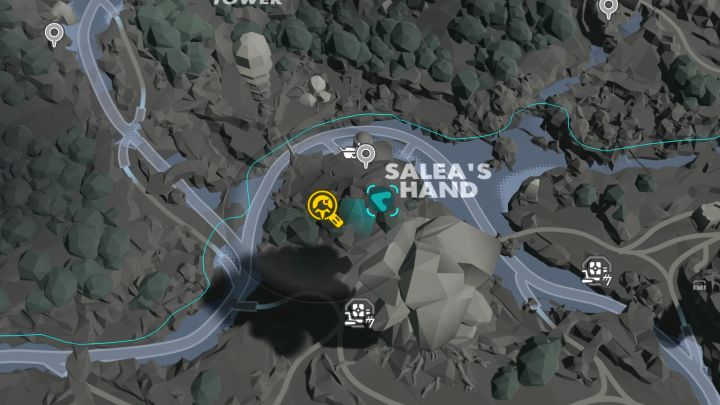
- Go south a bit and cross the fallen tree again. In the ruins adjacent to the camp you can place the holodisc in the slot to open the nearby hatch allowing you to go down to the vault.
- In the vault, examine the treasure chest - it contains blaster upgrade material and an audio log. You will also gain new Intel necessary to find the second vault on Akiva.
#6 Forgotten Vault (Akiva) - getting the holodisc
Related map marker: Forgotten Vault - Betrayed intel @ Akiva
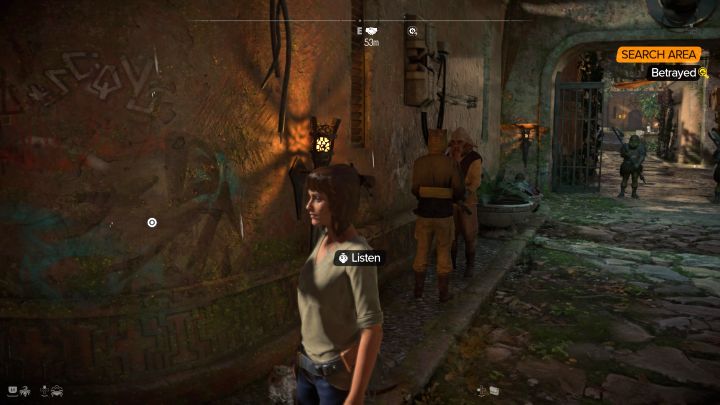
- By exploring the Overgrown Vault you should be able to unlock the Betrayed Intel - this is the first trace to reach the new vault.
- Set the quest as active and return to Myrra city. In the area marked on the map, eavesdrop on a conversation between 2 people (image above).
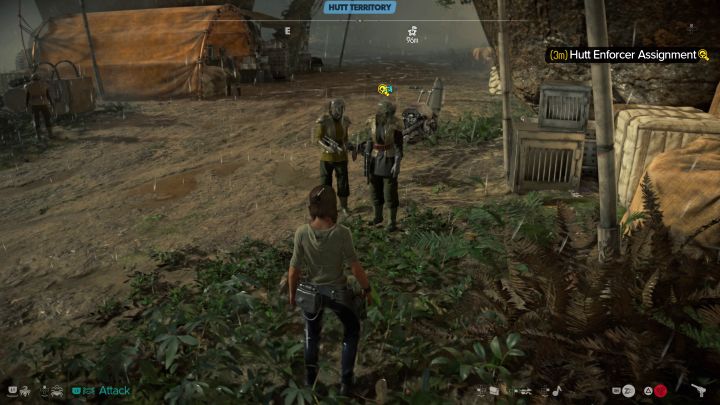
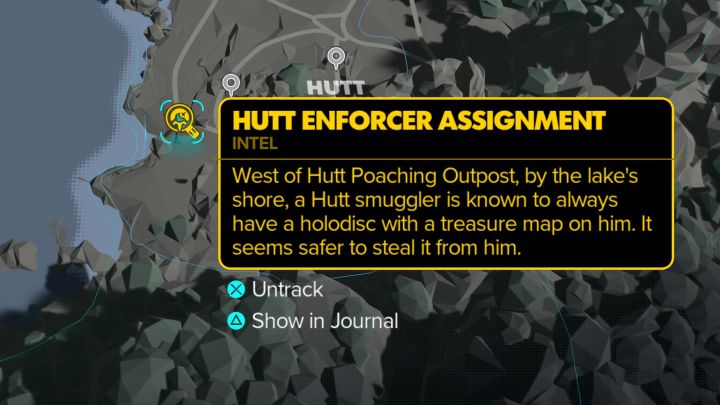
- Another trace leads to the Hutt Cartel camp - the holodisc is with one of the guards (the one with the yellow icon above his head).
- You do not have to take the holodisc by force and worry that your reputation with that faction will get worse. Hide in the grass, whistle and get rid of the guard that comes to you. You will recover the stolen holodisc.
#6 Forgotten Vault (Akiva) - reaching the vault
Related map marker: Forgotten Vault - Isolate frequency @ Akiva
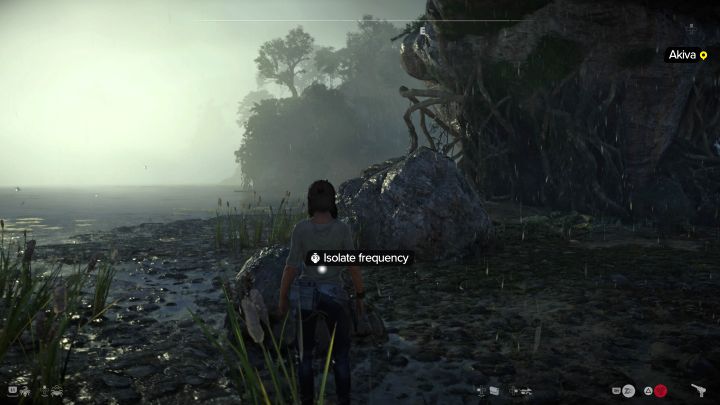
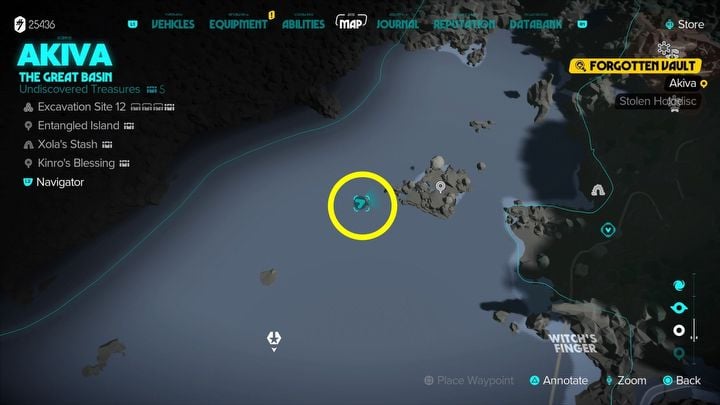
- You have to ride the speeder to a small island on the lake - this requires a speeder upgrade and the process is described on a separate page How to travel on water?. Examine the boulder on the island.
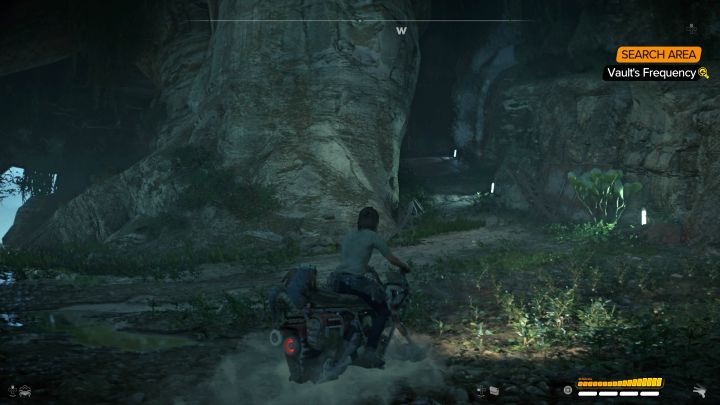
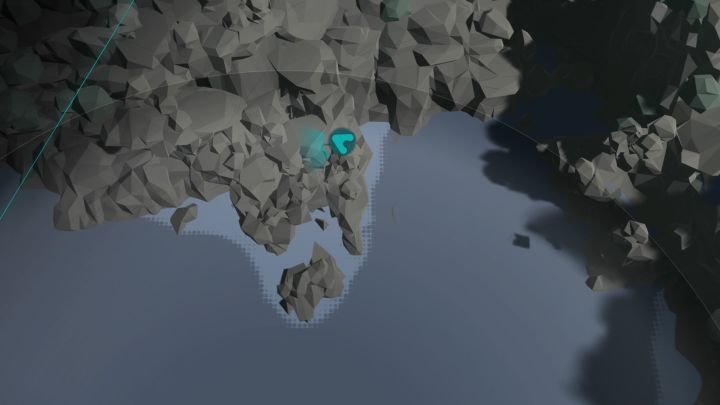
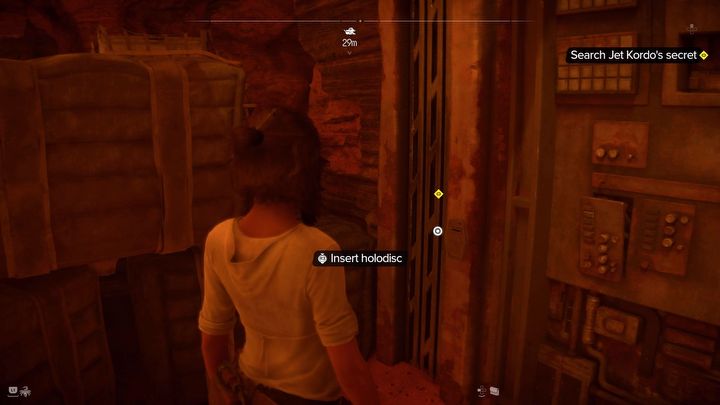
- Head north from the boulder and look for a speeder ramp (image 1). This will allow you to make the jump and reach the entrance to the northern vault. You need to place the holodisc in the slot here.
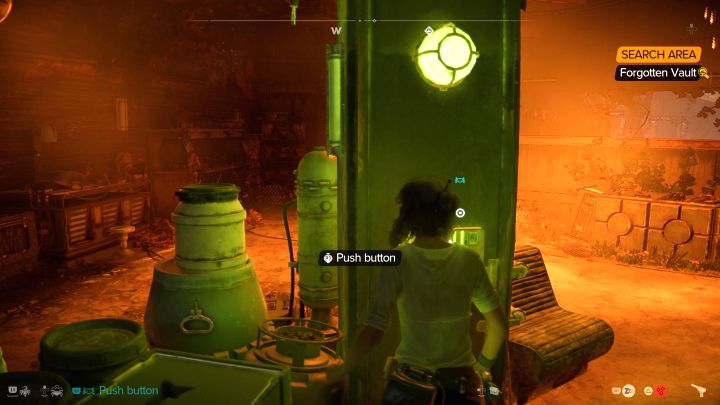
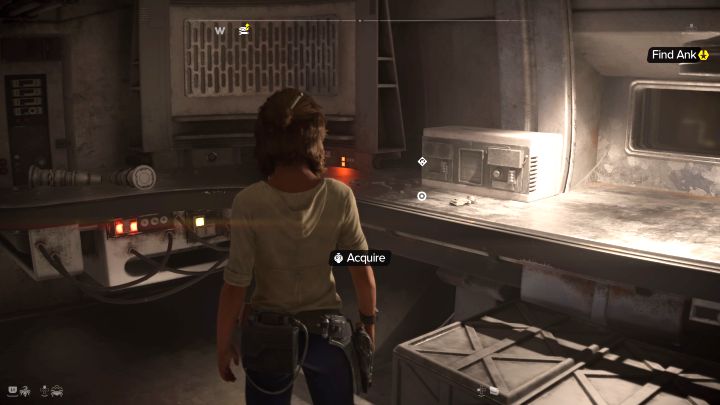
- Be careful in the vault, because when you try to search the main chest, a defense turret will activate and start firing. Quickly get to the button shown in the image to deactivate the turret.
- Return to the treasure chest - it contains the audio diary and the Scoundrel Pants (faster and quieter movement in stealth, improved blaster accuracy).
#7 Return to Jet's Vault (Toshara)
Related map marker: Jet Kordo's vault - Secret room @ Toshara
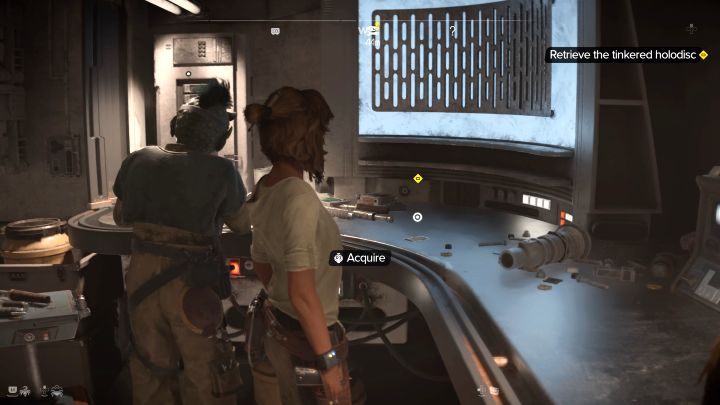
- After you have investigated all of the above vaults, you will be contacted by ND-5.
- You must return to your ship and find Tinkered Holodisc near the workshop.
- Return to Jet's vault, where the first holodisc lowered the ladder earlier. Look for a slot to place the Tinkered Holodisc - the picture shows it. Performing this action will unlock the secret vault room.
Quest rewards
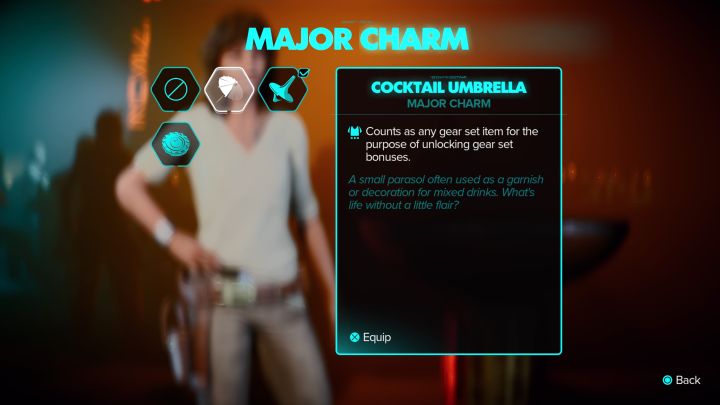
- In the secret room you will find the last treasure chest - you will get the final audio recording from the collection and Cocktail Umbrella pendant(you only need to have 1 item from the set equipped to receive the bonus for completing the entire set).
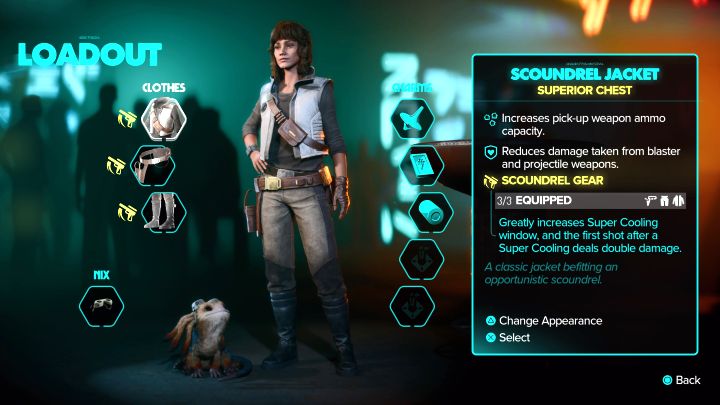
- By completing the described quest you should also have the complete Scoundrel outfit (3 items).
- Not every vault contains a piece of equipment. You must visit Jet's Vault (Scoundrel Belt), Buried Vault (Scoundrel Jacket), and Forgotten Vault (Scoundrel Pants).
You are not permitted to copy any image, text or info from this page. This site is not associated with and/or endorsed by the developers and the publishers. All logos and images are copyrighted by their respective owners.
Copyright © 2000 - 2026 Webedia Polska SA for gamepressure.com, unofficial game guides, walkthroughs, secrets, game tips, maps & strategies for top games.
