Resident Evil Zero HD: The clock puzzle
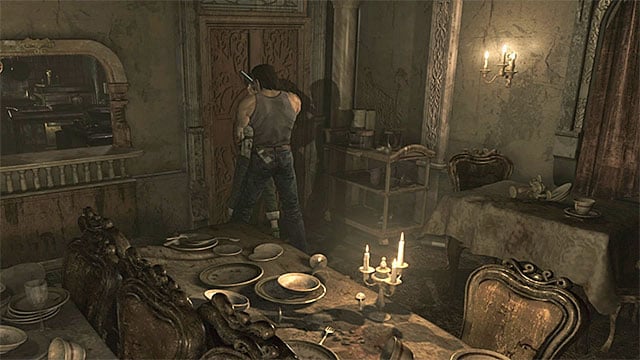
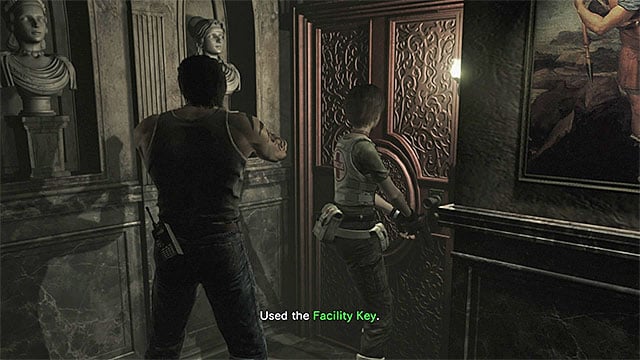
It is better to take the next steps as Rebecca, because she has the key that you have collected before the boss battle. There are two locations, in which you can use the key. First, return to the main hall (M2,3) and climb down to level 1F. Take the Eastern door (the one next to the first typewriter), to the dining room (M2,13) where several zombies are staying. Eliminate all of them and use the Facility Key to open the door into a small kitchen (M2,14).
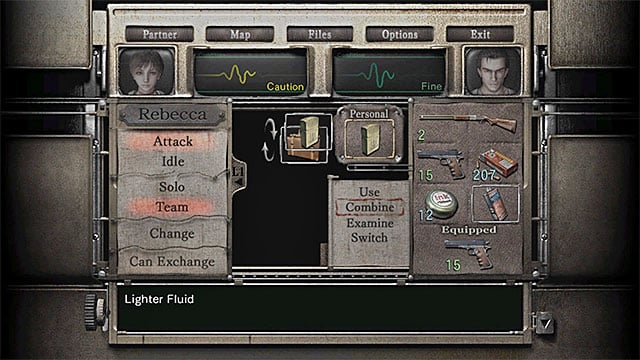
In the kitchen, you find some standard supplies, but also a Lighter Fluid. Make sure that Billy collects it. Access the inventory and combine the fluid with the lighter that Billy has (the above screenshot). From now on, in the selected moment of the game, you can use the lighter to light up oil lamps. Leave the kitchen and go to the Northern door that you can see in the distance.
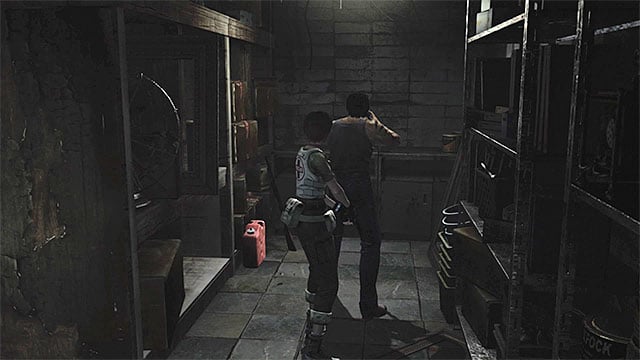
You will get into a narrow corridor (M2,15). Ignore the left path, because hot steam will make it impossible to follow it. Go right and enter the new room (M2,16). Kill zombies here (it is best to attack them while standing by the entrance) and examine the area. Here, you can find a Shotgun, among others, and it is a good idea to replace the Hunting Gun it with. The main good point of this shotgun is that its magazine can hold seven shells (whereas the Hunting Gun can only hold two).
Note - In the room with the shotgun, there also is a Black Statue. Ignore it for now, because you are going to need it for one of the puzzles that you solve later on.
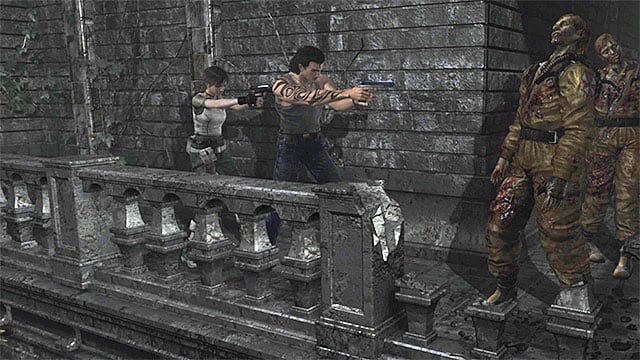
Remain in the room , where you have found the shotgun, and find an interactive ladder here. Use it to reach external balconies of the training facility (M2,17). Watch out here, because you encounter more zombies. While moving along the balconies, you can also find healing herbs. The only available path leads toy to door and across the door, you will get to the conference room at level 2F (M2,5).
Remain in the conference room and take the door (South-Western one) to the corridor where zombies used to be (M2,6). Ignore the double door that you pass be and reach the end of the corridor. Here, you find a red door (M2,18), where you can use the Facility Key for the second time, thanks to which you open the door (after that, you can dispose of the key).
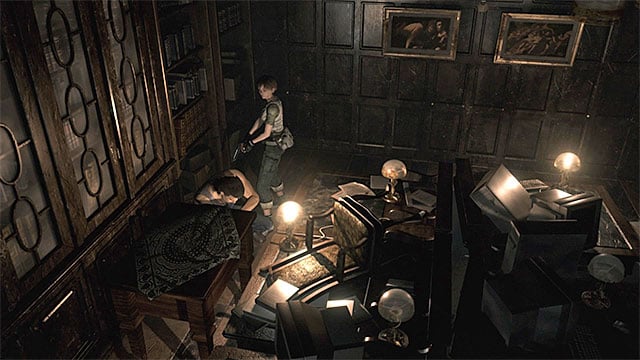
After you enter, switch to Billy. First, examine the room to find a file - Assistant Director's Diary. Return to the door and stand in the spot shown in the above screenshot. Lean the analog stick towards the table and wait for Billy to push it towards the bottom-left edge of the screen. Keep doing that up until the table gets stuck and it is impossible to pus it any further.
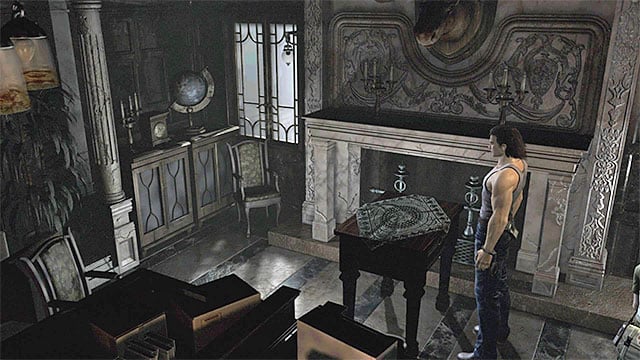
Climb onto the table, turn right by 90 degrees and climb down, thanks to which you get into a small recess to the right of a button in the wall. Turn towards the table and start pushing it left, up until you move it towards the fireplace shown in the above screenshot.
Note - If you push the table too far and you cannot pull it away, exit the room for a moment and it will be restored back to its initial position.
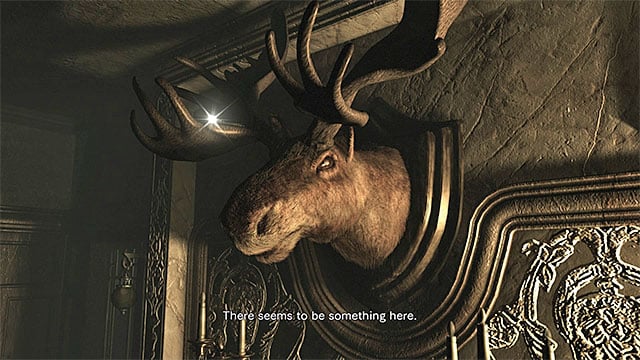
Return to the button that you have just passed by, a moment ago, and press it to switch the lights on. You can approach the table next to the fireplace and climb onto it.. Turn towards the trophy above the fireplace and examine it, thanks to which you obtain Iron Needle. You now need to return to the room, where you have been fighting the giant centipede (M2,10) - cross the conference room (M2,5), take the side door in the main hall and climb up the stairs to level 3F in the narrow corridor (M2,11).
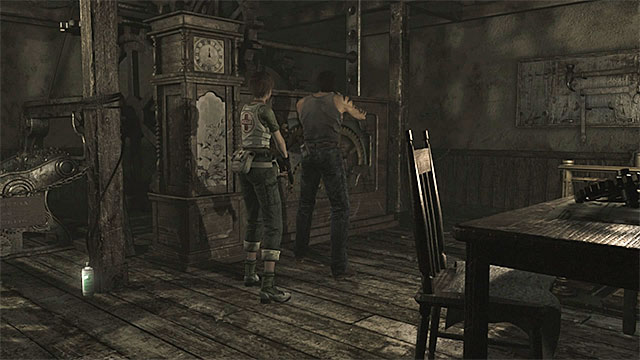
You need to reach the room at level 3F, where you have defeated the giant insects after the elevator ride, as Rebecca. Take the Southern door in the big room, to get into the area with the ravens and the fountain (M2,9). Here, dash up to the Western door, thanks to which you will reach your destination (M2,8). Approach the big interactive clock and examine it. Access Billy's inventory and select the Iron Needle to mount it onto the clock (Use option).
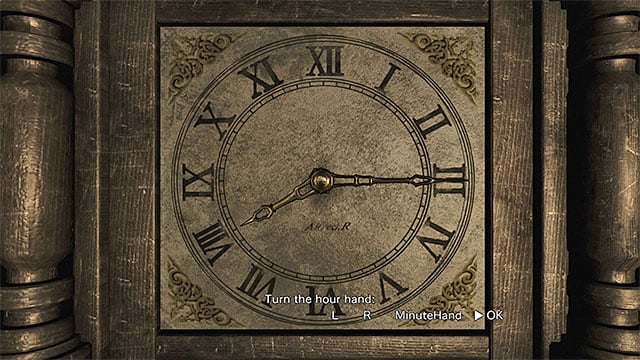
Now you will have to solve a puzzle whose aim is to set the clock to the right time. The time that you need to set is 8:15 that you have learned from the Notice to All Staff at the very beginning of your exploration of the training facility.
First, set the longer minute hand - keep selecting "R" from the list, up until you set the hand to the Roman numeral 3 - III. Now, switch to setting the hour - HourHand. Here, keep selecting "L" from the list, up until you reach the Roman 8 - VIII. The correct setting of the clock has been presented in the above screenshot. If you have performed everything correctly, confirm the selection with OK button. This will start two cutscenes, from which you learn that a new door within the facility has just been unlocked.

- Resident Evil Zero HD Game Guide & Walkthrough
- Resident Evil Zero HD: Game Guide
- Resident Evil Zero HD: Walkthrough
- Resident Evil Zero HD: Ecliptic Express Train
- Resident Evil Zero HD: Map Ecliptic Express Train
- Resident Evil Zero HD: Exploring first cars
- Resident Evil Zero HD: The start of the cooperation with Billy
- Resident Evil Zero HD: Boss Stinger (giant scorpion)
- Resident Evil Zero HD: Continuation of the train exploration
- Resident Evil Zero HD: Stopping the train from derailing
- Resident Evil Zero HD: Umbrella Training Facility
- Resident Evil Zero HD: Map Umbrella Training Facility
- Resident Evil Zero HD: The beginning of exploration
- Resident Evil Zero HD: Boss Centurion (huge centipede)
- Resident Evil Zero HD: The clock puzzle
- Resident Evil Zero HD: The conference room puzzle
- Resident Evil Zero HD: The chessboard puzzle
- Resident Evil Zero HD: Unlocking access to the basement
- Resident Evil Zero HD: Training Facility Basement
- Resident Evil Zero HD: Map Training Facility Basement
- Resident Evil Zero HD: The beginning of exploration
- Resident Evil Zero HD: Saving Rebecca
- Resident Evil Zero HD: The animal statues puzzle
- Resident Evil Zero HD: Exploring the testing area
- Resident Evil Zero HD: Return to the Training facility
- Resident Evil Zero HD: Unlocking the door to the observatory
- Resident Evil Zero HD: Laboratory
- Resident Evil Zero HD: Map Laboratory
- Resident Evil Zero HD: The beginning of exploration
- Resident Evil Zero HD: Boss Infected Bat
- Resident Evil Zero HD: Reaching the research facility
- Resident Evil Zero HD: Obtaining the Blue Leech Charm
- Resident Evil Zero HD: Obtaining the Green Leech Charm
- Resident Evil Zero HD: Gaining access to the area with the cable car
- Resident Evil Zero HD: Activating the cable car
- Resident Evil Zero HD: Factory
- Resident Evil Zero HD: Map Factory
- Resident Evil Zero HD: Activating the large elevator in the factory
- Resident Evil Zero HD: Boss Proto Tyrant - first encounter
- Resident Evil Zero HD: Leaving the factory
- Resident Evil Zero HD: Treatment Plant
- Resident Evil Zero HD: Map Treatment Plant
- Resident Evil Zero HD: Repowering the plant
- Resident Evil Zero HD: Saving Billy
- Resident Evil Zero HD: The crates puzzle
- Resident Evil Zero HD: Reaching the place where the motherboard is hidden
- Resident Evil Zero HD: Boss Proto Tyrant - second encounter
- Resident Evil Zero HD: Finding and using the motherboard
- Resident Evil Zero HD: Building a working battery
- Resident Evil Zero HD: Placing the battery in the forklift
- Resident Evil Zero HD: Reaching the Queen Leech's lair
- Resident Evil Zero HD: Boss Queen Leech - first encounter
- Resident Evil Zero HD: Preparations before the final battle
- Resident Evil Zero HD: Boss Queen Leech - second encounter
- Resident Evil Zero HD: Walkthrough
- Resident Evil Zero HD: Game Guide
You are not permitted to copy any image, text or info from this page. This site is not associated with and/or endorsed by the developers and the publishers. All logos and images are copyrighted by their respective owners.
Copyright © 2000 - 2026 Webedia Polska SA for gamepressure.com, unofficial game guides, walkthroughs, secrets, game tips, maps & strategies for top games.