Resident Evil Zero HD: The conference room puzzle
Your next task is to solve the puzzle in the conference room (the one with the second typewriter) (M2,5) and first, you will need to obtain two microfilms. Microfilm A is in the room at level 2F, where you have been using the crank to give Rebecca a ride to the upper level (M2,7). Just to remind you, you can get there by starting in the conference room, taking the door into the side corridor and reaching the double door, along the corridor. The location of the microfilm has been shown in the above screenshot.
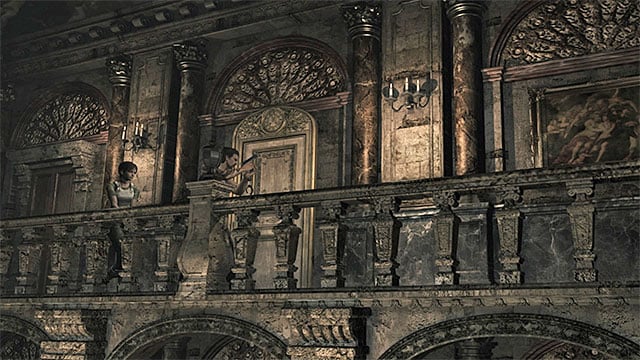
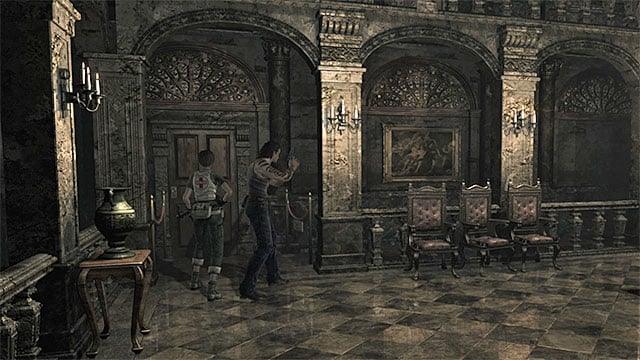
You cannot go and search for the other microfilm earlier, because it is behind the locked door that opens after you solve the clock puzzle described in the previous chapter. Return to the main hall and remain at its upper level (2F). The door that you are looking for is in the Eastern part of the hall (to the right of the door between the hall and the narrow corridor with stairs) (M2,19).
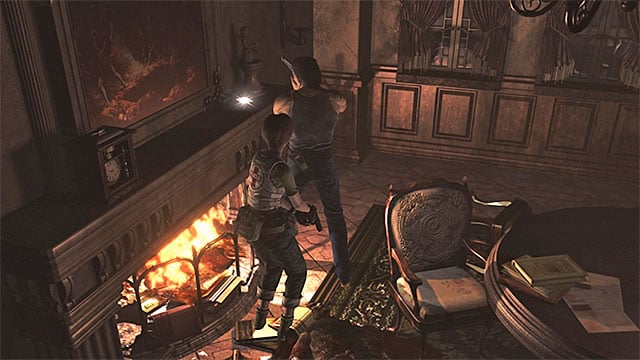
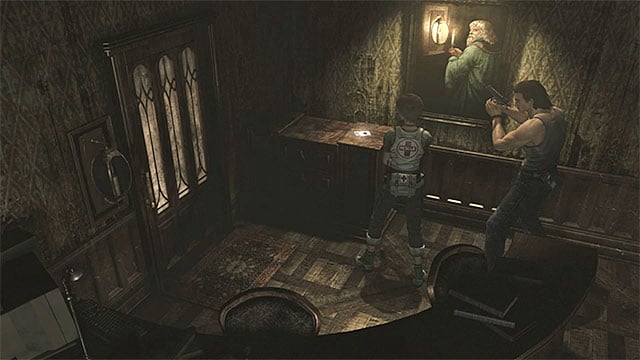
After you enter the room, be prepared to deal with several regular zombies - if you do not want to take the risk, remain in the starting point and wait for them to come to you. Examine the room behind the door after the fight, thanks to which you find Microfilm B above the fireplace. Apart from that, on the table, there is a file - A Verse of Poetry.
Return to the main hall, climb down to the lower level and consider saving the game, because you will soon run into a strong monster. Go to the door in the South-Western corner of the hell, across which you get into the narrow corridor (M2,20). Follow the corridor. If you want to, you can sneak a peak into the room along your path - it is a bathroom (M2,21), where there are some supplies. In such a situation, you need to keep in mind that you will be attacked by a leech-zombie monster, after you leave the bathroom. You can try and dash by the monster or fight, if you decide on the latter, it is imperative that you use the grenade launcher or another powerful weapon. If you do not want to fight the zombie in the bathroom, ignore this room altogether, because there are no storyline items there.
Along the narrow corridor, you will get into a room with projector (also this room has been unlocked after you solved the clock puzzle) (M2,22), where you need to start by clearing the area of zombies. After the fight, approach the projector and switch to the character who has microfilm A. Access the inventory, highlight the microfilm and Use it to place it in the projector. Do not start the projector just yet (Cancel), and put inside microfilm B. Only after you do that, start the projector. It is very important for the puzzle. To learn more, see the rest of the walkthrough. You can remember the characters, take them down, or you can see the screenshot in this walkthrough. Before you leave, collect the MO Disk. The image itself will be added to your inventory as a file - Microfilm Image.

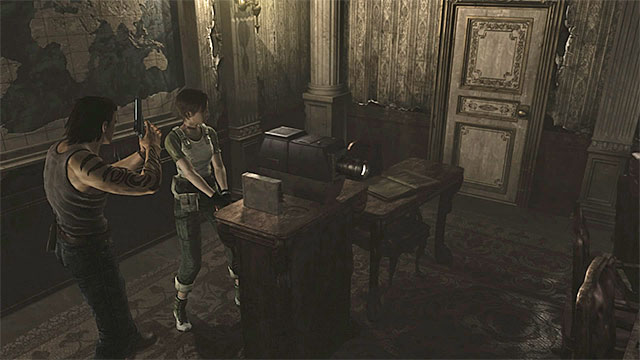
You now need to return to the conference room (M2,5). If you have not run into the leech-zombie yet, you will now encounter it in the corridor, on your way back. Since the corridor is quite wide, do not risk taking damage and do not waste ammo. Instead, dash by the monster and open the door to the main hall (do not worry, the zombie leech does not follow you there). Finish your walk to the conference room. After you get there, approach the lectern in the center, access the inventory and use the MO Disk.
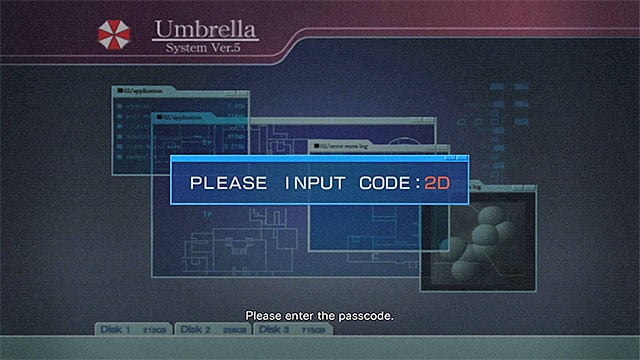
After you insert the disc, wait for the program to load. After a while, the device defines a random input code (in our case, the code was 2D - the above screenshot). Remember the code.
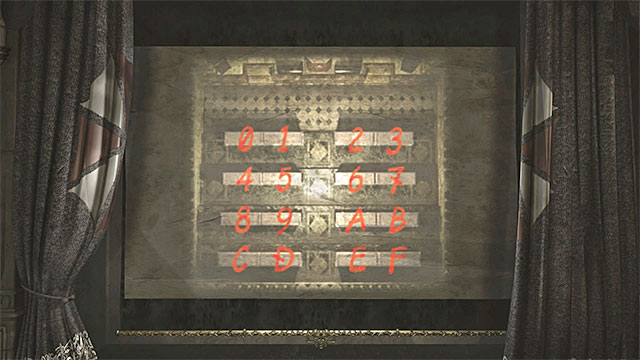
You can now walk away. The solution of the puzzle in this room is using two correct stations around. You need to single them out basing on the image from the projector. The slide has been presented in the above screenshot - note that there are digits 0-9 and letters A-F on the image.
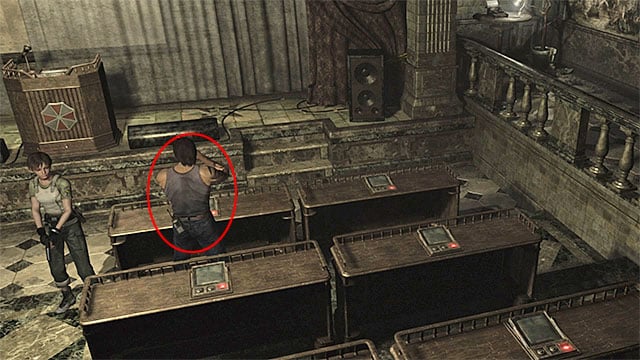
IN our example the ones to locate are stations 2 and D. After you check out the image, it turns out that
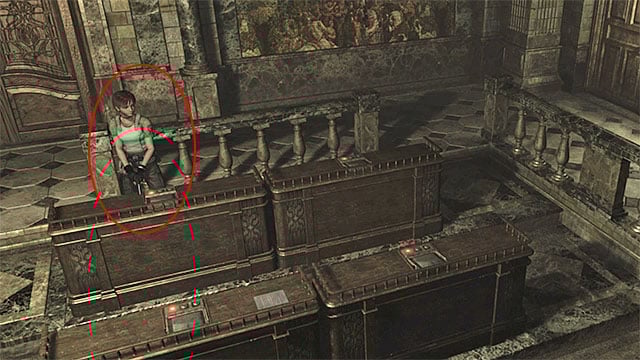
- station 2 is the third one from the left, in the front row (screenshot 1)
- station D is the second from the left in the last row (screenshot 2)
Of course, it is highly probable that your code will be different, but the way to specify the stations is the same.
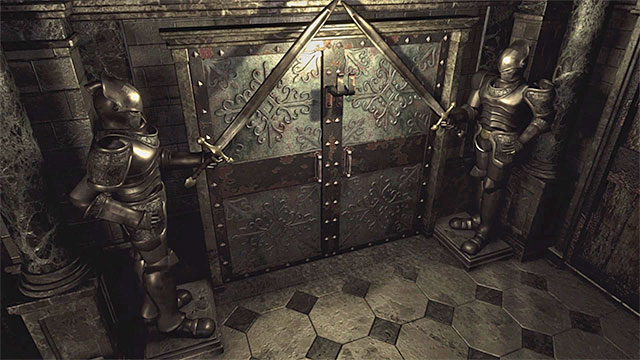
You need to leave a character by each of the stations (do not do anything just yet), so command your partner beforehand, not to follow you. Switch to the character by the first station (in our example, this is station 2) and press the button. Quickly, switch to the other character (by station D) and press the button. If you have been right about the stations, you will see a cutscene of three doors opening (the ones with armors on their sides).
- Resident Evil Zero HD Game Guide & Walkthrough
- Resident Evil Zero HD: Game Guide
- Resident Evil Zero HD: Walkthrough
- Resident Evil Zero HD: Ecliptic Express Train
- Resident Evil Zero HD: Map Ecliptic Express Train
- Resident Evil Zero HD: Exploring first cars
- Resident Evil Zero HD: The start of the cooperation with Billy
- Resident Evil Zero HD: Boss Stinger (giant scorpion)
- Resident Evil Zero HD: Continuation of the train exploration
- Resident Evil Zero HD: Stopping the train from derailing
- Resident Evil Zero HD: Umbrella Training Facility
- Resident Evil Zero HD: Map Umbrella Training Facility
- Resident Evil Zero HD: The beginning of exploration
- Resident Evil Zero HD: Boss Centurion (huge centipede)
- Resident Evil Zero HD: The clock puzzle
- Resident Evil Zero HD: The conference room puzzle
- Resident Evil Zero HD: The chessboard puzzle
- Resident Evil Zero HD: Unlocking access to the basement
- Resident Evil Zero HD: Training Facility Basement
- Resident Evil Zero HD: Map Training Facility Basement
- Resident Evil Zero HD: The beginning of exploration
- Resident Evil Zero HD: Saving Rebecca
- Resident Evil Zero HD: The animal statues puzzle
- Resident Evil Zero HD: Exploring the testing area
- Resident Evil Zero HD: Return to the Training facility
- Resident Evil Zero HD: Unlocking the door to the observatory
- Resident Evil Zero HD: Laboratory
- Resident Evil Zero HD: Map Laboratory
- Resident Evil Zero HD: The beginning of exploration
- Resident Evil Zero HD: Boss Infected Bat
- Resident Evil Zero HD: Reaching the research facility
- Resident Evil Zero HD: Obtaining the Blue Leech Charm
- Resident Evil Zero HD: Obtaining the Green Leech Charm
- Resident Evil Zero HD: Gaining access to the area with the cable car
- Resident Evil Zero HD: Activating the cable car
- Resident Evil Zero HD: Factory
- Resident Evil Zero HD: Map Factory
- Resident Evil Zero HD: Activating the large elevator in the factory
- Resident Evil Zero HD: Boss Proto Tyrant - first encounter
- Resident Evil Zero HD: Leaving the factory
- Resident Evil Zero HD: Treatment Plant
- Resident Evil Zero HD: Map Treatment Plant
- Resident Evil Zero HD: Repowering the plant
- Resident Evil Zero HD: Saving Billy
- Resident Evil Zero HD: The crates puzzle
- Resident Evil Zero HD: Reaching the place where the motherboard is hidden
- Resident Evil Zero HD: Boss Proto Tyrant - second encounter
- Resident Evil Zero HD: Finding and using the motherboard
- Resident Evil Zero HD: Building a working battery
- Resident Evil Zero HD: Placing the battery in the forklift
- Resident Evil Zero HD: Reaching the Queen Leech's lair
- Resident Evil Zero HD: Boss Queen Leech - first encounter
- Resident Evil Zero HD: Preparations before the final battle
- Resident Evil Zero HD: Boss Queen Leech - second encounter
- Resident Evil Zero HD: Walkthrough
- Resident Evil Zero HD: Game Guide
You are not permitted to copy any image, text or info from this page. This site is not associated with and/or endorsed by the developers and the publishers. All logos and images are copyrighted by their respective owners.
Copyright © 2000 - 2026 Webedia Polska SA for gamepressure.com, unofficial game guides, walkthroughs, secrets, game tips, maps & strategies for top games.