Enshrouded - How to Create Dedicated Server
Creating a dedicated server in Enshrouded is not very complex, but a bit peculiar. Here you will learn how to do it.

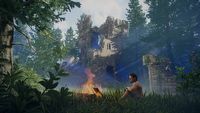
If catching Pals in Palworld is not for you and you would like to embark on more classical, survival journey, Enshouded entered Early Access just moments ago. The latter offers a medieval-like kingdom filled with magical creatures and mysteries to unveil. Obviously, building your own village is fun, but it’s even better with friends. This production offers dedicated server functionality to fully customise your experience. Creating such a server requires a bit more extra steps but worry not. Here, you will find all the information you need and more.
Creating a dedicated server in Enshrouded
Creating a dedicated server in Enshrouded is a good idea to enjoy the game in your own, fully controlled environment. Doing so requires extra work, though it is not very complex. Below you can find step-by-step guide that will walk you through creating your own dedicated server in Enshrouded:
- Buying Enshrouded on Steam gives you access to “Enshrouded Dedicated Server” tool. To find it, you will need to click on the dropdown menu right below “HOME” button in your Steam Library page and select “TOOLS”. Install it, but do not hit “Play” button!
- After Enshrouded Dedicated Server tool is installed, right click on it from your Steam library, select “Manage” and then click on “Browse local files”.
- With the directory opened, launch the Enshrouded Dedicated Server by running “enshrouded_server.exe” file.
Of course, you can launch the server from the Steam level, though it’s not recommended, as it will prevent you from playing the game at the same time.
Configuring your dedicated server in Enshrouded
Creating the server itself is just a beginning, configuring it is another story. Doing so is not very hard either, but there is no dedicated tool with its own GUI. To get the configuration file, it will first have to be generated. To do so, simply start the server at least once and then close it. This will create a file called “enshrouded_server.json”. The file will be located in the same directory as the server executable (“enshrouded_server.exe”). You can open it with any text editor such as Windows Notepad.
The file is a typical json file and consists of “key – value” pairs. It is very important to retain its original formatting. For example, quotation marks have to be preserved, you may change only values between them. Also, be careful not to delete any comma at the end of any row (the last row does not have comma, though).
Opening this file will give you access to changing the server’s settings. The default file looks as follows:
{
"name": "Enshrouded Server",
"password": "",
"saveDirectory": "./savegame",
"logDirectory": "./logs",
"ip": "0.0.0.0",
"gamePort": 15636,
"queryPort": 15637,
"slotCount": 16
}
The keys should be rather self-explanatory. They allow you to change values like server’s name, set up a password, change the save and logs directory for the server, change it’s IP and ports, as well as changing the max player number (slotCount).
If you would like the server to be visible for everyone enjoying Enshrouded, make sure to correctly forward ports on your router. It differs depending on your router model, but there are a ton of guides online that will walk you through it step-by-step.
If you would like to know more about Enshrouded, check also:
- Enshrouded - Game Crashing on Dedicated Server List Explained
- Enshrouded Multiplayer - PvP, Coop and Offline Single Player Explained
- Enshrouded - Console (PS5, PS4 and Xbox) Release

0

Author: Aleksander Kartasinski
Just a random from the depths of the internet who happens to be interested in video games like millions of other people on this planet. By sheer luck he was given a chance to write about them. Worked in IT department and supported users for way too long, but also given a chance to do some IT magic on a large scale in his free time. Interested in technology, games with intriguing mechanics, etymology, and linguistics.

Latest News
- Someone has remastered Medieval 2: Total War and Rome: Total War so well that the AI's moves are now calculated in a matter of seconds
- 15 years after releease the PC version of Alice: Madness Returns has been fixed by a fan
- Dark Souls 2: SOTFS Ascended Mod RPG with a new version and improved AI
- A free MMO game set in the Fallout universe gets a new version, offering exciting improvements
- The Return of Atreia is closer than ever - Aion 2 wishlists are now open