Dragon Age Inquisition: Shards in the Approach
Way to unlock: Automatically after interacting with oculara.
The quest-giver: - (M19,3)
Quest can be unlocked by interacting with any oculara in Western Approach (M19,3). Every time you will have to use an oculara to locate nearby Shards and get to them. Here are the hints for the shards (some of them are hard to get):
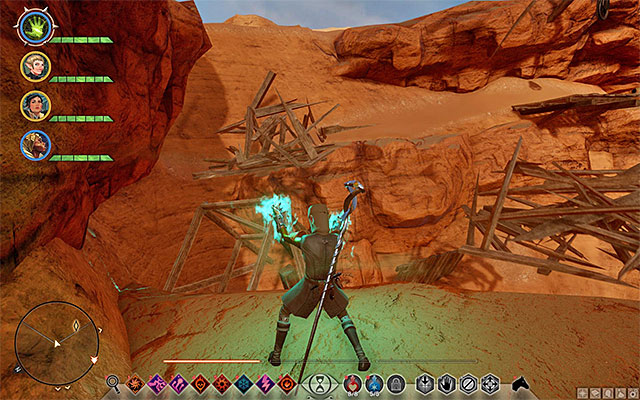
The first shard (M19,3a) is one of the hardest to locate. It lies on a ledge on heights, so you will have to find a ladder. Stand on the place shown above and use a mage to create a bridge. Now you can pass the gap to get the shard.
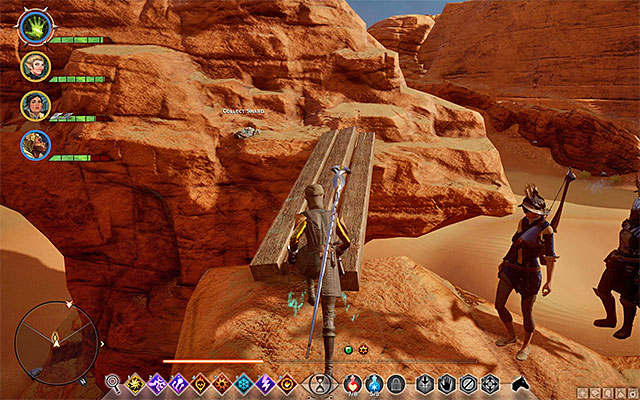
Getting the second shard (M19,3b) looks similar to the first one. Find the place where the mage can create a bridge and reach the shard.
The third shard (M19,3c) lies on the rocks. Find a ladder to get it.
The fourth shard (M19,3d) (and the two following described below) awaits you on the ledge in the Echoback Canyon in the northern part of the map. This area can be explored only after passing through Coracavus ruins while doing the side quest: "The Trouble with Darkspawn".
The fifth shard (M19,3e) lies on the distnctive hill in the canyon.
The sixth shard (M19,3f) is hidden on one of the balconies in the Echoback Fort and can be reached via a ladder.
The seventh shard (M19,3g) lies in an easy-to-get place to the North of the Griffon Wing Keep.
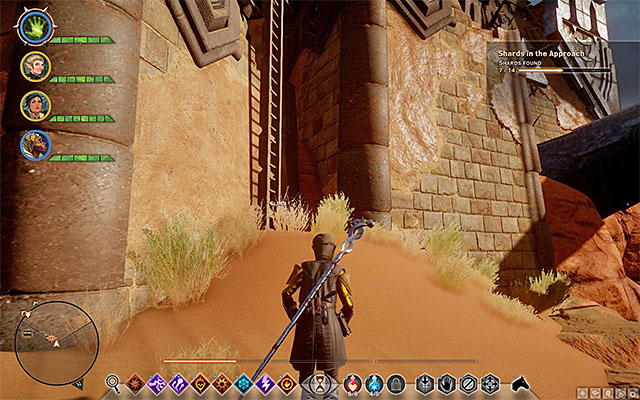
The eighth shard (M19,3h) lies on one of the balconies in the Griffon Wing Keep. A ladder leading there is shown above.
The ninth shard (M19,3i) can be found in the Southern part of the map. It lies on the rocks that you will have to climb.
The tenth shard (M19,3j) is also hidden in the Southern part of the map. It is lying on a big rock block.
The eleventh shard (M19,3k) can be found in the South-Western part of the map. You can find it near the Rift that has to be closed (climb the destroyed wall to get there).
The twelfth shard (M19,3l) can be found in the central part of the map. It lies on the rocks that you will be able to climb or jump onto.
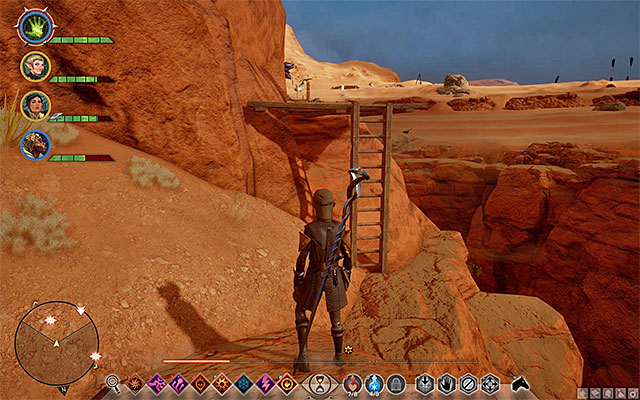
The thirteenth shard (M19,3m) is well hidden in the central part of the map. You will have to start from the North. Locate the ladder shown above and use it to reach a small wooden balcony. Go through it and climb on top of the rocks where the shard awaits you.
The fourteenth shard (M19,3n) lies in a visible place, near the Western camp.
Rewards for completing the quest:
- Experience (not much)
- 200 Influence Points

- Dragon Age: Inquisition Game Guide & Walkthrough
- Dragon Age Inquisition: Walkthrough
- Dragon Age Inquisition: Side quests - The Western Approach
- Dragon Age Inquisition: Into the Approach
- Dragon Age Inquisition: The Venatori
- Dragon Age Inquisition: Rifts in the Canyons
- Dragon Age Inquisition: Holding the Western Approach
- Dragon Age Inquisition: Code Requisition in the Approach
- Dragon Age Inquisition: Lazurite Survey in the Approach
- Dragon Age Inquisition: Fauna Requisition in the Approach
- Dragon Age Inquisition: Shards in the Approach
- Dragon Age Inquisition: Draconology
- Dragon Age Inquisition: Frederic's Livelihood
- Dragon Age Inquisition: Assault on Griffon Wing Keep
- Dragon Age Inquisition: A Tevinter Relic Hunt
- Dragon Age Inquisition: A Stranger Rift in the Ruins
- Dragon Age Inquisition: The Heart of the Still Ruins
- Dragon Age Inquisition: On the Chantry Trail
- Dragon Age Inquisition: Rifts in Sand and Dust
- Dragon Age Inquisition: Rifts in Echoback
- Dragon Age Inquisition: Rifts Off the Pass
- Dragon Age Inquisition: This Water Tastes Funny
- Dragon Age Inquisition: The Trouble with Darkspawn
- Dragon Age Inquisition: Fortress Squatters
- Dragon Age Inquisition: How to Lure a Dragon
- Dragon Age Inquisition: Hunting Patterns
- Dragon Age Inquisition: Notes on the Wastes
- Dragon Age Inquisition: Let's Slay the Beast
- Dragon Age Inquisition: A Manuscript of Some Authority
- Dragon Age Inquisition: Sharper White Claws
- Dragon Age Inquisition: The Abyssal High Dragon
- Dragon Age Inquisition: Side quests - The Western Approach
- Dragon Age Inquisition: Walkthrough
You are not permitted to copy any image, text or info from this page. This site is not associated with and/or endorsed by the developers and the publishers. All logos and images are copyrighted by their respective owners.
Copyright © 2000 - 2026 Webedia Polska SA for gamepressure.com, unofficial game guides, walkthroughs, secrets, game tips, maps & strategies for top games.