
Dark Souls 2: Things Betwixt

At the very beginning, go upstairs and collect the Human Effigy. Then, walk through the door, into another location, where you will find a soul and a torch, behind the cart. You can also start your first campfire here. Keep going ahead and, once you go past the tunnel, walk through the mist on the left. As you go deeper into the cave, you will encounter two opponents. They are relatively weak, block the first strike and attack yourself. Of course, try to lure them to you one-by-one. Several steps ahead, you should be especially careful, because there is another enemy around the corner.
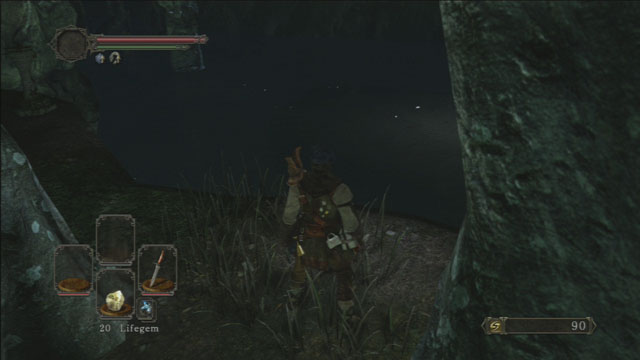
Once you exit the cave and reach the rocky ledge, go left. You will notice an enemy ahead, with its back turned at you. This is an ideal moment to strike by surprise. Approach him, very carefully, and perform an attack. At this moment, you will see a short cutscene, where your character lands several lethal blows. Go a bit ahead and collect the item at the end of the ledge. Then, go deeper into the cave, where you will encounter further enemies. One of them is an archer. First of all, deal with the first bandit and try to remain in constant movement, to avoid taking damage from arrows. An ideal way to deal with the archer is to run up to him, while strafing to the sides, every now and then. Once you are close to the enemy, he will try to produce his sword so, seize the opportunity and attack. As you follow the caves, you will encounter more enemies, who you need to deal with. After the fight, you can collect the item in the corner on the left side of the grotto.
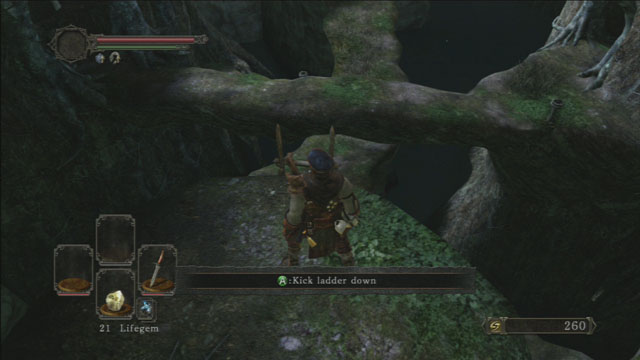
Once you are on another rocky ledge, the first thing that you should do is kick the ladder. This way, you will unlock a shortcut that you will be able to use later into the game. Also, note the nest on the left of the entrance. If you already have the Small Smooth & Silky Stone, you can leave it in this nest.The item which you have left on the ground will be replaced by other random item or weapon. On the right, there is another ledge that you can jump down onto and collect the item. Then, jump down and walk through the mist. This way, you will reach another cave, where you will encounter two enemies that you have already fought. After you defeat them, leave through the other exit and climb up the ladder on the right wall. At the other side of the wall, there are two enemies, below. You can defeat the first one of them, practically, with one blow, jump off the ledge and, when you are still in mid-air, attack, which will prove lethal to the opponent below. Defeat the other opponent and, before you leave, open the door on the right. Inside, you will find a Cracked Red Eye Orb. Then, walk through another mist.
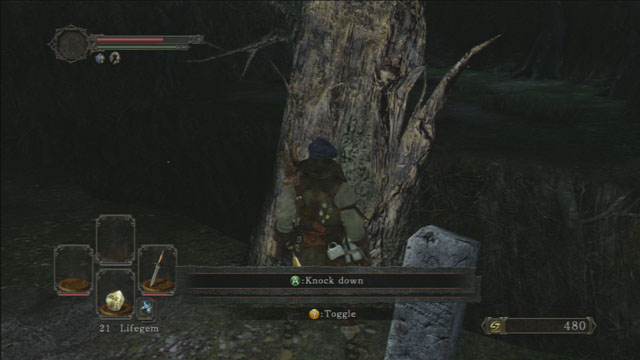
Keep going ahead and, after you reach a stone bridge, jump off it and walk through another mist. At this point, be especially careful, because the cave is quite dark and there is a chasm in front of you. Avoid the arrows of the archer at the other side, approach the tree and tip it over to create a bridge for yourself. Run over the fallen tree and defeat the enemy. In front of you, there is a hole in the ground, which you can jump into. While still in mid-air, perform an attack to kill the enemy below. Immediately, run up to the ladder and climb, because there is another archer here. After you defeat the enemy, walk through the mist

Once you leave, a bandit will approach from the left. After you kill him, do not attack the big beasts at the lake; right now they are too strong for you to handle them and fighting them may be fraught with consequences. Follow the road that the previous opponent approached from. At the end of the ledge, there is another tree that you need to kick to create a footbridge for yourself, over the chasm. Then, turn left and keep running ahead.

Enter the narrow passage and keep going ahead. This way, you will reach the central location, named Majula.

- Dark Souls II Game Guide & Walkthrough
- Dark Souls 2: Full walkthrough
- Dark Souls 2: Walkthrough
- Dark Souls 2: Things Betwixt
- Dark Souls 2: Majula
- Dark Souls 2: Forest Of The Fallen Giants (1)
- Dark Souls 2: Forest Of The Fallen Giants (2)
- Dark Souls 2: Forest Of The Fallen Giants - Let's move on
- Dark Souls 2: Heide's Tower Of Flame
- Dark Souls 2: Heide's Tower Of Flame - The Underground
- Dark Souls 2: No Man's Wharf
- Dark Souls 2: The Lost Bastille
- Dark Souls 2: The Lost Bastille - Interior
- Dark Souls 2: Belfry Luna
- Dark Souls 2: The Lost Bastille - let's continue
- Dark Souls 2: Sinner's Rise
- Dark Souls 2: Huntsman's Copse - the way to Undead Purgatory
- Dark Souls 2: Huntsman's Copse - the way through the mountains
- Dark Souls 2: Harvest Valley
- Dark Souls 2: Earthen Peak
- Dark Souls 2: Iron Keep - journey through the fortress
- Dark Souls 2: Iron Keep - the road to the King
- Dark Souls 2: Grave Of Saints
- Dark Souls 2: The Gutter
- Dark Souls 2: Black Gulch
- Dark Souls 2: Shaded Woods
- Dark Souls 2: Shaded Ruins
- Dark Souls 2: Doors Of Pharros
- Dark Souls 2: Brightstone Cove Of Tseldora - campsite
- Dark Souls 2: Brightstone Cove Of Tseldora - Queen's Lair
- Dark Souls 2: Shrine Of Winter
- Dark Souls 2: Drangleic Castle - courtyard
- Dark Souls 2: Drangleic Castle - interiors
- Dark Souls 2: Shrine Of Amana
- Dark Souls 2: Undead Crypt
- Dark Souls 2: Aldia's Keep
- Dark Souls 2: Dragon Aerie
- Dark Souls 2: Dragon Shrine
- Dark Souls 2: Dream Of Giants / Throne Of Want
- Dark Souls 2: Walkthrough
- Dark Souls 2: Full walkthrough
You are not permitted to copy any image, text or info from this page. This site is not associated with and/or endorsed by the developers and the publishers. All logos and images are copyrighted by their respective owners.
Copyright © 2000 - 2026 Webedia Polska SA for gamepressure.com, unofficial game guides, walkthroughs, secrets, game tips, maps & strategies for top games.