
StarCraft Remastered: Mission 10 - Eye of the Storm
Last update:
Mission objectives:
- Destroy Overmind
- Tassadar, Zeratul and Raynor must survive
Overmind is isolated from most of his army, and there's no one to defend him. The Conclave decides to support you, offering the help of Aldaris himself. The Terrans, under Raynor's command, also unexpectedly enter the fray. They will help you defeat the Overmind.
This is one long and tough mission. The enemy has five bases. The central one is a densely populated base of the Overlord. Four red bases surround it, two of which (south-west and north-east) are poorly defended mining operations. The enemy will establish no further bases; by they will try to rebuild all the structures they lose. You either have to attack a couple of red bases at the same time, or do them one by one, each time reinforcing the base you just conquered.
Strong defenses are the most important factor here.
You command two bases: the Protoss (1) at the bottom and Terran's at the top (2). Resources are shared, but population limits are separate. You can create 400 Supplies/Psi (regular limit times two). You can use all units and buildings of both of these races. Around the Zerg "nests" are many places with more resources. The most interesting place is the one with four has deposits in the top-right corner. At the beginning, don't build too big bases because the enemy will often strike the weakest points. The Terrans are very vulnerable to Defelier attacks - especially those buildings that burn if not repaired.
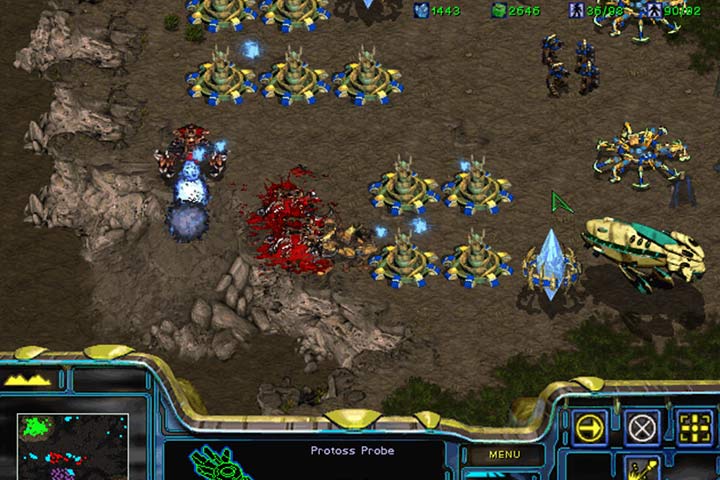
The first 30 minutes should be spent on digging in and getting as much resources as possible. The red Zerg will attack you most often, with everything he's got. Most often, it will be a land attack: Mutalisks and Guardians or a Zerg Queen or Defiler. First, destroy both mining operations (3), which have minimal defenses. You can reach all places without transporters. Remember that the enemy will dispatch Drones to rebuild the lost Hatcheries. Leave small units there. Then get ready to destroy the main production hubs of the Zerg (4). These are strong bases defended by many units. You can use the following strategies:
- Golaith and Siege Tank (Terrans). Unlock artillery mode for tanks and set your units up close to the cliffs (5). Keep the mechs near them in case the Zerglings or some aircrafts attack. Slowly start crushing everything that stands in your way.
- Wraith and Battlecrusier or Scout and Carrier. Both races have powerful air force. Fighters make sure you have air superiority and heavier units may demolish buildings and ground units. A Battlecrusier may be a better solution since it has the Yamato cannon. Using that allows to destroy AA towers from afar.
- Dragoon, Reaver i Archon (Protoss). Such group crushes most land units. Keep the Reavers at the front, to let them destroy enemies from a distance (6). Only the Dragoons can really handle the Mutalisks or Guardians, but you can also use one or two Templars, who will use Psionic Storm on groups of enemies.
- Zelots and Scout/Wraith. Make a few Protoss teams and overrun the enemy with a swarm of Zelots. Fighters should take care of enemy aircraft. You can produce Wraiths instead of Scouts. This will let you save up on population.
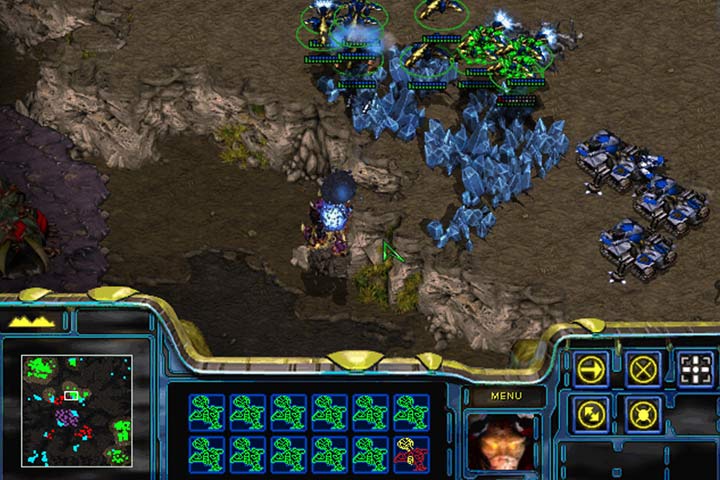
- Ghost (Terrans) along with a support group (7). You can destroy everything on your way with nukes. Build a couple Command Centers with silos and make sure there's enough rockets. Also make sure your soldiers can cloak. Have a team of Marines or Goliaths ready in case your soldiers become exposed.
Regardless of the strategy you opt for, you have to destroy the red Zerg first. Otherwise, your soldiers and bases will be constantly under attack. When the red Zerg army falls, the inner base will become active. From now on, the purple Zerg will send its units to fight. Focus on destroying enemy Hives (8). There are 4 of these, located around the Overmind. When you decide the defenses are sufficiently weakened, it's time for an attack (9). Any soldier can kill it; it doesn't have to be Zeratul. After killing Overmind, the mission will be finished with success.

- StarCraft: Remastered Game Guide
- StarCraft Remastered: Game Guide
- StarCraft Remastered: Campaign Walkthrough
- StarCraft Remastered: Protoss
- StarCraft Remastered: Mission 1 - First Strike
- StarCraft Remastered: Mission 2 - Into the Flames
- StarCraft Remastered: Mission 3 - Higher Ground
- StarCraft Remastered: Mission 4 - The Hunt for Tassadar
- StarCraft Remastered: Mission 5 - Choosing Sides
- StarCraft Remastered: Mission 6 - Into the Darkness
- StarCraft Remastered: Mission 7 - Homeland
- StarCraft Remastered: Mission 8 - The Trial of Tassadar
- StarCraft Remastered: Mission 9 - Shadow Hunters
- StarCraft Remastered: Mission 10 - Eye of the Storm
- StarCraft Remastered: Protoss
- StarCraft Remastered: Campaign Walkthrough
- StarCraft Remastered: Game Guide
You are not permitted to copy any image, text or info from this page. This site is not associated with and/or endorsed by the developers and the publishers. All logos and images are copyrighted by their respective owners.
Copyright © 2000 - 2026 Webedia Polska SA for gamepressure.com, unofficial game guides, walkthroughs, secrets, game tips, maps & strategies for top games.