
StarCraft Remastered: Mission 5 - Revolution
Last update:
Mission objectives:
- Bring Kerrigan to the Antigan command center;
- Defend Antigan rebels;
- Raynor and Kerrigan must survive;
- New objective: Destroy the Confederate forces.
The inhabitants of Antiga want to join the newly formed rebel movement. The Confederates are aware of this, however, and they sent their troops to prevent an uprising. Raynor and Kerrigan are dispatched to the planet on a mission to liberate its inhabitants and support them in combat. The mission is divided into two stages. The first one involves leading a group of soldiers a beacon in the rebel base (purple) in the top right corner. The second requires us to assume command of the base and destroy the Confederate forces.
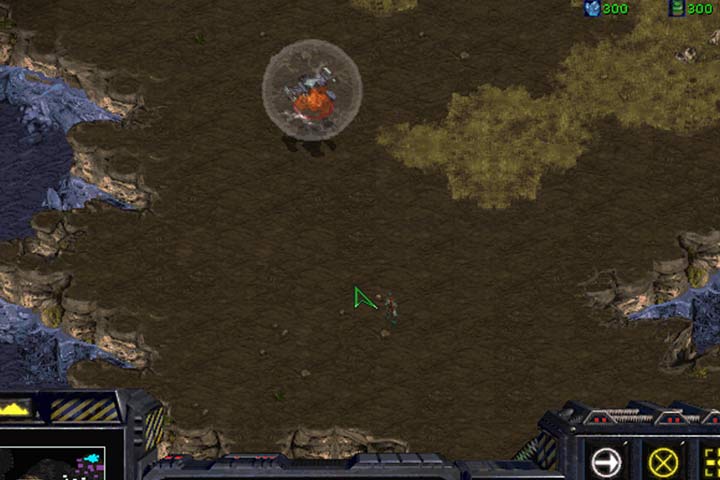
You start in the top left corner. Send the Marines and Raynor down the map until you meet Kerrigan, a Ghost spec ops troop. Ghosts are snipers that attack at a large distance and can use Personal Cloaking to become invisible to the enemy. In this form, they use up Energy (purple bar beneath the hit points) and attack without endangering themselves. However, units and buildings that have the Detector ability can spot Ghosts. The game will explain this further when you see 3 enemy turrets. Having destroyed them, you'll encounter a lone Vulture and a new kind of enemy: a Wraith fighter. Use the second ability of Kerrigan, Lockdown, on it. In this way, you'll immobilize the enemy and prevent it from attacking. Use this moment to eliminate it.
The Confederates set up their own bunker line at the rebel base. You can take Kerrigan to the headquarters in to two ways. The first: by slowly destroying the Bunkers one by one. Raynor should begin every attack because he has the most hit points. The second option is to destroy the Turret and the first Bunker, then you activate Kerrigan's Cloak and simply walk through the enemy line until you reach the beacon. After a short cut scene, the rebels join you and start to fire. Lead Raynor's squad at the same time and clear the place out.

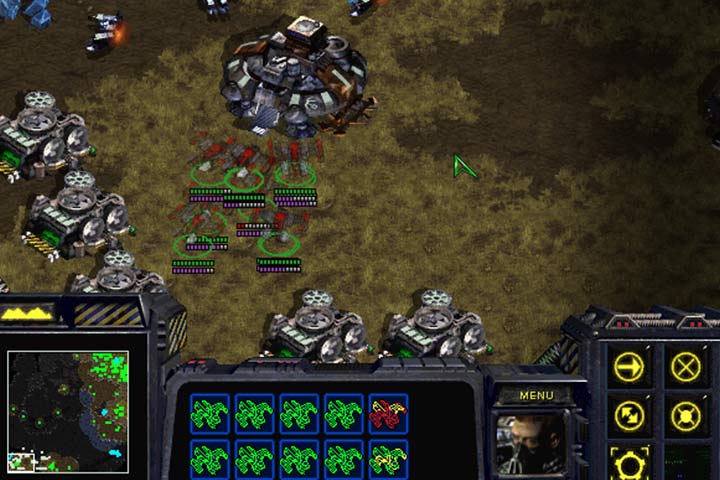
Use all minerals to create workers and start mass crystal mining. Have at least one or two Marines in every Bunker. You will only fight the terrans so don't produce Firebats. Apart from infantry, you can also create an air force - you gain access to two new units: you've already seen the Wraith fighter. It has a laser for land units and powerful antiaircraft rockets. What's important, having developed an adequate technology, it can become invisible like Kerrigan and Ghosts. The second vessel is a simple transporter that can accommodate up to 8 footmen or 4 Vultures or Firebats.
Deploy infantry to the Bunkers at the bottom of the base and in its middle part. Build extra Turrets in the entire area but don't build them below the hills. The Confederates will send troops every then and again. Usually, they drop them in the southern parts or at the destroyed defensive line (below your Command Center). If you begin to expand your base in these regions, they'll change the landing zone. Your base is located in a good spot so it's a good idea to simply fortify it. You have enough resources available. You can also build several Vultures. Then, develop the Spider Mine technology and deploy them near the landing zone.
The enemy has two bases. The lesser one, which is the starting point of enemy landings, is located in the bottom right corner of the map. It is focused on extracting raw materials and is guarded by fighters and land forces. The main base can be found in the bottom left corner of the map and is defended by a line of antiaircraft Turrets. There, you can also find all production buildings of the enemy. You will need a large group of land forces to eliminate it. To do it painlessly, you need to do a couple of things.
Having fortified your position and expanded your economic infrastructure, you can begin raising an assault squad. Build an extra Starport with an extension, one or two Barracks, and an extension to the Command Center. The last listed item lets you scan any point on the map. Not only will this remove the fog of war for a few seconds, but also detect cloaked or burrowed units. In this mission, hostile Wraiths won't use their Cloak ability but the enemy has a number of mines placed on their island. The assault squad should consists of 24 Marines, 3 Dropships, and 12 Wraiths.
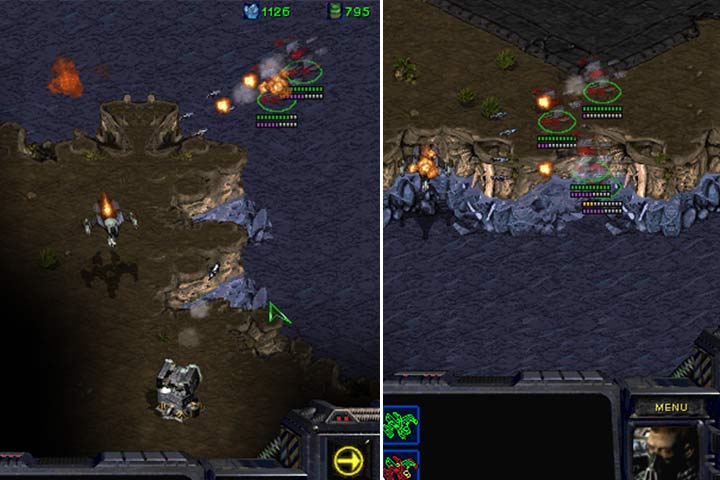
Having unlocked the Cloak ability, send your fighters to destroy enemy air force. Try to stay at a distance from the bank because Turrets are armed with rapid-firing guns. Start from the right corner of the map and activate invisibility. Fly up to the enemy fighters as closely as possible and attack them. A single shot from the entire squad will immediately destroy a hostile fighter/transporter. Once you've destroyed the majority of enemy fighters, go to the lesser enemy base in the right side of the map. Now, start attacking the Goliaths and, at the same time, bring your transporters with infantry. Deploy your footmen at the enemy Refinery and start clearing out this part of the map. Watch out for mines! Scan the area around the enemy Command Center and destroy mines with your air force. Send back your transporters for reinforcements, if needed.
The time has come to attack the main base of the enemy. Concentrate your air force and Marines in the bottom corner of the map and go left. Order the infantry to destroy the enemy turret and repel hostile units with your footmen. At the same time, activate your Wraiths' invisibility and fly to the bottom left corner of the map. The fighters have to destroy the Command Center and then everything inside the base. The infantry should focus on destroying production buildings - first Startport, then Factory, and lastly Barracks. Now, eliminate the remainder of enemy structures, turrets, and units. Once done, the mission is over.

- StarCraft: Remastered Game Guide
- StarCraft Remastered: Game Guide
- StarCraft Remastered: Campaign Walkthrough
- StarCraft Remastered: Terrans
- StarCraft Remastered: Mission 1 - Wasteland
- StarCraft Remastered: Mission 2 - Backwater Station
- StarCraft Remastered: Mission 3 - Desperate Alliance
- StarCraft Remastered: Mission 4 - The Jacobs Installation
- StarCraft Remastered: Mission 5 - Revolution
- StarCraft Remastered: Mission 6 - Norad II
- StarCraft Remastered: Mission 7 - The Trump Card
- StarCraft Remastered: Mission 8 - The Big Push
- StarCraft Remastered: Mission 9 - New Gettysburg
- StarCraft Remastered: Mission 10 - The Hammer Falls
- StarCraft Remastered: Terrans
- StarCraft Remastered: Campaign Walkthrough
- StarCraft Remastered: Game Guide
You are not permitted to copy any image, text or info from this page. This site is not associated with and/or endorsed by the developers and the publishers. All logos and images are copyrighted by their respective owners.
Copyright © 2000 - 2026 Webedia Polska SA for gamepressure.com, unofficial game guides, walkthroughs, secrets, game tips, maps & strategies for top games.