Deathloop: Afternoon Delight - walkthrough
This page of the Deathloop guide contains a walkthrough of the Afternoon Delight mission. It's a visionary's track related to the murder of Charlie and Fia in one action.
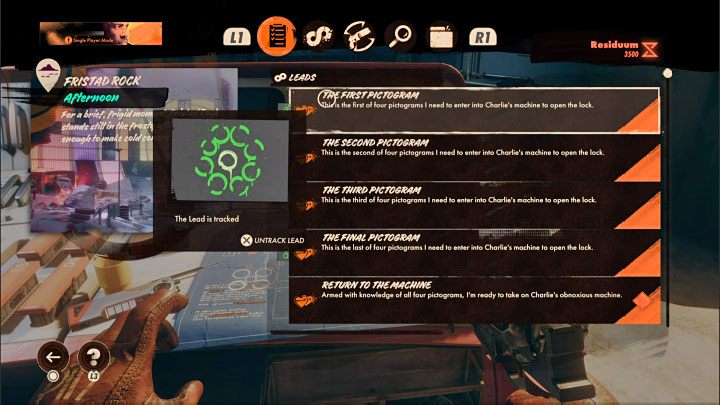
On this page of our Deathloop guide you'll find the walkthrough of the Afternoon Delight Visionary Lead / mission. The walkthrough will inform you how to sneak through Fia's fortress and kill the Visionary, how does the pictogram puzzle work, how to solve the data cassette puzzle, where to find Charlie and Fia inside the hideout, and what your main options for killing both Visionaries are.
- Unlocking the mission
- Search Fia's Fortress
- Find the pictograms
- Return to the machine
- Scout the hideaway
- Charlie Montague and Fia Zborowska - murder possibilities
Unlocking the mission
This task is a continuation of the Space Invader mission, described on a separate page of the guide. You'll receive it immediately after completing the aforementioned lead.
During the previous investigation you've learned Charlie and Fia are lovers. This lead revolves around finding the way for Colt to sneak into the underground complex where the two lovers meet up. This will allow you to kill both Visionaries at once.
Search Fia's Fortress

After you reach the sewers, you have to plan a journey to the Fristad Rock district. Choose midday as your time of day, as it's the only time the fortress is open.
Fia's Fortress is a large, spacious bunker - we've shown the area surrounding the entrance on the picture. There's a turret in front of the bunker. You can hack it to distract enemies and make it help Colt eliminate them.

The main rule you need to follow is not to cause any alarms. Otherwise, Fia might purposely overload the unstable bunker reactor and destroy the entire island. That will prematurely end the current Loop. The information on neutralizing the reactor can be found on a separate page: The Reactor - how to turn it off?. If you don't want to take any risks, we recommend returning to the main menu and reloading the game if you cause an alarm. That way, you'll restart at the moment of entering the Fristad Rock (in the same Loop), allowing you to resume infiltration.
Here are some more tips on how to sneak into the bunker:
- Before heading to Fia's hideout, try to obtain a silenced or a nail-shooting weapon. That will allow you to eliminate enemies easily without raising the alarm.
- Focus on eliminating Fia to prevent her from sabotaging the reactor, and kill regular enemies only after her death.
- It's a good idea to eliminate the Visionary Egor beforehand, obtaining his Aether Slab. Having this power, you can avoid detection more easily. Shift (the power of teleportation) will also be very useful, and you should already have it thanks to eliminating Charlie for the first time.

After entering the bunker select the left passageway, prepared to use the Hackamajig to neutralise a sensor (a camera).

You'll get to the locker room. There should be two enemies there, and you can eliminate them via stealth. You can also sneak past them, getting closer to the bunker's main area.

Inside the reactor area, you're at the highest detection risk, as you can be easily spotted by one of the two enemies in the upper control room. Wait for the right moment to sneak into this room by using the Shift and the Aether power. Quietly eliminate the enemies inside.
There's a damaged glass wall in the first control room. Go through it to get closer to Fia's personal quarters, then turn right.

Once again, sneak through the subsequent rooms. Finally, you'll reach the room Fia's in. Kill the Visionary with a sneak attack - you need to wait for a good moment to approach her from behind.
After you get rid of Fia, it's recommended to take out all enemies remaining in the bunker, allowing you to search for the pictograms peacefully. It's still worth it to use stealth and quietly eliminate single enemies. It's not as crucial anymore, however.
Find the pictograms
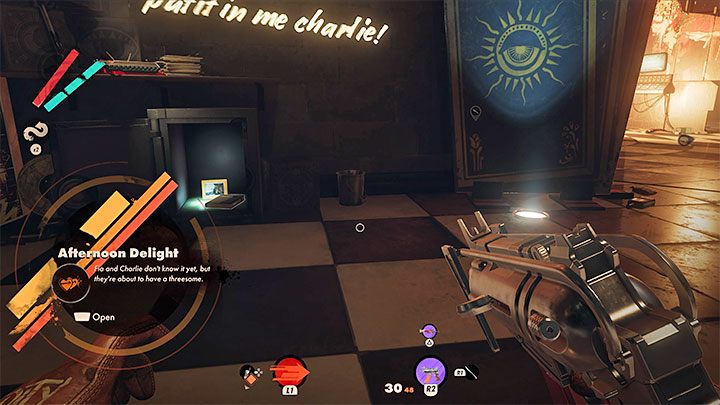
The four pictograms are unfortunately randomly selected by the game from a pictogram pool , so we unfortunately can't provide more detailed instructions on how to find them. Their one common characteristic is that they're all located inside the bunker, so you must explore it until you manage to locate all pictograms. Interact with them - you'll either receive a message about the wrong pictogram, or you'll succeed, with the pictogram getting added to your journal (it'll come in handy later).
Note - the pictograms can be found and examined in any order. You can also do so without eliminating Fia, but then you're risking her overloading the reactor, preventing you from finding all the pictograms without having to restart the Loop and infiltrate the bunker again.
Here are some of the more problematic pictograms you may be forced to find:
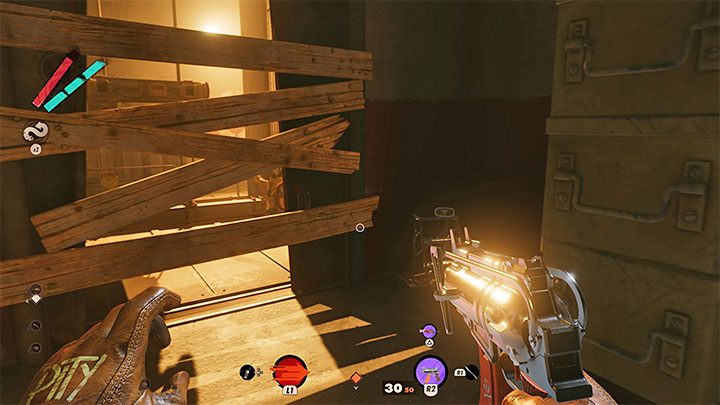
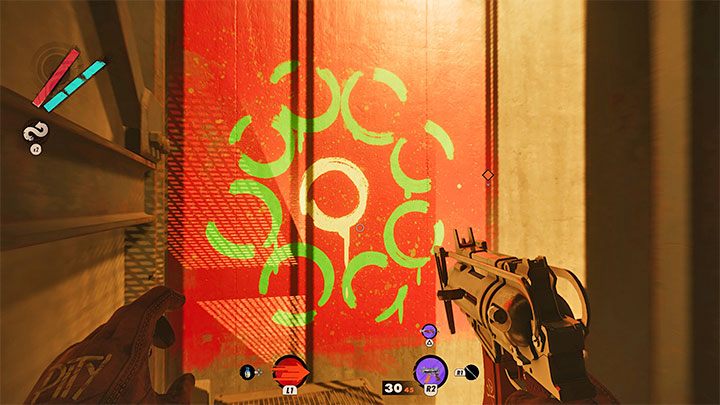
If the pictogram's description refers to a shaft, you'll need to head to the other side of the bunker, opposite from the reactor room. There you'll find the entrance to the elevator shaft, blocked with planks, as shown on picture 1. Destroy the planks with a kick or a firearm.
After entering the elevator shaft, use the Shift power to reach the higher ledge. Turn to the wall, on which you'll see the pictogram.
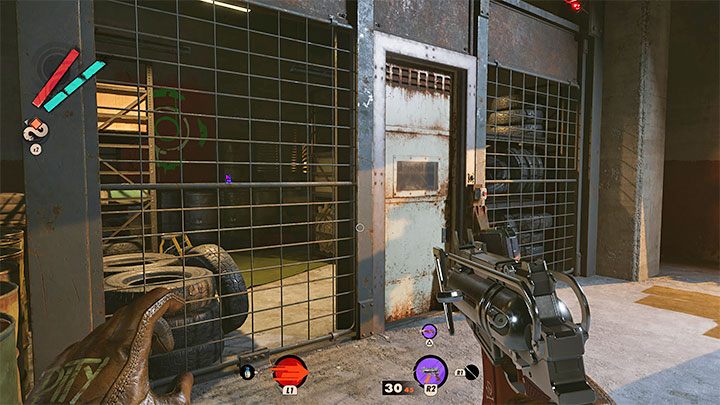
If the pictogram description mentions something about needing power, you'll need to look for the closed room on picture 1 that neighbors the elevator shaft.
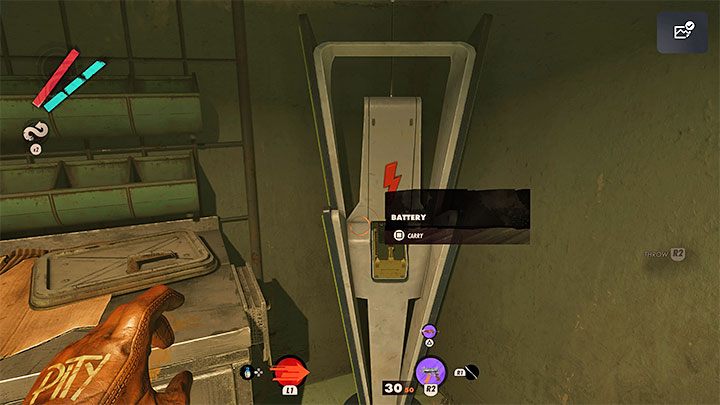
You can reach the closed room in several ways, the most obvious of which involves using a battery. Look into the room on the opposite side of the tunnel. You'll find used batteries and a charging station (Picture 2). Take a charged battery to the gate, insert it in the slot and open the way forward.
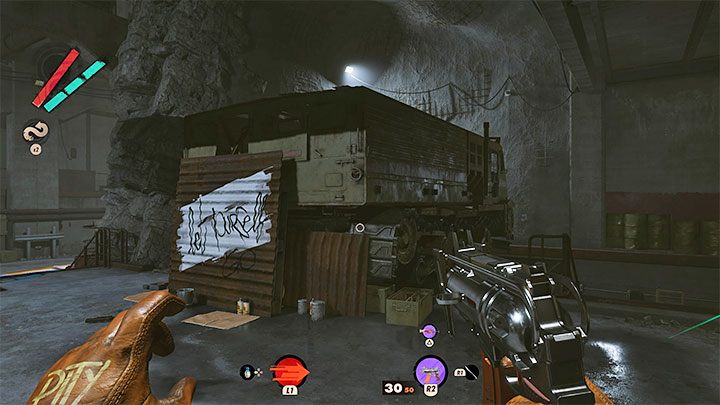

If the pictogram description mentions a behemoth on wheels, you should take interest in the vehicle on tracks shown on picture 1. It's parked to the left of the aforementioned closed room.
You have to crawl under the vehicle and examine its undercarriage, where you'll find the pictogram (picture 2).
Return to the machine
After finding and adding the four randomly chosen pictograms to your journal you need to leave the bunker and return to the tunnels. As your destination, once again choose the Fristad Rock district. Go there afternoon. Once again, make a trip to the bunker with a large machine on the coast.
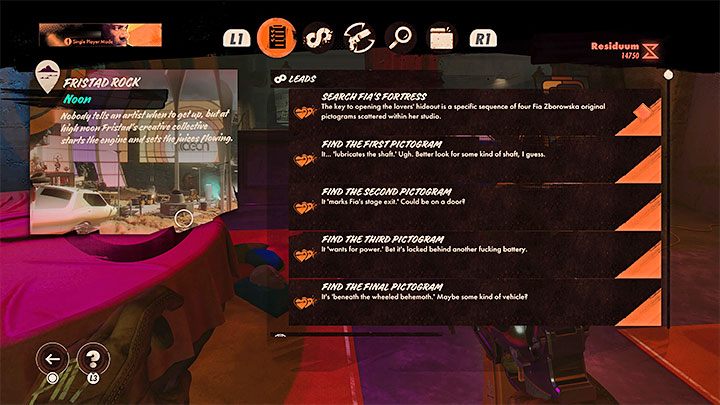
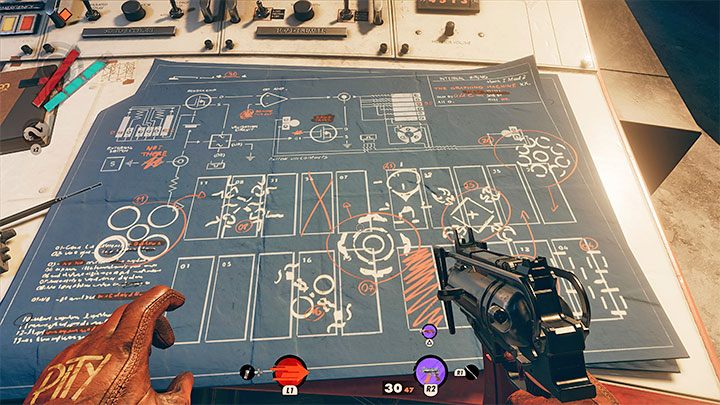
This time you can solve the puzzle with the data cassetes. To finish the puzzle, you have to check the pictogram symbols in the journal (starting from pictogram 1, ending with pictogram 4), find them on the blueprint, and then read to which cassette's number the symbol refers.
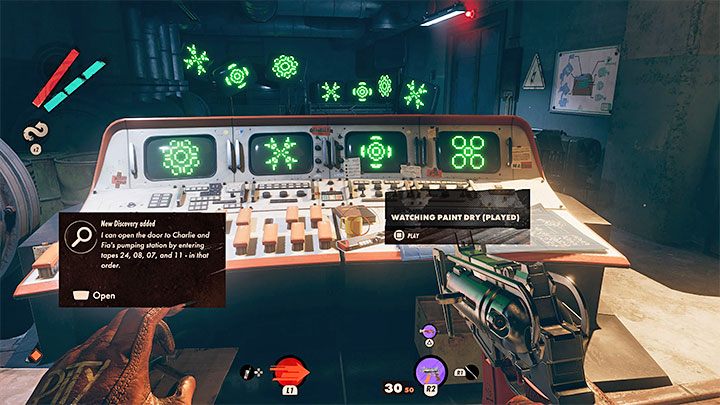
The game should add the reward for solving the puzzle to your inventory once you solve it for the first time. Thanks to this you won't need to repeat the entire puzzle in subsequent loops, but you'll be able to immediately interact with the correct tapes based on your journal entry.
Scout the hideaway
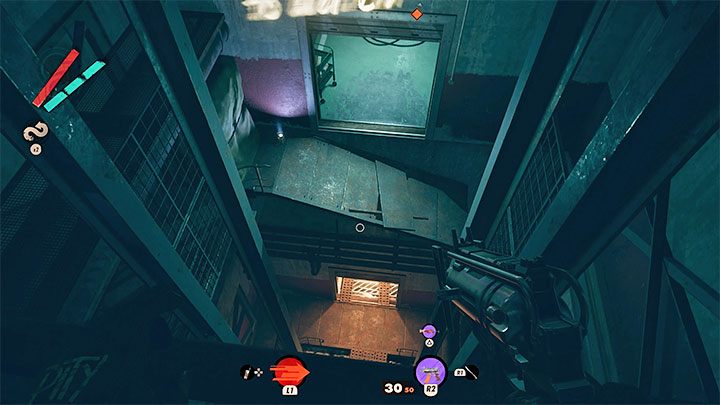
Finishing the puzzle will unlock the door to the right, letting you examine the new area of the bunker. You'll enter a large, not functional elevator shaft. Carefully jump down the ledges and reach the bottom of the shaft. Use the passageway there.

You'll reach a huge hangar, where you can see Charlie and Fia arguing in the distance. At this point, the mission will end, but it's worth it to use the opportunity to eliminate two Visionaries in a single attack. Continue reading our walkthrough.
Charlie Montague and Fia Zborowska - murder possibilities

We don't advise immediately attacking the Visionaries - instead, you should focus on climbing quietly. Use the Shift power to make the climb easier, and watch out for laser traps (they're easy to avoid with Shift). Head upwards until you reach the ledge above Charlie and Fia.
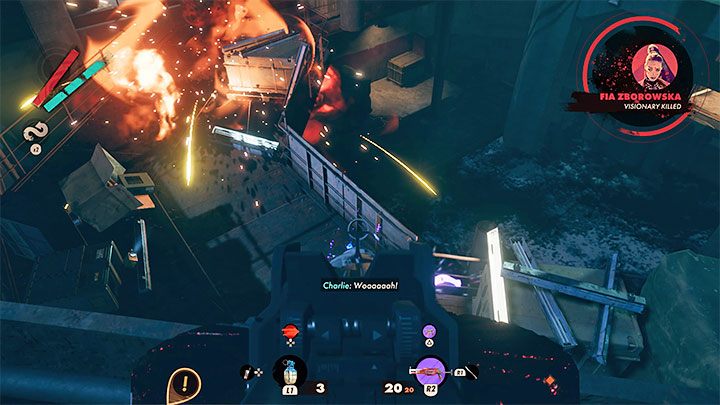
If you don't mind aggressive solutions, you can attack the Visionaries from the higher ledge, getting into direct combat. It's a good idea to start by throwing a grenade while having a shotgun ready along with good offensive/defensive powers.
You can also wait until they stop arguing and begin to sneak around, looking for an opportunity to get behind them and take them out quietly.
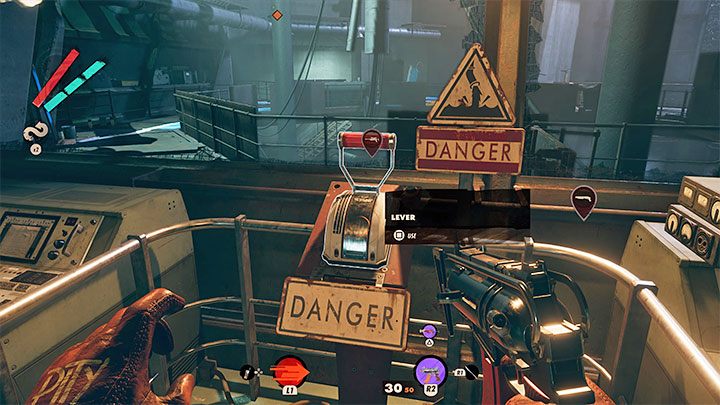
The most interesting option is dispatching the Visionaries by flooding the bunker. To do it, you need to reach a distant control room with the lever shown in the picture.
After pulling the lever, you will have a limited amount of time to escape - the level of water will gradually rise.

You can sprint to the exit or use Shift on the high ledges after leaving the room.
You need to reach the second control room, one neighboring the room you pulled the lever in. Once you reach the place shown in the picture, use the Hackamajig on the antenna over the closed passageway. This will unlock it.
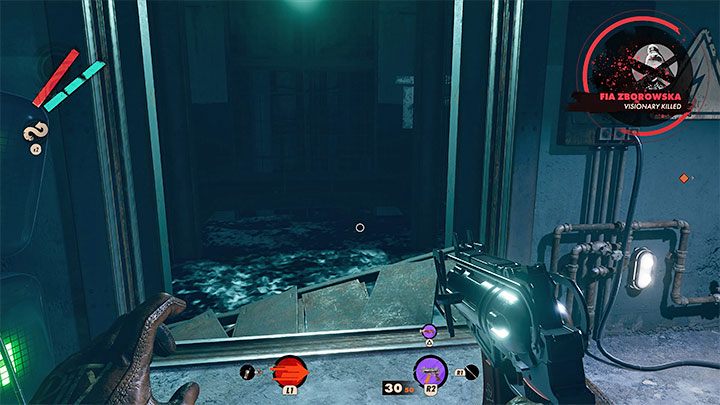
Continue your escape by getting to the shaft. Once again, use Shift to teleport onto higher ledges and reach the top of the shaft again (where you've solved the cassette puzzle). The entire lower section of the bunker will be flooded, drowning Charlie and Fia.

- Deathloop Guide
- Deathloop: Game Guide
- Deathloop: Walkthrough
- Deathloop: Visionary Leads
- Deathloop: Space Invader - walkthrough
- Deathloop: Afternoon Delight - walkthrough
- Deathloop: Devouring of the Lambs - walkthrough
- Deathloop: Chaos Theory - walkthrough
- Deathloop: Lost in Transmission - walkthrough
- Deathloop: Radio Silence - walkthrough
- Deathloop: Ballad of Ramblin' Frank - walkthrough
- Deathloop: What Wenijes Want - walkthrough
- Deathloop: Visionary Leads
- Deathloop: Walkthrough
- Deathloop: Game Guide
You are not permitted to copy any image, text or info from this page. This site is not associated with and/or endorsed by the developers and the publishers. All logos and images are copyrighted by their respective owners.
Copyright © 2000 - 2026 Webedia Polska SA for gamepressure.com, unofficial game guides, walkthroughs, secrets, game tips, maps & strategies for top games.