Stage 10 (Flies and Spiders): The Dark Forest
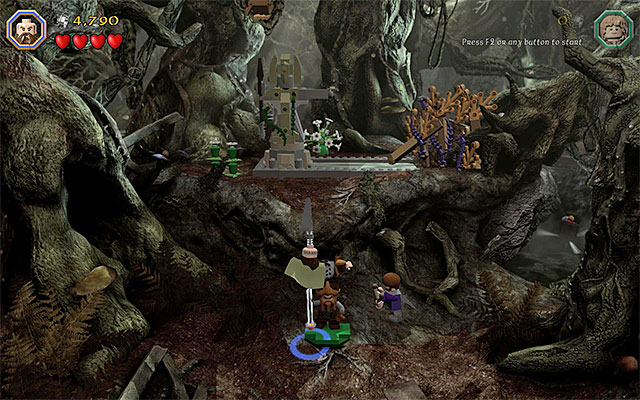
Start exploring the forest by destroying the objects around the starting point. At the same time, avoid contact with the swamps, because this way, your character may drown, which means losing some of the valuable studs. Destroy the bush on the right and hold down the building key/button. You can now stand, as Nori and Bifur, in the highlighted spot. Switch to the latter and climb onto the former. Finally, switch to Dwalin and start climbing over the two allies.
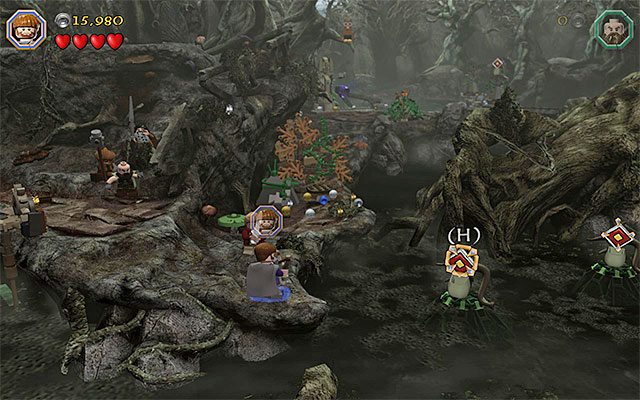
As Dwalin, leap towards the ledge, approach the big block from the left side and hit it with Dwalin's Warhammer to move it to the right and smash it. You can now proceed to the right. Follow the linear path and stop only after you approach the swamps. Switch to Ori here and use Ori's Slingshot to hit the target shown in the above screenshot. Jump over to the float and use the slingshot again. Jump over to the next float and onto the other side.
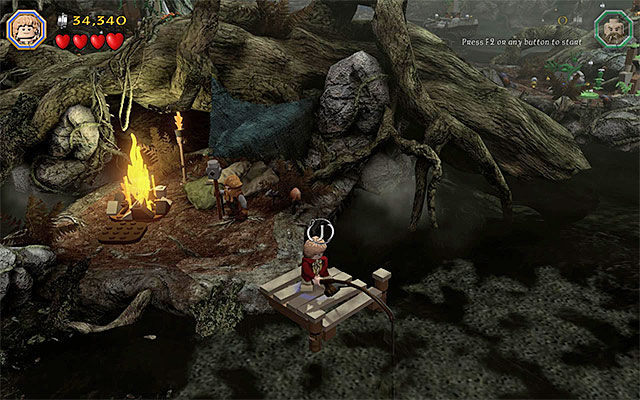
Switch to Bilbo and destroy the new objects around. You should, especially, turn your attention to the small pier, where there is a skeleton. Disposing of the skeleton will allow you to start a fishing minigame. Select the Fishing Rod from Bilbo's inventory and start the minigame. remember always to tap the key at the last possible moment, thanks to which you will obtain additional studs.
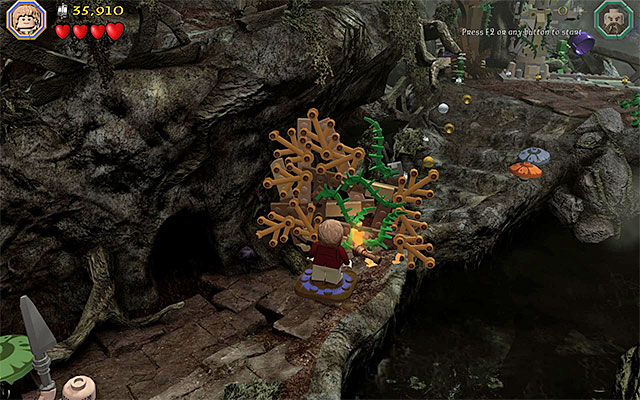
Regardless of how well you did at the minigame, a torch will fall to the ground. Pick it up and approach the flames to set it on fire. Carefully, jump over the two floats and return to the other side of the swamp. You need to go towards the background here, i.e. towards the barricade that you have ignored earlier. Use the torch to set it on fire, which will clear the path for you.
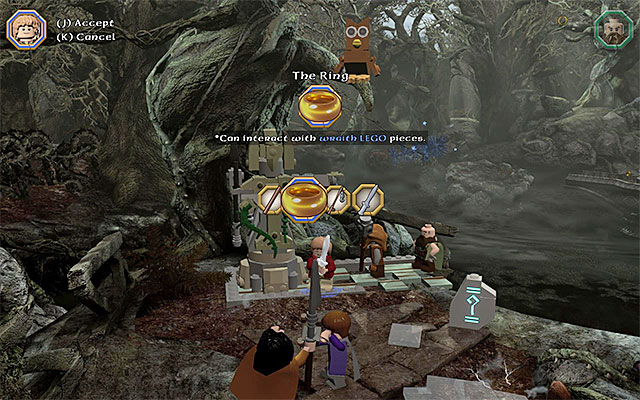
After you approach a larger glade, switch to Bilbo. You need to put on the Ring, which you can find in the Hobbit's inventory. You can do that by selecting this item from Bilbo's inventory (the above screenshot) or by standing next to the hint sign and pressing the key/button displayed on the screen.
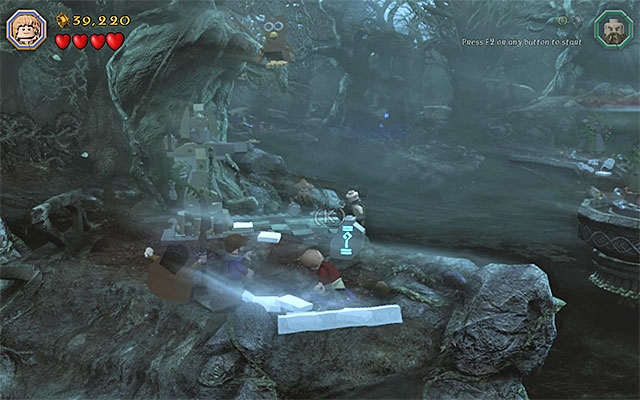
After you put on the ring, approach the hopping objects on the ground and hold down the appropriate key/button to complete the construction here. You can now switch to Dwalin. Approach the newly-built object and push it down to the water, by hitting it with Dwalin's Warhammer.
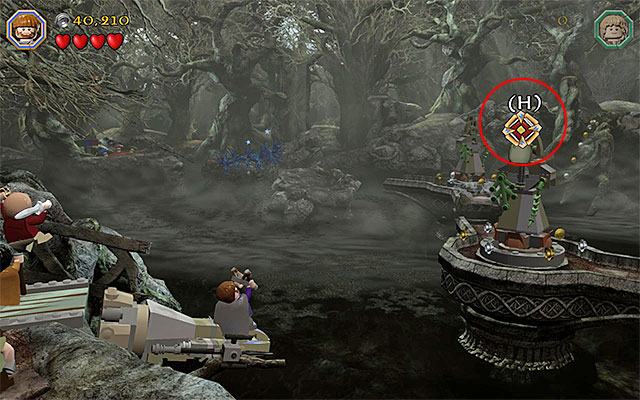
Switch to Ori and select Ori's Slingshot again. You need to stand on the block that has just been tipped over, i.e. right next to the swamp. Aim the slingshot at the target shown in the above screenshot. Hitting the target results in rotating the entire structure. Jump towards the platform (be accurate here to prevent falling into water!). Wait for until Dori is joined by the rest of the characters and hit the same target again, so that the platform returns to its initial position.
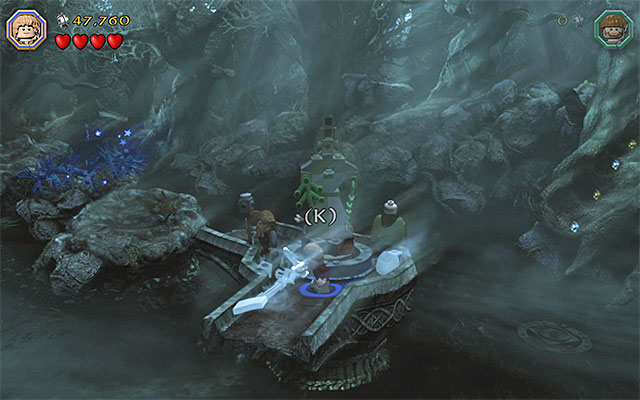
Switch to Bilbo and jump towards the neighboring platform. You need to put on The Ring again, because only then are the elements on the ground available. Build another target off them, switch to Ori and hit the target with a pebble shot from the slingshot. wait for the platform to rotate again and take the last jump towards the circular platform/ After a while, your party will join the rest of the allies and the next part of this stage will start.
- LEGO The Hobbit Game Guide & Walkthrough
- LEGO The Hobbit: Walkthrough, Collectibles, Maps
- LEGO The Hobbit: Walkthrough
- Stage 1 (Greatest Kingdom in Middle-Earth): Inside the Lonely Mountain
- Stage 1 (Greatest Kingdom in Middle-Earth): Smaug's attack
- Middle-Earth: Reach the cottage of Bilbo Baggins
- Stage 2 (An Unexpected Party): The Party
- Middle-Earth: The journey to Bree
- Stage 3 (Azog the Defiler): The Camp
- Stage 3 (Azog the Defiler): The battle with the Orcs
- Stage 3 (Azog the Defiler): The battle with Azog the Defiler
- Middle-Earth: Reach Troll Dwellings
- Stage 4 (Roast Mutton): Free the horses
- Stage 4 (Roast Mutton): The battle with the Trolls
- Stage 4 (Roast Mutton): Rescue the allies
- Middle-Earth: Reach the troll cave
- Stage 5 (The Troll Hoard): Explore the cave
- Stage 5 (The Troll Hoard): Save the rabbits of Rhosgobel
- Stage 5 (The Troll Hoard): The orc encounter
- Middle-Earth: Meet Elrond in Rivendell
- Stage 6 (Over Hill and Under Hill): The way through the pass
- Stage 6 (Over Hill and Under Hill): Climb the stone giant
- Middle-Earth: Reach shelter
- Stage 7 (Goblin-town): Cooperation with a goblin
- Stage 7 (Goblin-town): Gollum's puzzles
- Stage 7 (Goblin-town): The first battle with Great Goblin
- Stage 7 (Goblin-town): Escape from the goblin city
- Stage 7 (Goblin-town): The second battle with Great Goblin
- Middle-Earth: The way through the pinewood forest
- Stage 8 (Out of the Frying Pan...): Escape the orcs
- Stage 8 (Out of the Frying Pan...): The battle with Azog the Defiler
- Middle-Earth: Descend from the Lonely Mountain
- Stage 9 (Queer Lodgings): The bear attack
- Stage 9 (Queer Lodgings): The cabin in the woods
- Middle-Earth: Reach the Dark Forest
- Stage 10 (Flies and Spiders): The Dark Forest
- Stage 10 (Flies and Spiders): The spider cave
- Stage 10 (Flies and Spiders): The battle with the spiders
- Middle-Earth: Crossing the elven kingdom
- Stage 11 (Barrels Out of Bond): The cellar
- Stage 11 (Barrels Out of Bond): Goblin attack
- Stage 11 (Barrels Out of Bond): Go down the river
- Middle-Earth: Make your way to Esgaroth
- Stage 12 (A Warm Welcome): The armory
- Stage 12 (A Warm Welcome): The docks
- Stage 12 (A Warm Welcome): The battle with Bolg
- Middle-Earth: Reach High Fells
- Stage 13 (Looking for Proof): The mountain path
- Stage 13 (Looking for Proof): Angmar's Tomb
- Middle-Earth: The journey to Dol Guldur Keep
- Stage 14 (The Necromancer): The keep's exterior
- Stage 14 (The Necromancer): The keep's interior
- Stage 14 (The Necromancer): The battle with Azog the Defiler
- Stage 14 (The Necromancer): The battle with Sauron
- Middle-Earth: The journey across Dale
- Stage 15 (On the Doorstep): The climb
- Middle-Earth: Reach the vault in the Lonely Mountain
- Stage 16 (Inside Information): The vault
- Stage 16 (Inside Information): Defeat Smaug
- LEGO The Hobbit: Walkthrough
- LEGO The Hobbit: Walkthrough, Collectibles, Maps
You are not permitted to copy any image, text or info from this page. This site is not associated with and/or endorsed by the developers and the publishers. All logos and images are copyrighted by their respective owners.
Copyright © 2000 - 2026 Webedia Polska SA for gamepressure.com, unofficial game guides, walkthroughs, secrets, game tips, maps & strategies for top games.