Stage 11 (Barrels Out of Bond): Go down the river
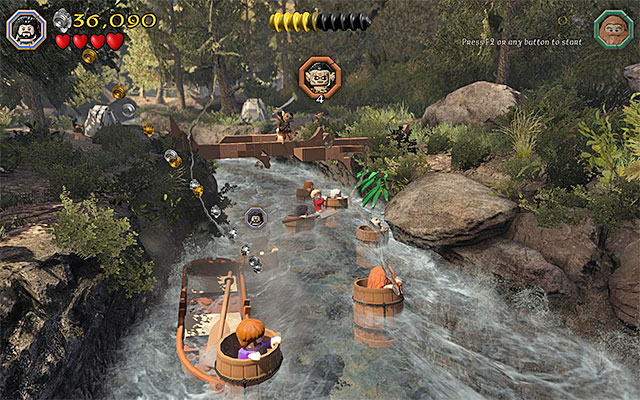
Rafting down the river is divided into two parts and the first one is less complicated. First of all, it is worth knowing that the first part of the rafting loops, i.e. you do not need to bother about the fact that this scene will end unexpectedly. This will happen only after you have performed the actions described below. This, of course, is an opportunity for you to collect all of the studs, especially that you will be allowed to switch between the characters in the barrels, freely.
In order to complete the first part, you need to start disposing of those of the goblins that are jumping towards some of the allies. Each time this happens, start by pressing the character swap key/button, thanks to which you will switch, automatically to the character that is being attacked. In order to get the goblin off, you need to play a minigame, which consists in rhythmical tapping of the indicated keys/buttons (they will be different each time). Eliminate four monsters this way.
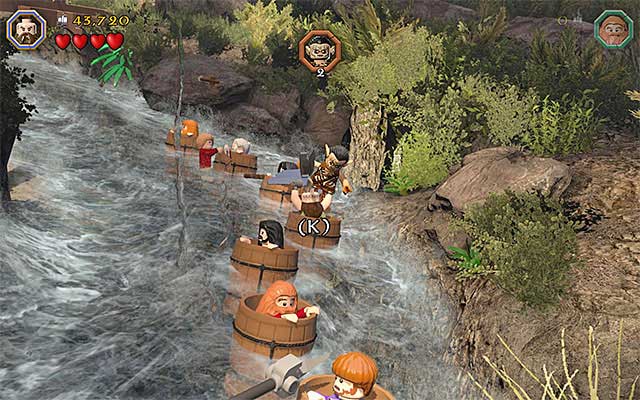
Soon, the party will reach a small bay. You can ignore the enemies that remained in the water, unless you want to gain some more studs (note - your characters may be attacked by more goblins, which involves completing the game of wrestling!). Instead, focus on Bombur, who came out to the shore as the only one and started using the barrel as an additional protection. Start eliminating the new wave of goblins and, at the same time, keep destroying the elements in the area, because there are, exceptionally, many of them.
Go into the background, continue eliminating goblins that appear in Bombur's path. Go left then and walk onto the wooden bridge. You need to stop in the central part of the bridge, jump and slam against the cracked plate.
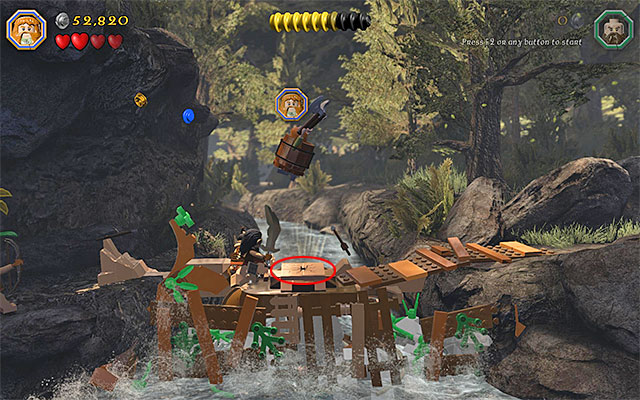
Note - If you want to give the left bank a better scrutiny, do not destroy the dam by slamming against the cracked plate, because the second part of the rafting will, otherwise, start too early.
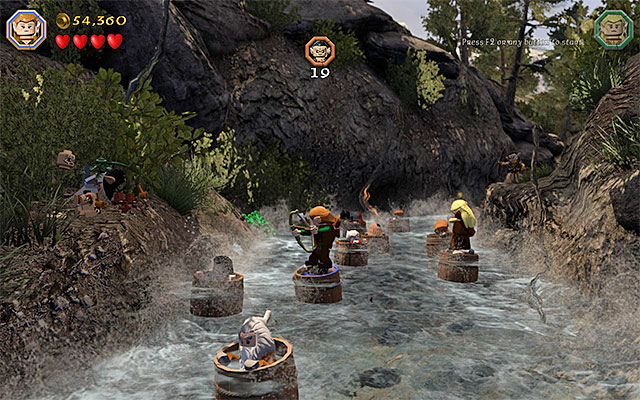
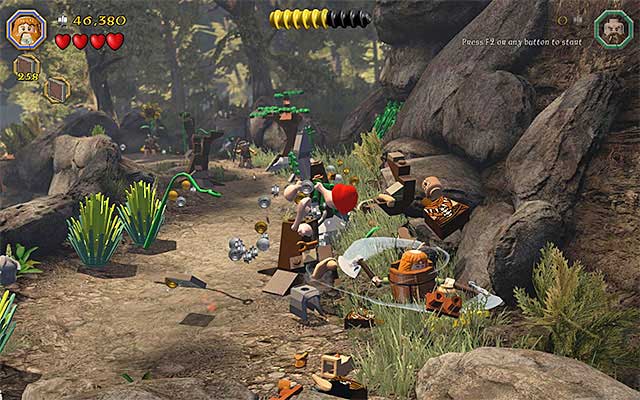
The second part of rafting is a bit different than the first one, in that you will be controlling elves only. Just like earlier, this part does not end before you achieve certain, predetermined, ends, which is a good thing to take advantage of, in order to collect all of the studs (there also is a minikit here). This time around, you need to eliminate 20 goblins that occupy both banks of the river. You do not need to aim at them manually, and only press the ranged attack key/button instead, at the moment at which your elf is sufficiently close to the enemy. After you dispose the required number of monsters, this stage ends.
- LEGO The Hobbit Game Guide & Walkthrough
- LEGO The Hobbit: Walkthrough, Collectibles, Maps
- LEGO The Hobbit: Walkthrough
- Stage 1 (Greatest Kingdom in Middle-Earth): Inside the Lonely Mountain
- Stage 1 (Greatest Kingdom in Middle-Earth): Smaug's attack
- Middle-Earth: Reach the cottage of Bilbo Baggins
- Stage 2 (An Unexpected Party): The Party
- Middle-Earth: The journey to Bree
- Stage 3 (Azog the Defiler): The Camp
- Stage 3 (Azog the Defiler): The battle with the Orcs
- Stage 3 (Azog the Defiler): The battle with Azog the Defiler
- Middle-Earth: Reach Troll Dwellings
- Stage 4 (Roast Mutton): Free the horses
- Stage 4 (Roast Mutton): The battle with the Trolls
- Stage 4 (Roast Mutton): Rescue the allies
- Middle-Earth: Reach the troll cave
- Stage 5 (The Troll Hoard): Explore the cave
- Stage 5 (The Troll Hoard): Save the rabbits of Rhosgobel
- Stage 5 (The Troll Hoard): The orc encounter
- Middle-Earth: Meet Elrond in Rivendell
- Stage 6 (Over Hill and Under Hill): The way through the pass
- Stage 6 (Over Hill and Under Hill): Climb the stone giant
- Middle-Earth: Reach shelter
- Stage 7 (Goblin-town): Cooperation with a goblin
- Stage 7 (Goblin-town): Gollum's puzzles
- Stage 7 (Goblin-town): The first battle with Great Goblin
- Stage 7 (Goblin-town): Escape from the goblin city
- Stage 7 (Goblin-town): The second battle with Great Goblin
- Middle-Earth: The way through the pinewood forest
- Stage 8 (Out of the Frying Pan...): Escape the orcs
- Stage 8 (Out of the Frying Pan...): The battle with Azog the Defiler
- Middle-Earth: Descend from the Lonely Mountain
- Stage 9 (Queer Lodgings): The bear attack
- Stage 9 (Queer Lodgings): The cabin in the woods
- Middle-Earth: Reach the Dark Forest
- Stage 10 (Flies and Spiders): The Dark Forest
- Stage 10 (Flies and Spiders): The spider cave
- Stage 10 (Flies and Spiders): The battle with the spiders
- Middle-Earth: Crossing the elven kingdom
- Stage 11 (Barrels Out of Bond): The cellar
- Stage 11 (Barrels Out of Bond): Goblin attack
- Stage 11 (Barrels Out of Bond): Go down the river
- Middle-Earth: Make your way to Esgaroth
- Stage 12 (A Warm Welcome): The armory
- Stage 12 (A Warm Welcome): The docks
- Stage 12 (A Warm Welcome): The battle with Bolg
- Middle-Earth: Reach High Fells
- Stage 13 (Looking for Proof): The mountain path
- Stage 13 (Looking for Proof): Angmar's Tomb
- Middle-Earth: The journey to Dol Guldur Keep
- Stage 14 (The Necromancer): The keep's exterior
- Stage 14 (The Necromancer): The keep's interior
- Stage 14 (The Necromancer): The battle with Azog the Defiler
- Stage 14 (The Necromancer): The battle with Sauron
- Middle-Earth: The journey across Dale
- Stage 15 (On the Doorstep): The climb
- Middle-Earth: Reach the vault in the Lonely Mountain
- Stage 16 (Inside Information): The vault
- Stage 16 (Inside Information): Defeat Smaug
- LEGO The Hobbit: Walkthrough
- LEGO The Hobbit: Walkthrough, Collectibles, Maps
You are not permitted to copy any image, text or info from this page. This site is not associated with and/or endorsed by the developers and the publishers. All logos and images are copyrighted by their respective owners.
Copyright © 2000 - 2026 Webedia Polska SA for gamepressure.com, unofficial game guides, walkthroughs, secrets, game tips, maps & strategies for top games.