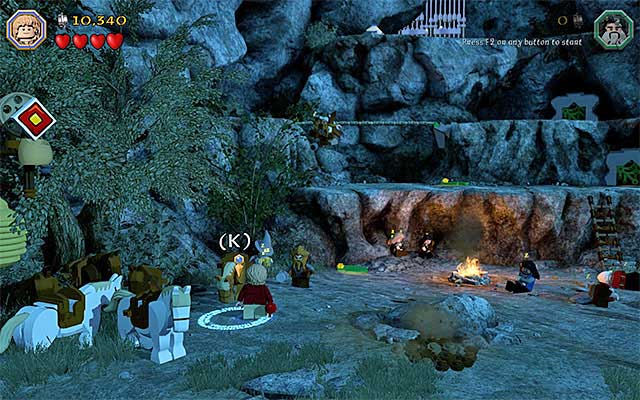
Stage 3 (Azog the Defiler): The Camp
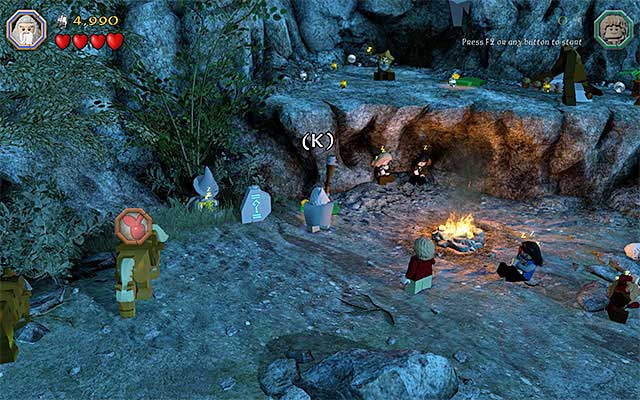
At the beginning of this part of the mission, you will have access to Bilbo and Oin and it is a good idea to cut to the latter one. Start by clearing the entire main camp of all of the objects that can be destroyed. As Oin, stand at the cliff, shown in the above screenshot, and make sure that you have the Oin's Staff equipped. Then press the button. Leave Oin in here and switch to Bilbo. You need to approach Oin, climb onto him and reach the ledge above (press the action key/button at the end).
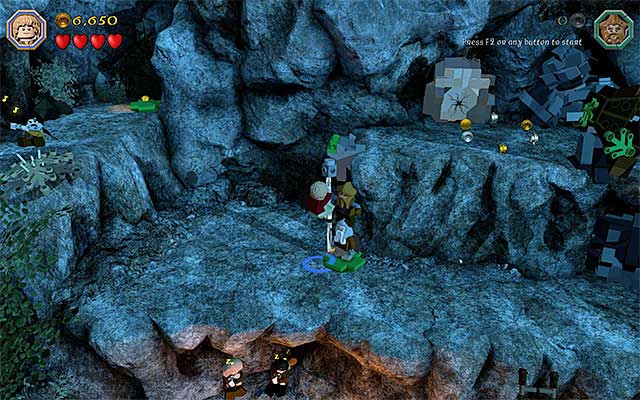
Here, the available characters will be joined by Nori, but you do not need to select him right now. Start by destroying all of the destructible objects on the right and hold down the indicated key/button, to build a ladder. This will allow Oin to reach that ledge. Select Nori or Oin, stand at the new ledge and press the appropriate button. Switch to the other of the dwarves and climb onto the character at the cliff. Finally, cut to Bilbo. Approach the dwarves (Oin and Nori have made a kind of a tower) and start climbing onto them. The purpose of this action is to reach the ledge above.

Just like earlier, start by destroying the objects on the right. This will allow Bilbo to unlock the manhole, which the dwarves are going to use. This way, they will reach the ledge. Now, use the axe to destroy the cracked slab.
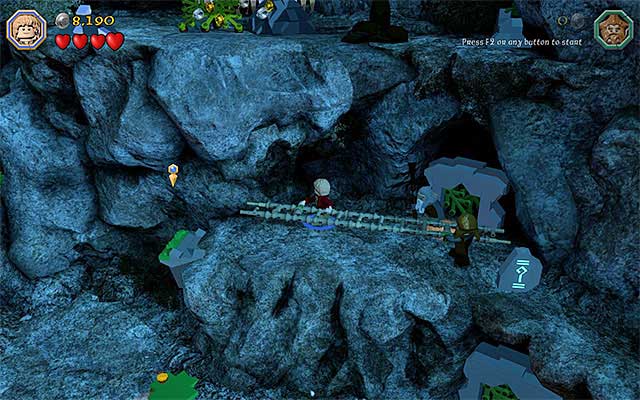
Hold down the indicated key/button, in order to build a ladder. Select any character, stand next to the right end of the ladder and press the appropriate key. After that character picks up the ladder, switch to another character. Approach the left end of the ladder and press the required key/button, again. Now, you only need to carry the ladder over slightly to the left. The characters that are holding the ladder, will throw it over to the left automatically, which will gain you access to another ledge.
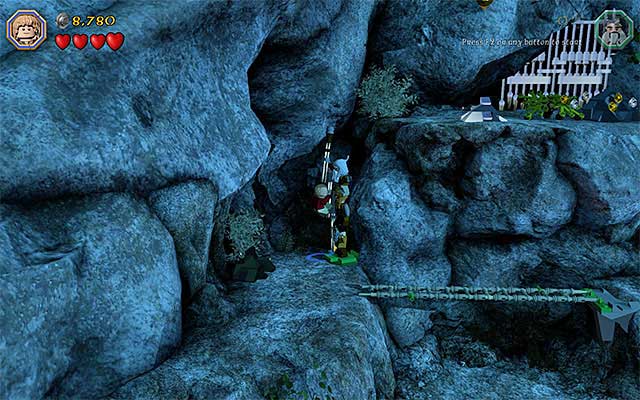
At this point, the party will be joined by Bifur. It is a good idea to select him immediately and make sure that he has his spear equipped (Bifur's Boar Spear). Approach the cliff and press the indicated key/button. Now, both Oin and Nori need to climb onto Bifur (each one of them also needs to have the staff equipped!). Finally, select Bilbo and start climbing over the dwarves, who have created a tall wall. As a reward for this, you will reach the top ledge.
Approach the tree on the right, destroy it and collect the red fruit You can now return to the camp (jump down onto the ledges below). Approach one of the horses, stand in the center of the blue circle and press the appropriate key/button. The game will soon start another cutscene and the second part of this stage will start.
- LEGO The Hobbit Game Guide & Walkthrough
- LEGO The Hobbit: Walkthrough, Collectibles, Maps
- LEGO The Hobbit: Walkthrough
- Stage 1 (Greatest Kingdom in Middle-Earth): Inside the Lonely Mountain
- Stage 1 (Greatest Kingdom in Middle-Earth): Smaug's attack
- Middle-Earth: Reach the cottage of Bilbo Baggins
- Stage 2 (An Unexpected Party): The Party
- Middle-Earth: The journey to Bree
- Stage 3 (Azog the Defiler): The Camp
- Stage 3 (Azog the Defiler): The battle with the Orcs
- Stage 3 (Azog the Defiler): The battle with Azog the Defiler
- Middle-Earth: Reach Troll Dwellings
- Stage 4 (Roast Mutton): Free the horses
- Stage 4 (Roast Mutton): The battle with the Trolls
- Stage 4 (Roast Mutton): Rescue the allies
- Middle-Earth: Reach the troll cave
- Stage 5 (The Troll Hoard): Explore the cave
- Stage 5 (The Troll Hoard): Save the rabbits of Rhosgobel
- Stage 5 (The Troll Hoard): The orc encounter
- Middle-Earth: Meet Elrond in Rivendell
- Stage 6 (Over Hill and Under Hill): The way through the pass
- Stage 6 (Over Hill and Under Hill): Climb the stone giant
- Middle-Earth: Reach shelter
- Stage 7 (Goblin-town): Cooperation with a goblin
- Stage 7 (Goblin-town): Gollum's puzzles
- Stage 7 (Goblin-town): The first battle with Great Goblin
- Stage 7 (Goblin-town): Escape from the goblin city
- Stage 7 (Goblin-town): The second battle with Great Goblin
- Middle-Earth: The way through the pinewood forest
- Stage 8 (Out of the Frying Pan...): Escape the orcs
- Stage 8 (Out of the Frying Pan...): The battle with Azog the Defiler
- Middle-Earth: Descend from the Lonely Mountain
- Stage 9 (Queer Lodgings): The bear attack
- Stage 9 (Queer Lodgings): The cabin in the woods
- Middle-Earth: Reach the Dark Forest
- Stage 10 (Flies and Spiders): The Dark Forest
- Stage 10 (Flies and Spiders): The spider cave
- Stage 10 (Flies and Spiders): The battle with the spiders
- Middle-Earth: Crossing the elven kingdom
- Stage 11 (Barrels Out of Bond): The cellar
- Stage 11 (Barrels Out of Bond): Goblin attack
- Stage 11 (Barrels Out of Bond): Go down the river
- Middle-Earth: Make your way to Esgaroth
- Stage 12 (A Warm Welcome): The armory
- Stage 12 (A Warm Welcome): The docks
- Stage 12 (A Warm Welcome): The battle with Bolg
- Middle-Earth: Reach High Fells
- Stage 13 (Looking for Proof): The mountain path
- Stage 13 (Looking for Proof): Angmar's Tomb
- Middle-Earth: The journey to Dol Guldur Keep
- Stage 14 (The Necromancer): The keep's exterior
- Stage 14 (The Necromancer): The keep's interior
- Stage 14 (The Necromancer): The battle with Azog the Defiler
- Stage 14 (The Necromancer): The battle with Sauron
- Middle-Earth: The journey across Dale
- Stage 15 (On the Doorstep): The climb
- Middle-Earth: Reach the vault in the Lonely Mountain
- Stage 16 (Inside Information): The vault
- Stage 16 (Inside Information): Defeat Smaug
- LEGO The Hobbit: Walkthrough
- LEGO The Hobbit: Walkthrough, Collectibles, Maps
You are not permitted to copy any image, text or info from this page. This site is not associated with and/or endorsed by the developers and the publishers. All logos and images are copyrighted by their respective owners.
Copyright © 2000 - 2026 Webedia Polska SA for gamepressure.com, unofficial game guides, walkthroughs, secrets, game tips, maps & strategies for top games.