Stage 13 (Looking for Proof): Angmar's Tomb
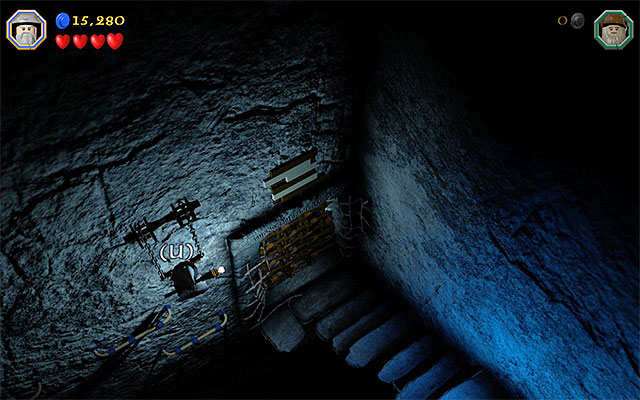
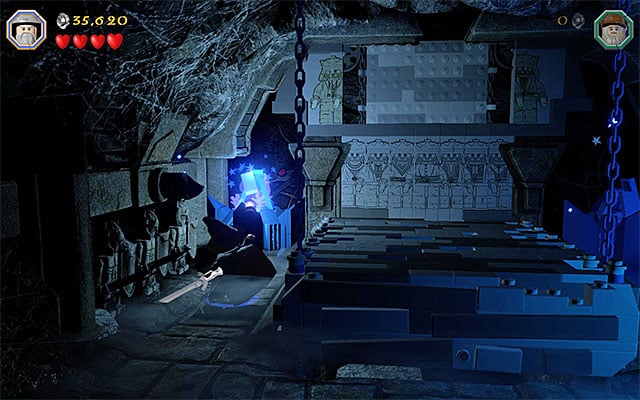
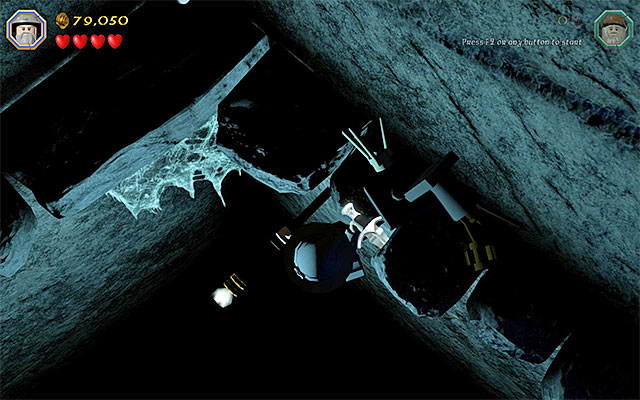
The best way to start the tomb's exploration is by using the Save Statue. Climb down the stairs and, also here, watch your steps, to prevent losing the ground under your feet. After you reach the locked gate, jump towards the, barely visible, interactive edge on the left. Then, jump towards another edge and leap towards the catch shown in the above screenshot.
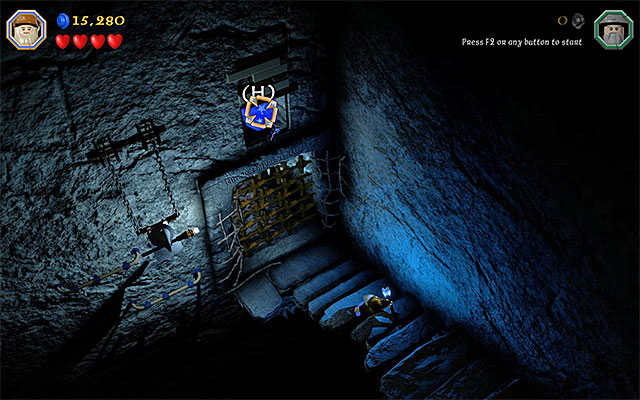
After you reach the catch mentioned above, this will unlock a blue object above the locked gate. Switch to the other wizard and use his staff to shoot a magic projectile and unlock the passage. Walk into the next location in the tomb. The location is a quite easy labyrinth, although the only purpose of the exploration of the side branches is to obtain more studs, supplies and treasures.
If you want to get through this part of the tomb, as quickly as possible, after you reach the first fork, take the path to the right. This way, you will reach a barricade, through which you can cut, using the staff of one of the wizards.
Then, during the exploration of the labyrinth, turn left twice, thanks to which the wizards will reach the passage to the next location. The camera view will change here to the third-person perspective. As for the exploration of the sarcophagus chamber, start by destroying all of the interactive objects in this area (you can hit the sarcophagus itself, several times).
There is an easy way to leave the sarcophagus chamber, i.e. by using the staff (the action key/button) on the blue fireplaces to the left and to the right of the sarcophagus (you can do that as one character only, no cooperation required). Climb down the stairs and go ahead. Stop after you reach a much larger gate. You will have to solve a simple puzzle here.
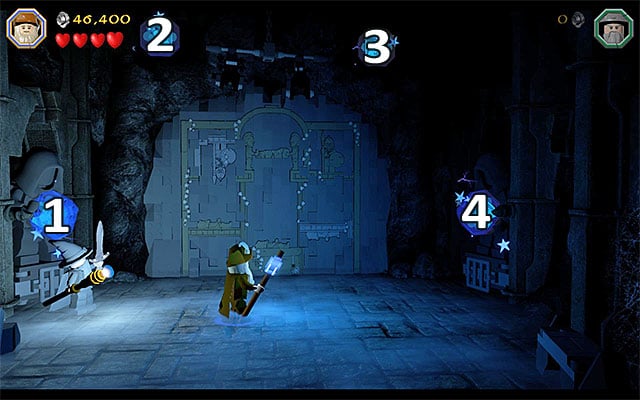
Start by switching to Radagast and healing the bat. The abovementioned puzzle consists in firing the magic projectiles at the blue targets, which needs to be done in the order in which they are highlighted. First, fire at targets 1, 2, 3 and 4 (the above screenshot), and then at targets 4, 2, 1 and 3. If you make a mistake, you will have to repeat only the last part of the puzzle. Completing it, will gain you access to the next part of the tomb.
Note- while solving the puzzle, aim manually, i.e. hold down the action key/button!
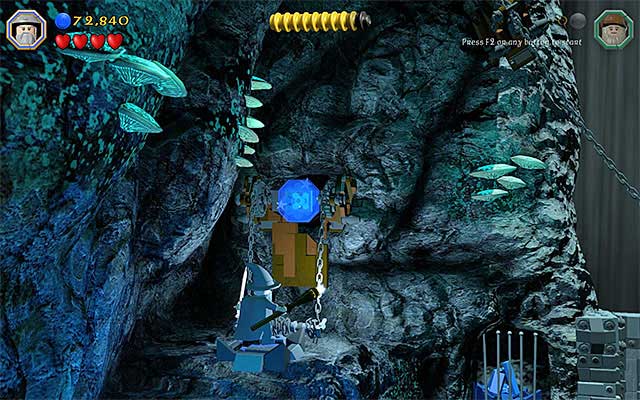
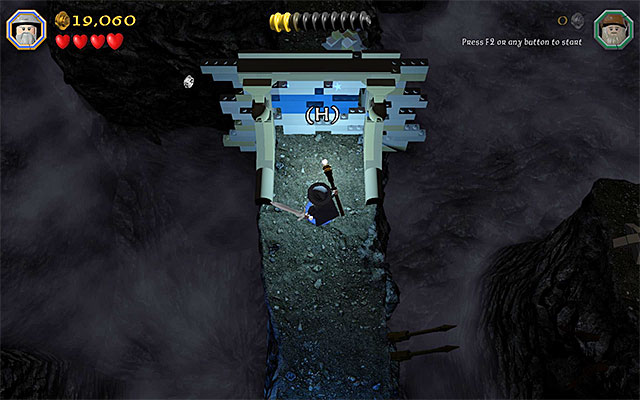
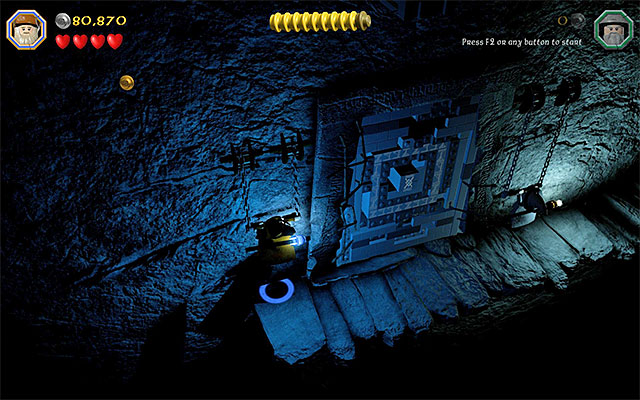
Go ahead, destroy the successive interactive objects. After you reach a big cavern, explore its left part, in the first place and take the path to the pressure plate shown in the above screenshot. Stand on the plate and, after another blue element is revealed, fire a magic projectile at it. Go now to the Right side of the cavern (you can do that as the same character). Destroy the objects here and hold down the building key/button to build a ladder. Climb up the ladder, to the upper ledge. Just like earlier, you need to walk onto the pressure plate and send the magic projectile towards the blue object.
Jump down and stand at the locked gate. Look up here and use the staff to fire at the big blue object, located above the gate. Wait for the passage to unlock and go ahead. After you get at the chasm, shimmy along the edge carefully. Along your way, you will have to destroy several smaller obstacles that are standing in the way (a standard attack with melee weapon) and jump towards several successive neighboring edges (the jump key/button).
Stop after you find a big blue padlock. As you probably figured out, you need to use the staff. After the successful attack, jump down to a lower level and go left. Apart from the abovementioned obstacles, you also need to be prepared to stat tapping, rhythmically, the action key/button. This will allow your character avoid falling into the chasm.
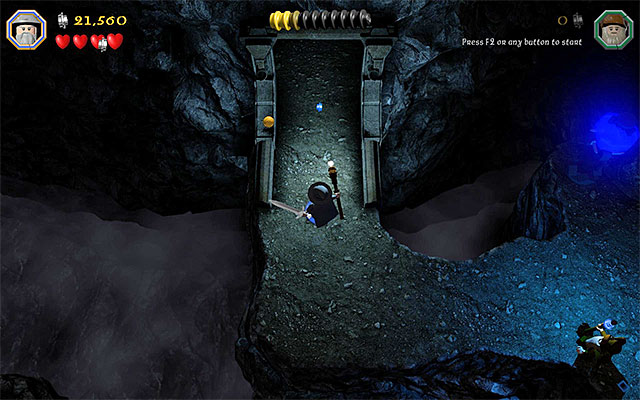
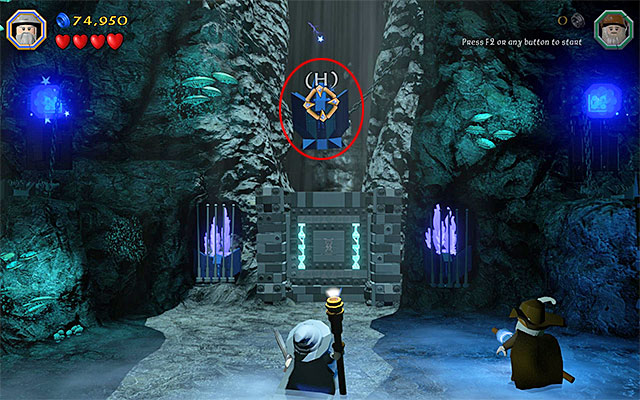
Keep using the narrow edges until you reach the last locked gate. To the left and to the right of the gate, there are catches and each of the wizards needs to reach them. This being done, stand at the gate and fire a projectile towards the blue object above it. This is the end of this long journey across the tomb.

- LEGO The Hobbit Game Guide & Walkthrough
- LEGO The Hobbit: Walkthrough, Collectibles, Maps
- LEGO The Hobbit: Walkthrough
- Stage 1 (Greatest Kingdom in Middle-Earth): Inside the Lonely Mountain
- Stage 1 (Greatest Kingdom in Middle-Earth): Smaug's attack
- Middle-Earth: Reach the cottage of Bilbo Baggins
- Stage 2 (An Unexpected Party): The Party
- Middle-Earth: The journey to Bree
- Stage 3 (Azog the Defiler): The Camp
- Stage 3 (Azog the Defiler): The battle with the Orcs
- Stage 3 (Azog the Defiler): The battle with Azog the Defiler
- Middle-Earth: Reach Troll Dwellings
- Stage 4 (Roast Mutton): Free the horses
- Stage 4 (Roast Mutton): The battle with the Trolls
- Stage 4 (Roast Mutton): Rescue the allies
- Middle-Earth: Reach the troll cave
- Stage 5 (The Troll Hoard): Explore the cave
- Stage 5 (The Troll Hoard): Save the rabbits of Rhosgobel
- Stage 5 (The Troll Hoard): The orc encounter
- Middle-Earth: Meet Elrond in Rivendell
- Stage 6 (Over Hill and Under Hill): The way through the pass
- Stage 6 (Over Hill and Under Hill): Climb the stone giant
- Middle-Earth: Reach shelter
- Stage 7 (Goblin-town): Cooperation with a goblin
- Stage 7 (Goblin-town): Gollum's puzzles
- Stage 7 (Goblin-town): The first battle with Great Goblin
- Stage 7 (Goblin-town): Escape from the goblin city
- Stage 7 (Goblin-town): The second battle with Great Goblin
- Middle-Earth: The way through the pinewood forest
- Stage 8 (Out of the Frying Pan...): Escape the orcs
- Stage 8 (Out of the Frying Pan...): The battle with Azog the Defiler
- Middle-Earth: Descend from the Lonely Mountain
- Stage 9 (Queer Lodgings): The bear attack
- Stage 9 (Queer Lodgings): The cabin in the woods
- Middle-Earth: Reach the Dark Forest
- Stage 10 (Flies and Spiders): The Dark Forest
- Stage 10 (Flies and Spiders): The spider cave
- Stage 10 (Flies and Spiders): The battle with the spiders
- Middle-Earth: Crossing the elven kingdom
- Stage 11 (Barrels Out of Bond): The cellar
- Stage 11 (Barrels Out of Bond): Goblin attack
- Stage 11 (Barrels Out of Bond): Go down the river
- Middle-Earth: Make your way to Esgaroth
- Stage 12 (A Warm Welcome): The armory
- Stage 12 (A Warm Welcome): The docks
- Stage 12 (A Warm Welcome): The battle with Bolg
- Middle-Earth: Reach High Fells
- Stage 13 (Looking for Proof): The mountain path
- Stage 13 (Looking for Proof): Angmar's Tomb
- Middle-Earth: The journey to Dol Guldur Keep
- Stage 14 (The Necromancer): The keep's exterior
- Stage 14 (The Necromancer): The keep's interior
- Stage 14 (The Necromancer): The battle with Azog the Defiler
- Stage 14 (The Necromancer): The battle with Sauron
- Middle-Earth: The journey across Dale
- Stage 15 (On the Doorstep): The climb
- Middle-Earth: Reach the vault in the Lonely Mountain
- Stage 16 (Inside Information): The vault
- Stage 16 (Inside Information): Defeat Smaug
- LEGO The Hobbit: Walkthrough
- LEGO The Hobbit: Walkthrough, Collectibles, Maps
You are not permitted to copy any image, text or info from this page. This site is not associated with and/or endorsed by the developers and the publishers. All logos and images are copyrighted by their respective owners.
Copyright © 2000 - 2026 Webedia Polska SA for gamepressure.com, unofficial game guides, walkthroughs, secrets, game tips, maps & strategies for top games.