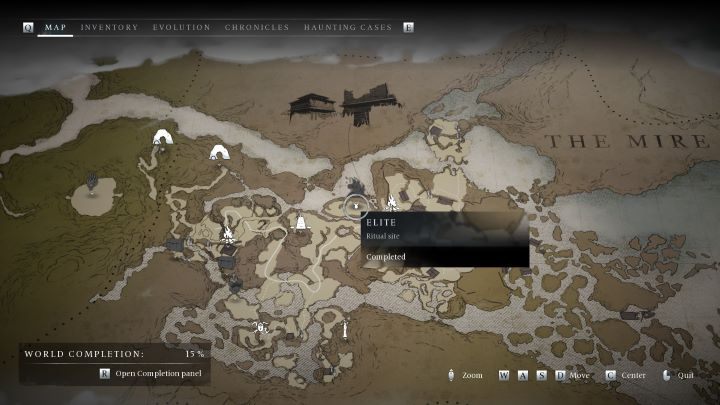
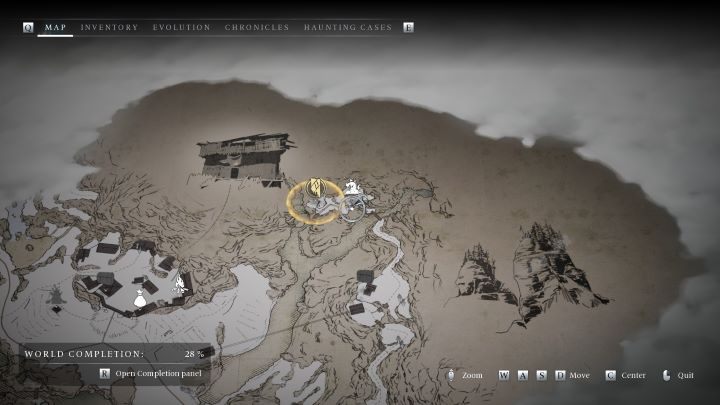
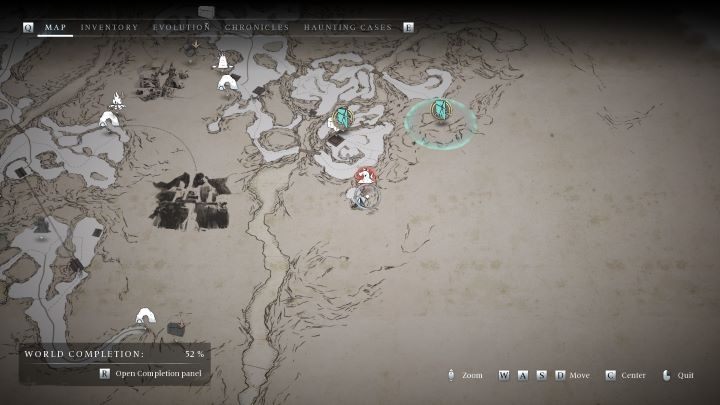
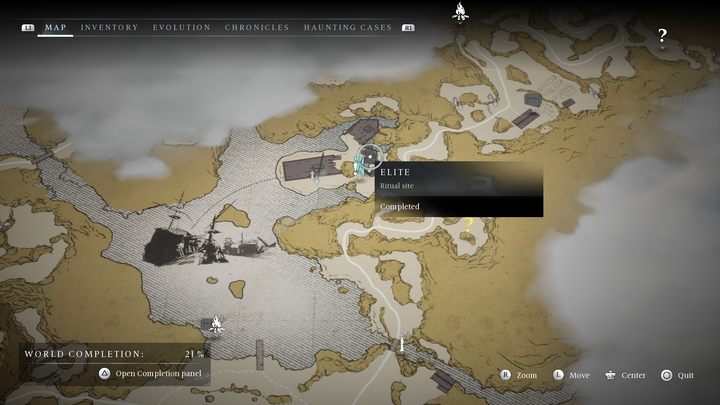
New Eden Banishers Map
Banishers Ghosts of New Eden: All Elite enemies
Aside from bosses you'll also encounter optional Elites. On this page of our guide to Banishers Ghosts of New Eden we've listed their locations, how to manifest them and acquire Elite Gems.
Last update:
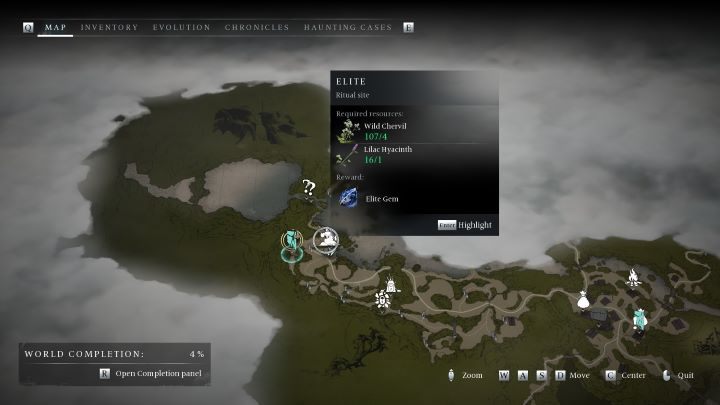
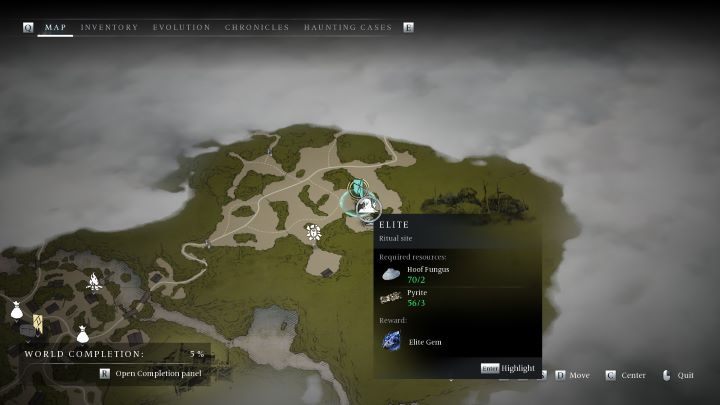
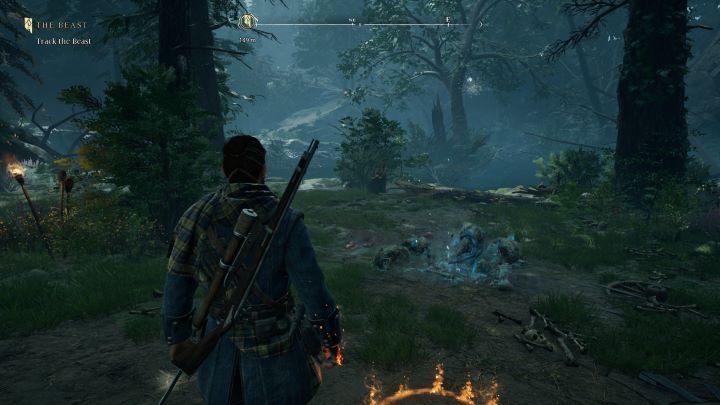
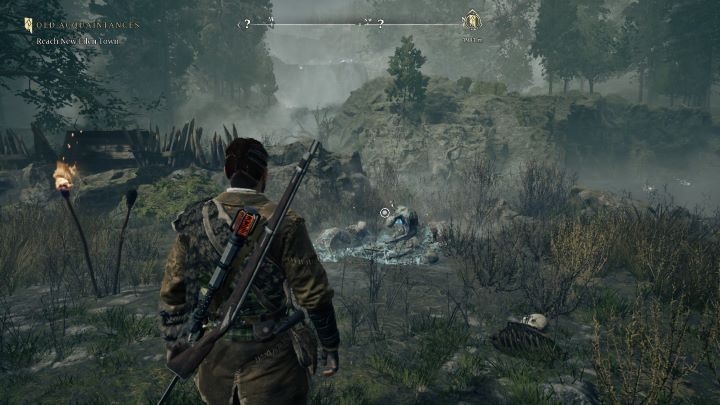
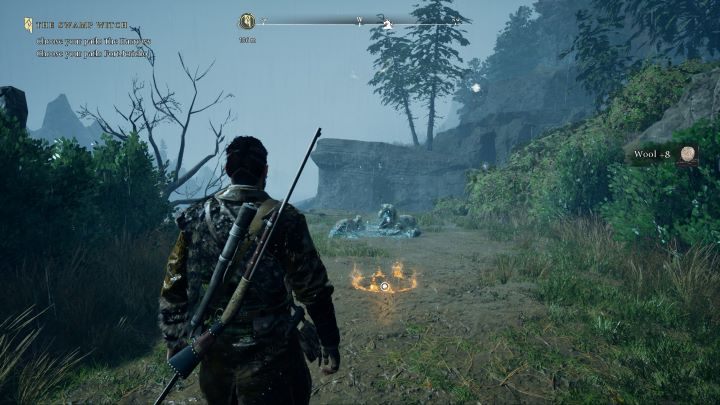
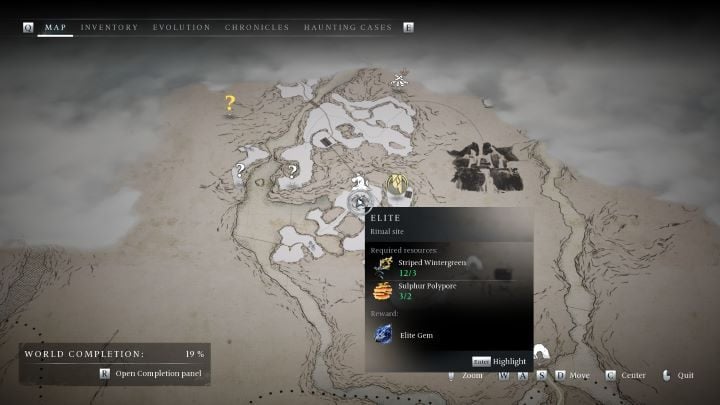
Elite enemies are a side activity you will encounter in Banishers Ghosts of New Eden. They work on the same principle as Nests - you must find a place full of spiritual energy, perform the Make-Manifest ritual and complete the following optional encounter. As with Nests, there are special rules when fighting Elite opponents that change the course of the fight. Unlike the previous activity, instead of a horde of enemies, you will face a powerful mini-boss. For defeating the elite opponent, you will receive a permanent increase in statistics and an Elite Gem, a rare item used for upgrades. On this page of the guide, we have listed all the Elite opponents in the game and the rules assigned to them.
Some of the haunted places are endless - you can approach them many times, but a single completion is enough for the game to consider them passed. So, we included advice for the infinite haunted places only for their first completion.
- The Dark Woods - Elite enemy #1
- The Dark Woods - Elite enemy #2
- The Dark Woods - Elite enemy #3
- The Mire Marshes - Elite enemy #1
- The Mire Marshes - Elite enemy #2
- Mount Pleasant - Elite enemy #1
- Mount Pleasant - Elite enemy #2 (Infinite)
- Mount Pleasant - Elite enemy #3
- Mount Pleasant - Elite enemy #4 (Infinite)
- Mount Pleasant - Elite enemy #5
- The Harrows - Elite enemy #1
- The Harrows - Elite enemy #2
- The Harrows - Elite enemy #3
The Dark Woods - Elite enemy #1
Related map marker: Elite Enemy #1 - The Dark Woods @ New Eden
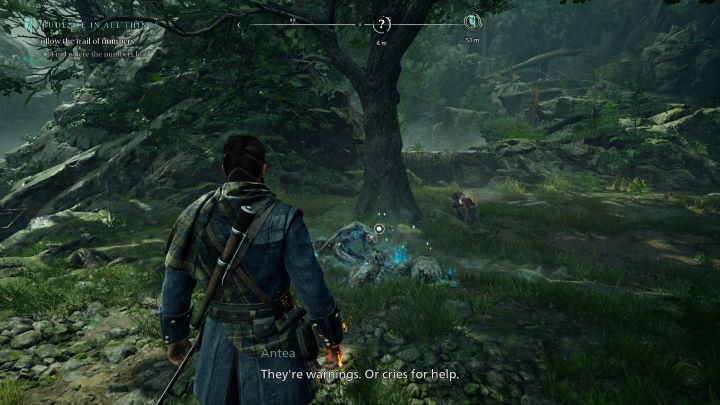
- Location: West of the hunting camp, in a clearing far behind Prudence Hake's house, under a large tree.
- Rule: More damage dealt by Antea's light attacks and fists.
- Comment: Despite his high experience level of 14, the enemy shouldn't cause you much trouble - light attacks will deplete his health bar in the blink of an eye. Beware of summoned minor enemies and area attacks - eliminate them immediately and don't let yourself get surrounded.
The Dark Woods - Elite enemy #2
Related map marker: Elite Enemy #2 - The Dark Woods @ New Eden
- Location: East of the hunting camp, in a small grove behind the hut where the blacksmith was hiding.
- Rule: Increased damage when Antea has low spiritual energy points.
- Comment: Your damage dealt is significantly reduced when Antea has more than 1/3 of spiritual energy. Frequent character switching is crucial, especially since the opponent can immobilize Red - a quick switch to Antea will allow you to get back to the fight.
The Dark Woods - Elite enemy #3
Related map marker: Elite Enemy #3 - The Dark Woods @ New Eden

- Location: In the area south of Kate's Bivouac shelter.
- Rule: Charged strong attacks deal more damage.
- Comment: This fight may turn out to be difficult - you will face a powerful possessed dog. Focus on defense and don't even try to use other attacks than charged strong and Banishments - they are almost useless here. Maintain a moderate distance from the enemy - the mini-boss takes large breaks between his attacks. Be especially wary of his charge, marked by an orange flash around his snout.
The Mire Marshes - Elite enemy #1
Related map marker: Eliete Enemy #1 - The Mire Marshes @ New Eden
- Location: In the fog-covered area, west of the Old Marsh Encampment shelter.
- Rule: Each successful attack increases the damage dealt. The effect resets after receiving damage.
- Comment: You will face possessed corpses wielding sabers. The rifle is useless here, as the enemy will dodge almost every shot. Switch to Antea immediately - her attacks deal more damage to the opponents. The rule here is very problematic, as the enemy can block your blows and parry them if you hit him twice when he blocks. Getting parried will stun you, expose you to counterattack and cancel the damage multiplier. To easily defeat an enemy, perform a series of two to three attacks, then step back, wait for the opponent's attack and counter with another series after he misses. In this way, you should avoid getting parried and maintain your damage multiplier, which will quickly deplete the enemy's health bar.
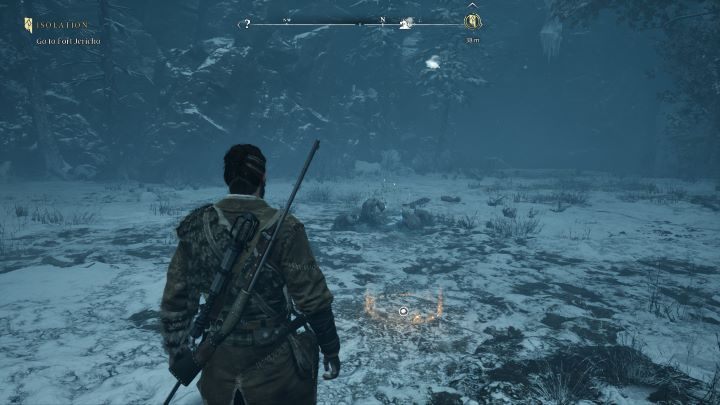
The Mire Marshes - Elite enemy #2
Related map marker: Elite Enemy #2 - The Mire Marshes @ New Eden
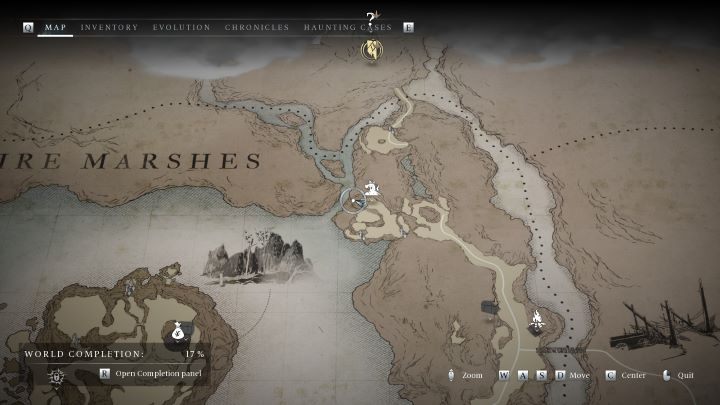
- Location: In the fog-covered area on the way to Fort Jericho.
- Rule: Increased damage when Antea has low spiritual energy points.
- Comment: You will face a possessed dog. Begin the fight as Antea and attack the enemy to deplete your spiritual energy as quickly as possible. Also be careful with reinforcements - especially undead soldiers and green ghosts on the rocks. When your energy reaches a low level, deplete it completely using the Outburst, which should seriously injure the mini-boss and other nearby enemies.
Mount Pleasant - Elite enemy #1
Related map marker: Eliete Enemy #1 - Mount Pleasant @ New Eden
- Location: In the starting area of Mount Pleasant.
- Rule: More damage dealt by Leap.
- Comment: You will face an enemy shooter. The strategy is very simple - use Antea's Leap whenever possible, while avoiding minor enemies. If you run out of spirit points, replenish it with normal attacks or by drinking a healing elixir. Also watch out for the green ghosts on the surrounding rocks - a single rifle shot should destroy them despite reduced damage.
Mount Pleasant - Elite enemy #2 (Infinite)
Related map marker: Elite Enemy (Infinite) #2 - Mount Pleasant @ New Eden
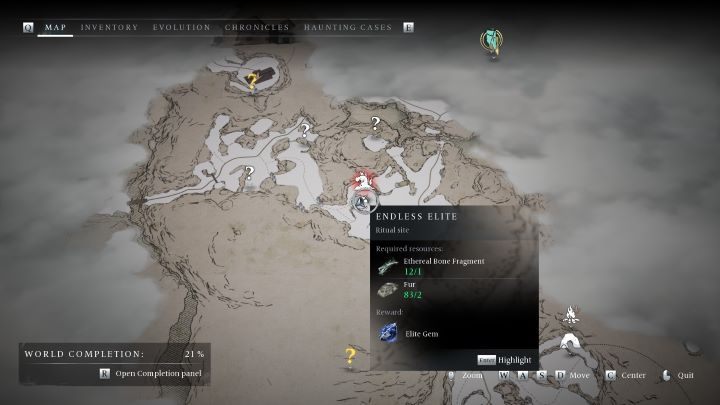
- Location: In a clearing on the way to Fort Jericho.
- Principle: Banishment charges faster and deals more damage.
- Comment: Focus on fast attacks that will charge your Banishment bar the fastest. When it's full, banish the currently most dangerous target. Also watch out for the spirits on the rocks, which can be eliminated with a single shot from a rifle. This enemy is infinite - we have described infinite haunted grounds in detail on a separate page of the guide.
Mount Pleasant - Elite enemy #3
Related map marker: Elite Enemy #3 - Mount Pleasant @ New Eden
- Location: In the Outpost area, before the entrance to the mine - you will pass right next to it during the main story.
- Rule: Enemies explode when killed.
- Comment: You will face a blue swordsman. The rule suggests fighting at a distance, but the mini-boss can dodge rifle shots. Eliminate regular opponents with your rifle and keep your distance - the explosions are large and marked with an orange circle on the ground. It's best to deal with the main enemy with Antea's melee attacks and perfect switches. Explosions also damage enemies - they don't deal much damage to possessed corpses, but they are a big threat to ghosts.
Mount Pleasant - Elite enemy #4 (Infinite)
Related map marker: Elite Enemy - Mount Pleasant @ New Eden
- Location: In the area southeast of Fort Jericho, south of the guard tower.
- Rule: Rifle and Ensnare deal increased damage.
- Comment: The battle strategy is quite simple - get rid of your opponents and don't get overwhelmed while aiming at their weak points. Banishing Shot will be very useful here.
Mount Pleasant - Elite enemy #5
Related map marker: Elite Enemy #1 - The Harrows @ New Eden
- Location: Northwest of Fort Jericho, just outside the Bligh Manor area.
- Rule: Increased damage dealt by Perfect Switch after Parry, Run, and Dodge.
- Comment: The Deathblow skill from the Outburst tree will be very useful here - this perfect switch is cheap and fast, so it can constantly throw the enemy off balance before he can hit you. Get rid of minor opponents with Red's attacks to replenish the spiritual energy you need for perfect switches.
The Harrows - Elite enemy #1
Related map marker: Elite Enemy #2 - The Harrows @ New Eden
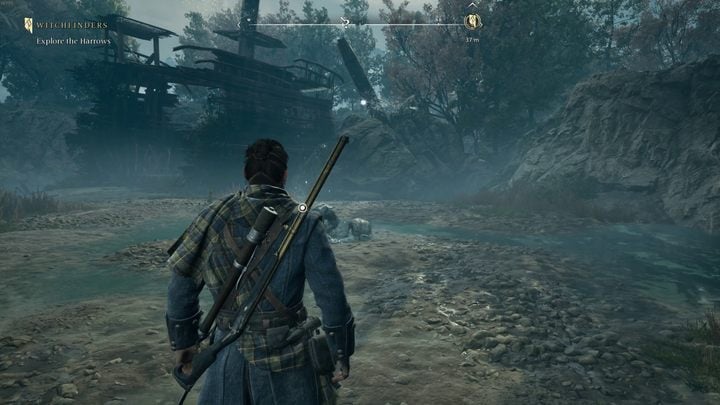
- Location: In the north-western part of the region, on the shore next to the shipwreck.
- Rule: More damage when Red's health bar is full.
- Comment: Approach the fight very defensively and replenish your missing health immediately if you get hit. Fighting without having a full health bar is tedious, so be careful not to run out of healing potions.
The Harrows - Elite enemy #2
Related map marker: Elite Enemy #3 - The Harrows @ New Eden

- Location: Southern part of the region, on a small branch of the road leading to the beach.
- Rule: Presences deal extra damage.
- Comment: You can defeat the drowned bosman using Antea's special powers. When these are charging, temporarily switch to Red and charge the Banishing bar with attacks. Before attacking the main opponent, you should get rid of minor enemies first.
The Harrows - Elite enemy #3

- Location: The central part of the region, on the northern shore of a large lake.
- Rule: Defeating enemies regenerates decotion charges, and using them deals damage to nearby enemies.
- Comment: Quite an unusual set of modifiers. Draw the attention of several enemies at once and as soon as they approach, drink the decotion. Before drinking, weaken opponents with regular attacks beforehand. Also make sure to quickly finish off wounded ghosts to replenish healing potions in this way.

- Banishers Ghosts of New Eden Guide
- Banishers Ghosts of New Eden: Game Guide
- Banishers Ghosts of New Eden: Secrets and Collectibles
- Banishers Ghosts of New Eden: All Locked chests
- Banishers Ghosts of New Eden: All Lost chests
- Banishers Ghosts of New Eden: All cursed chests
- Banishers Ghosts of New Eden: All Blue chests
- Banishers Ghosts of New Eden: All Nests
- Banishers Ghosts of New Eden: All Elite enemies
- Banishers Ghosts of New Eden: All Scourges
- Banishers Ghosts of New Eden: All Void Breaches
- Banishers Ghosts of New Eden: All Treasure maps
- Banishers Ghosts of New Eden: All Altars
- Banishers Ghosts of New Eden: All Collectibles
- Banishers Ghosts of New Eden: All Haunted Grounds
- Banishers Ghosts of New Eden: Soul Grabbers
- Banishers Ghosts of New Eden: Secrets and Collectibles
- Banishers Ghosts of New Eden: Game Guide
You are not permitted to copy any image, text or info from this page. This site is not associated with and/or endorsed by the developers and the publishers. All logos and images are copyrighted by their respective owners.
Copyright © 2000 - 2026 Webedia Polska SA for gamepressure.com, unofficial game guides, walkthroughs, secrets, game tips, maps & strategies for top games.