Batman Arkham City: Access the Sionis Steel Mill through the main chimney
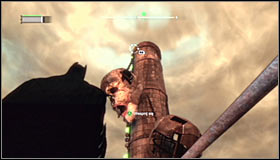 |  |
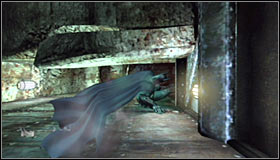
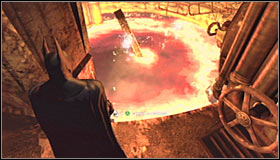
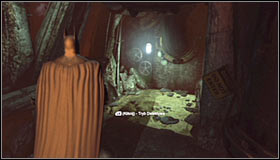
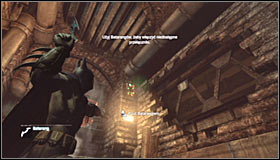
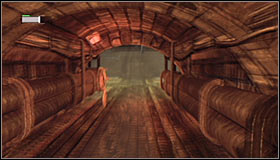
Stay where you are and turn towards the big chimney with skulls attached to it. #1. Note that you can use the Grapnel Gun to grab its upper part #2.
 |  |
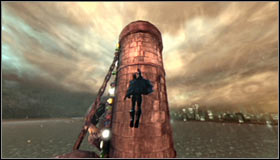
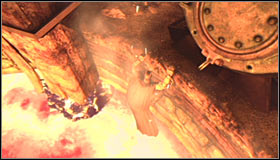
After reaching the chimney hole, a cutscene showing Batman spectacularly gliding down will automatically play #1. You will resume crouching on a line inside the Waste Exchange and you'll have to glide (hold down A) to the ledge visible in the distance #2.
 |  |
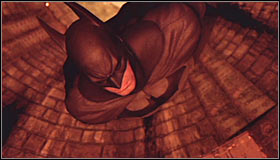
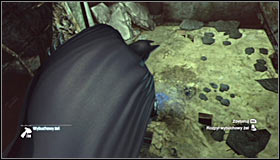
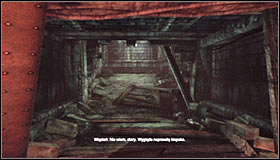
Move along the only possible route. After reaching the partially crumbled passage, gain momentum (A) and hold the right trigger at the right moment, thanks to which Batman will perform an impressive slide #1. Afterwards move on, automatically getting past a couple obstacles #2.
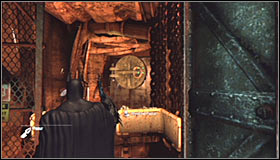 | 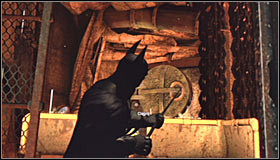 |
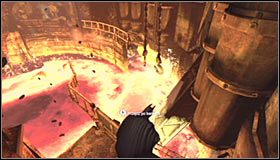
Stop after reaching the hot balustrade. Choose the Batclaw and in accordance with the instructions, shoot it at the valve visible in the distance (hold down the left trigger and press the right) #1. Now you have to rhythmically press A #2 in order to open the valve.
 |  |
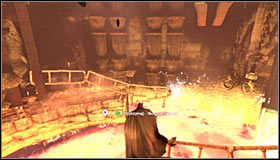
Note that the temperature in this part of the room has depreciated, so you can jump onto the balustrade #1 and press B to jump down onto the lower shelf. Follow the only possible path here as well. After reaching its end, approach the edge #2 and press the right trigger and A at the same time to hang above the abyss.
 |  |
Move to the left #1 and soon you will reach a place where you will have to climb onto a new ledge. Continue forward and interact with the nearby barrier #2.
 |  |
Walk along the barrier to the middle part of the room and turn right #1. In accordance with the instructions, lean out the analog stick up and press A to jump towards the invisible platform. carefully jump down onto stable ground and head forward. Stop at the place where the game will suggest you turn on Detective Mode #2.
 | 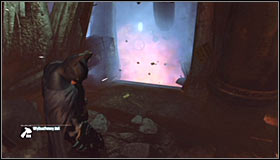 |
As you have probably noticed, the floor here is rather weak. Choose the Explosive Gel from the inventory, get onto the fragile floor part, hold down the left trigger and afterwards press the right one to spray the gel #1. Move away to a safe distance and press RB to detonate the charge #2. Now you can jump down onto the lower floor.
 |  |
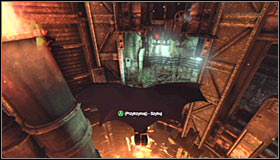
Start off by pressing the right trigger, thanks to which you will pass below the pipes #1. At the same time, note that you have reached the Loading Bay. Open the inventory and choose the Batarang. Hold down the left trigger, aim at the switch on the right wall #2 and press the right trigger to throw the Batarang. Hitting the switch will turn off the steam.
 |  |
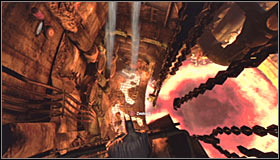
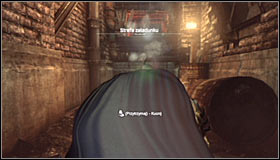
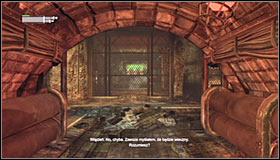
Climb up and continue going through the narrow tunnels #1, eventually reaching a spot from where you will be able to see Harley Quinn and the abducted doctor Stacy Baker from behind some crates. Move on and soon you will reach a tunnel with blazing fire #2. There are two "traps" to avoid here, both of which require you to wait until the flame disappears and quickly passing by it.
 |  |
Keep going along the only possible tunnel, listening to numerous conversations on the way. Don't get scared, as the camera will change its position after some time #1. You can continue moving using this view or press the right trigger to return to the first person perspective. Don't worry about the bandits above you, as they won't notice you. Your target is reaching the tunnel located in the west part of the Loading Bay #2.
 | 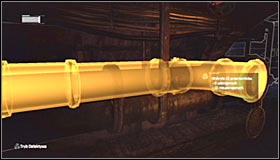 |
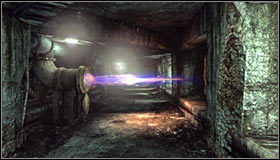
Head north and take the first turn right #1. Right after you enter the tunnel it will turn out that the passage is blocked by steam. Follow the hint and switch to Detective Mode #2. You will have to follow the distinguishable yellow pipe.
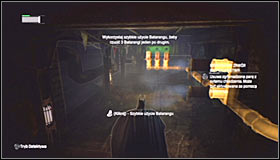 |  |
Return to the main corridor and for a change use the left passage. After a short walk you should reach the steam corridor #1. Equip the Batarang. In a short period of time, you will have to throw a total of three Batarangs, in each case you should only press (not hold!) the left trigger. The Batarangs will hit the safety valves visible in the distance #2 and the objective is to turn off all three green lamps above them at the same time.
 | 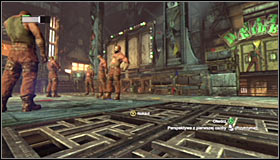 |
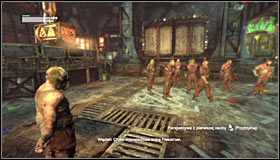
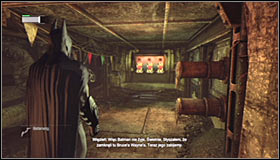
You can return to the previously explored corridor. Note that now you can pass to the main room of the Loading Bay #1. Stand in such a place that you're able to attack one of the enemies standing above you by surprise (Y) #2 and begin this fight in such a way.
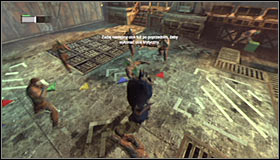 | 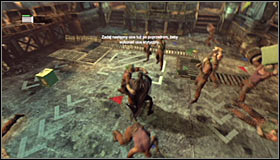 |
Afterwards take care of the other enemies present in the room #1, remembering to perform dodges and counterattacks often. I'd especially suggest looking out for the ones equipped with weapons and throwing big objects at you #2. You can either destroy them or avoid getting hit. After the fight, listen to new conversations with Harley Quinn and Alfred. Your current priority will change, as you will have to rescue the doctor abducted by Joker.

- Batman: Arkham City Game Guide
- Batman Arkham City: Game Guide
- Batman Arkham City: Main story
- Batman Arkham City: Prologue
- Batman Arkham City: Climb to higher ground to contact Alfred
- Batman Arkham City: Climb to the top of the ACE Chemical building to collect your equipment
- Batman Arkham City: Locate and enter Two-Face's Courthouse
- Batman Arkham City: Save Catwoman from Two-Face
- Batman Arkham City: Scan the crime scene for ballistic evidence
- Batman Arkham City: Locate the source of the sniper shot
- Batman Arkham City: Scan the sniper rifle for forensic evidence
- Batman Arkham City: Track down the source of the radio signal to locate Joker
- Batman Arkham City: Access the Sionis Steel Mill through the main chimney
- Batman Arkham City: Save the doctor from Joker's thugs
- Batman Arkham City: Break into Joker's office in the Loading Bay
- Batman Arkham City: Track Freeze's location by identifying the coldest point in Arkham
- Batman Arkham City: Locate Mister Freeze and recover the cure
- Batman Arkham City: Rescue Mister Freeze from Penguin in the Museum
- Batman Arkham City: Disable Penguin's Communications Disruptors
- Batman Arkham City: Disable Penguin's Final Communications Disruptor underground
- Batman Arkham City: Rescue Mister Freeze from Penguin in the Museum (part 2)
- Batman Arkham City: Rescue remaining undercover GCPD officers in the Museum
- Batman Arkham City: Collect the security override from Freeze's suit to disable the Freeze Gun
- Batman Arkham City: Confront Penguin in the Iceberg Lounge
- Batman Arkham City: Defeat Solomon Grundy
- Batman Arkham City: Defeat Penguin
- Batman Arkham City: Analyse the assassin's blood to follow her trail
- Batman Arkham City: Follow assassin using tracker device to locate Ra's al Ghul
- Batman Arkham City: Analyze the assassin's bandages for new evidence
- Batman Arkham City: Catch assassin and plant tracking device
- Batman Arkham City: Follow assassin using tracer device to locate Ra's al Ghul
- Batman Arkham City: Reconstruct video data from the Mechanical Guardian
- Batman Arkham City: Locate more Mechanical Guardians to fully reconstruct the video data
- Batman Arkham City: Locate the secret entrance using the video data
- Batman Arkham City: Follow assassin using tracer device to locate Ra's al Ghul (part 2)
- Batman Arkham City: Locate Ra's al Ghul and obtain a sample of his blood
- Batman Arkham City: Defeat Ra's al Ghul
- Batman Arkham City: Return to the GCPD to deliver the blood of Ra's al Ghul to Mister Freeze
- Batman Arkham City: Interrogate Quincy Sharp for information on Hugo Strange
- Batman Arkham City: Return to the GCPD to deliver the blood of Ra's al Ghul to Mister Freeze (part 2)
- Batman Arkham City: Defeat Mister Freeze
- Batman Arkham City: Infiltrate the Steel Mill
- Batman Arkham City: Rescue Vicki Vale from chopper crash site
- Batman Arkham City: Infiltrate the Steel Mill (part 2)
- Batman Arkham City: Locate Joker in the Steel Mill
- Batman Arkham City: Defeat Joker
- Batman Arkham City: Scan the TYGER helicopter to locate the Master Control Program
- Batman Arkham City: Retrieve Master Control Program transmitter from Primary Helicopter
- Batman Arkham City: Gain access to Wonder Tower
- Batman Arkham City: Climb the observation deck to stop Protocol 10
- Batman Arkham City: Follow tracker to save Talia from Joker
- Batman Arkham City: Get the cure from Joker and stop him from becoming immortal
- Batman Arkham City: Main story
- Batman Arkham City: Game Guide
You are not permitted to copy any image, text or info from this page. This site is not associated with and/or endorsed by the developers and the publishers. All logos and images are copyrighted by their respective owners.
Copyright © 2000 - 2026 Webedia Polska SA for gamepressure.com, unofficial game guides, walkthroughs, secrets, game tips, maps & strategies for top games.