Batman Arkham City: Locate the source of the sniper shot
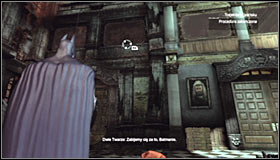 | 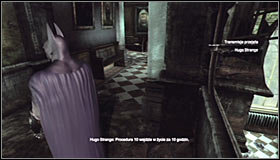 |
Before leaving the area, you can have an optional conversation with Two-Face. He's hanging at the same spot where Catwoman previously was. As for choosing the exit, you have two options. The more obvious solution is using the Grapnel Gun on one of the upper floor windows #1. It would let you reach the previously examines balcony #2 and from there to one of the exits.
 | 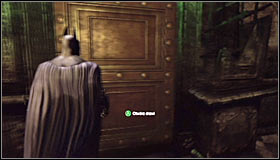 |
If you don't want to follow the same route, you can head to the door located in the corner of the room #1. A few moments later you will reach a rear entrance from the courthouse #2.
Notice! If you have left the building through the front door, be ready for eliminating some more enemies!
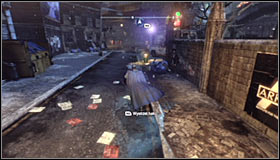 | 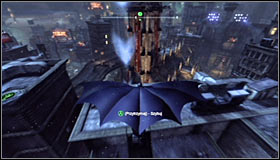 |
You next target is the Medical Center found inside the church located north-east you're your current location. Depending on your taste, you can get there by following the streets #1 or gliding #2 and using the Grapnel Gun.
 | 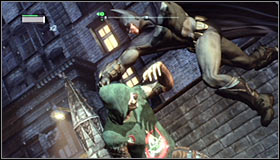 |
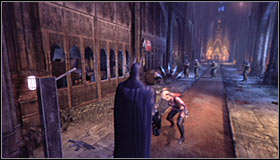
Regardless of the chosen method, you have to reach the Medical Center entrance. It would be good to surprise the enemies gathered there with an attack from above #1, though it's not absolutely essential. Of course remember to make use of counterattacks and dodges throughout the fight #2.
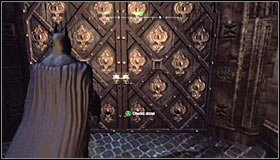 |  |
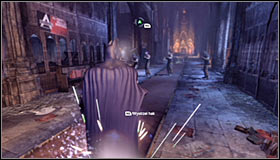
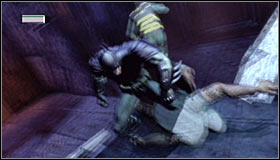
Once you're ready, use the door leading to the Medical Center #1. After getting inside, go to the next room and be ready to quickly press Y when Harley Quinn attacks #2. Listen out the short conversation with this character, after which Harley will exit the building and leave you with a few armed enemies.
 | 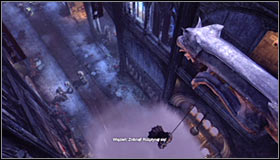 |
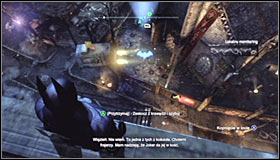
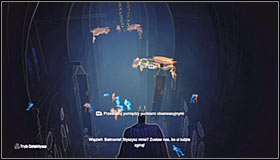
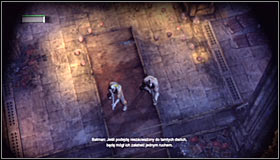
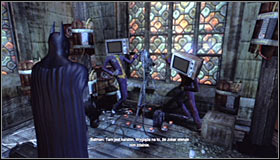
Now you have to perform all the moves flawlessly, or else Batman ore one of the hostages is going to die. Start off by pressing Y to throw a Smoke Pellet #1. Afterwards QUICKLY press RB so that Batman uses the Grapnel Gun to get onto the gargoyle statue #2, getting out of the enemy's sight.
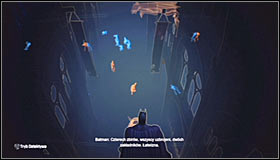 |  |
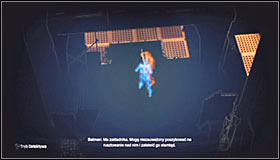
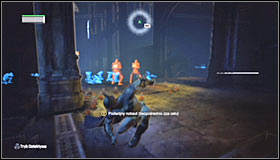
Follow Batman's suggestion and turn on the Detective Mode #1. That way you will learn that there are four armed enemies in the building and two of them have taken hostages. Eliminating them will be very linear, though the game won't leave any place for mistakes. Start jumping through the gargoyles #2 using the Grapnel Gun (RB).
 | 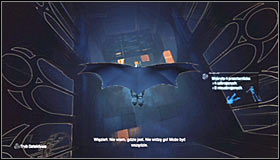 |
Stop after reaching the second vantage points and Batman will notice the enemy with a hostage below #1. Hold down A and start gliding towards him #2.
 |  |
After reaching the balcony above the enemy, press Y to take him out #1. You need to hurry, as otherwise he will kill the hostage. Afterwards you can use the Grapnel Gun to return onto the nearest vantage point #2.
 |  |
Now we will focus on eliminating the second guard with a hostage #1. Move to the vantage points closest to him and afterwards glide down #2, landing behind them.
 |  |
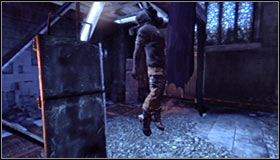
Crouch and approach the destructible wall #1, beside which the guard is standing. In accordance with the received instructions, press Y to break through the wall and take down the bandit #2. Once again return onto the gargoyles.
 |  |
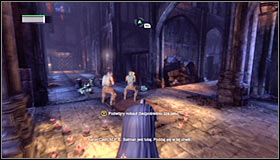
Now you need to eliminate the two last enemies, who should now be standing beside each other #1. Move to one of the neighbouring ledges and press B, making Batman quietly land behind their backs #2.
 | 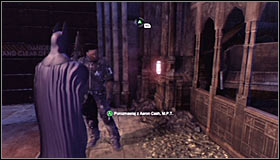 |
Press and hold the right trigger and approach the guards. Make sure that you're standing close enough and press Y #1 to perform a double takedown. Afterwards you can take a look around the medical center without being disturbed by anyone. I'd suggest talking with the doctors, Adam Hamasaki, Anne Bishop and Aaron Cash #2.
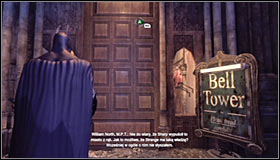 |  |
Head towards the door left of the Medical Center exit, in the north part of the building #1. Go up the stairs onto the upper platform and use the Grapnel Gun on the ledge visible in the distance #2, thanks to which you will be able to continue the climbing.
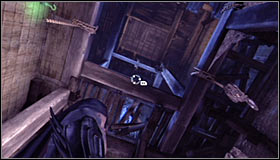 |  |
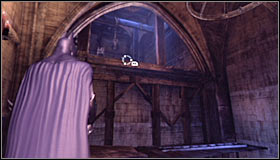
As the stairs to the bell tower have been damaged, keep using the Grapnel Gun to grab onto the upper ledges #1. Eventually you should reach the ladder leading into the bell room. After reaching it, approach the sniper rifle from which the fire has been shot #2.

- Batman: Arkham City Game Guide
- Batman Arkham City: Game Guide
- Batman Arkham City: Main story
- Batman Arkham City: Prologue
- Batman Arkham City: Climb to higher ground to contact Alfred
- Batman Arkham City: Climb to the top of the ACE Chemical building to collect your equipment
- Batman Arkham City: Locate and enter Two-Face's Courthouse
- Batman Arkham City: Save Catwoman from Two-Face
- Batman Arkham City: Scan the crime scene for ballistic evidence
- Batman Arkham City: Locate the source of the sniper shot
- Batman Arkham City: Scan the sniper rifle for forensic evidence
- Batman Arkham City: Track down the source of the radio signal to locate Joker
- Batman Arkham City: Access the Sionis Steel Mill through the main chimney
- Batman Arkham City: Save the doctor from Joker's thugs
- Batman Arkham City: Break into Joker's office in the Loading Bay
- Batman Arkham City: Track Freeze's location by identifying the coldest point in Arkham
- Batman Arkham City: Locate Mister Freeze and recover the cure
- Batman Arkham City: Rescue Mister Freeze from Penguin in the Museum
- Batman Arkham City: Disable Penguin's Communications Disruptors
- Batman Arkham City: Disable Penguin's Final Communications Disruptor underground
- Batman Arkham City: Rescue Mister Freeze from Penguin in the Museum (part 2)
- Batman Arkham City: Rescue remaining undercover GCPD officers in the Museum
- Batman Arkham City: Collect the security override from Freeze's suit to disable the Freeze Gun
- Batman Arkham City: Confront Penguin in the Iceberg Lounge
- Batman Arkham City: Defeat Solomon Grundy
- Batman Arkham City: Defeat Penguin
- Batman Arkham City: Analyse the assassin's blood to follow her trail
- Batman Arkham City: Follow assassin using tracker device to locate Ra's al Ghul
- Batman Arkham City: Analyze the assassin's bandages for new evidence
- Batman Arkham City: Catch assassin and plant tracking device
- Batman Arkham City: Follow assassin using tracer device to locate Ra's al Ghul
- Batman Arkham City: Reconstruct video data from the Mechanical Guardian
- Batman Arkham City: Locate more Mechanical Guardians to fully reconstruct the video data
- Batman Arkham City: Locate the secret entrance using the video data
- Batman Arkham City: Follow assassin using tracer device to locate Ra's al Ghul (part 2)
- Batman Arkham City: Locate Ra's al Ghul and obtain a sample of his blood
- Batman Arkham City: Defeat Ra's al Ghul
- Batman Arkham City: Return to the GCPD to deliver the blood of Ra's al Ghul to Mister Freeze
- Batman Arkham City: Interrogate Quincy Sharp for information on Hugo Strange
- Batman Arkham City: Return to the GCPD to deliver the blood of Ra's al Ghul to Mister Freeze (part 2)
- Batman Arkham City: Defeat Mister Freeze
- Batman Arkham City: Infiltrate the Steel Mill
- Batman Arkham City: Rescue Vicki Vale from chopper crash site
- Batman Arkham City: Infiltrate the Steel Mill (part 2)
- Batman Arkham City: Locate Joker in the Steel Mill
- Batman Arkham City: Defeat Joker
- Batman Arkham City: Scan the TYGER helicopter to locate the Master Control Program
- Batman Arkham City: Retrieve Master Control Program transmitter from Primary Helicopter
- Batman Arkham City: Gain access to Wonder Tower
- Batman Arkham City: Climb the observation deck to stop Protocol 10
- Batman Arkham City: Follow tracker to save Talia from Joker
- Batman Arkham City: Get the cure from Joker and stop him from becoming immortal
- Batman Arkham City: Main story
- Batman Arkham City: Game Guide
You are not permitted to copy any image, text or info from this page. This site is not associated with and/or endorsed by the developers and the publishers. All logos and images are copyrighted by their respective owners.
Copyright © 2000 - 2026 Webedia Polska SA for gamepressure.com, unofficial game guides, walkthroughs, secrets, game tips, maps & strategies for top games.