Dark Souls: Anor Londo - p. 3
Once you kill both knights, run under the arch to the right (as the door is closed).

Watch out for next gargoyles - some of them are lurking below at the wall.

A good and simple technique while fighting with them is to push them down into abyss - you can do it when monsters stand next to the edge. Just block their attack with your shield.

Now you have to run to a lower part of the location on a bay with spikes. There are two gargoyles lurking down there. You can't fight them on this "bridge", because you can be hit by crossbowmen.

In this case it is best to shoot a floor in the lower tower. Gargoyles will appear from around the corner. So now shoot them - they will tray top attack you but they will block themselves on sharp elements of the bridge. One of them usually falls down after few seconds. Otherwise, kill him with a bow.

After eliminating one of the enemies, run down and do not stop. Block the first blow from gargoyle and enter the tower. Inside the tower hide behind the column to the left, and kill the beast.

The next fragment is extremely difficult - you have to go up over two bays, under the fire of powerful crossbowmen.

A first part of this difficult moment is easy - run up. Then hide behind a pillar in the middle of the road.
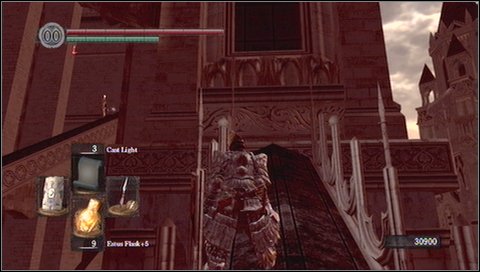
A problem is that you have to get to the top, avoiding bolts and then turn to the right to one of them and kill him. Enemies are very strong and tough. The simplest tactics, if you're properly equipped, is to parry their blows and counterattack. Equip a good shield and run up the bay.
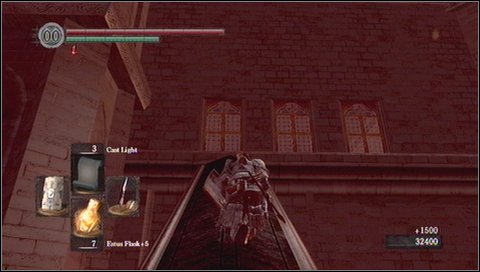
At the top quickly turn right and roll over or jump towards the enemy.

Block first blows to get know his attacks. Then parry his blows with a shield and counterattack. You can't retreat too far, because another crossbowman can attack you.
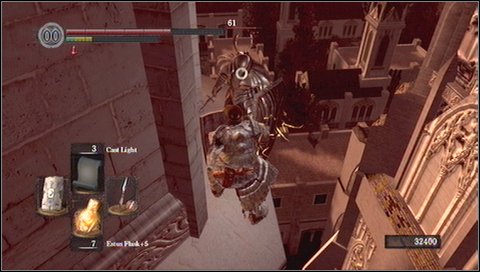
Once you kill the enemy, do not go to kill his colleague on the other side (unless you want to risk). Instead of that, follow the edge and jump down on the balcony below.

Go inside through fog.

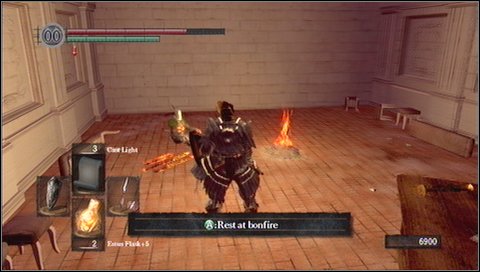
In the corridor turn to the left and open the door.

Light the bonfire inside.

- Dark Souls Game Guide & Walkthrough
- Dark Souls: Game Guide
- Dark Souls: Walkthrough
- Dark Souls: In which order should you visit locations?
- Dark Souls: Undead Asylum
- Dark Souls: Firelink Shrine
- Dark Souls: Firelink Shrine -> Undead Burg
- Dark Souls: Undead Burg - p. 1
- Dark Souls: Undead Burg - p. 2
- Dark Souls: Undead Burg - A bridge with Wyvern
- Dark Souls: Undead Parish - p. 1
- Dark Souls: Undead Parish - p. 2
- Dark Souls: Undead Parish - p. 3
- Dark Souls: Undead Burg -> Depths
- Dark Souls: Depths - p. 1
- Dark Souls: Depths - p. 2
- Dark Souls: Depths - p. 3
- Dark Souls: Blighttown - p. 1
- Dark Souls: Blighttown - p. 2
- Dark Souls: Blighttown - p. 3
- Dark Souls: Blighttown - Swamps
- Dark Souls: Blighttown -> Quelaag's Domain
- Dark Souls: Darkroot Garden - p. 1
- Dark Souls: Darkroot Garden - p. 2
- Dark Souls: Darkroot Basin
- Dark Souls: Sen's Fortress - p. 1
- Dark Souls: Sen's Fortress - p. 2
- Dark Souls: Sen's Fortress - p. 3
- Dark Souls: Sen's Fortress - p. 4
- Dark Souls: Sen's Fortress - p. 5
- Dark Souls: Anor Londo - p. 1
- Dark Souls: Anor Londo - p. 2
- Dark Souls: Anor Londo - p. 3
- Dark Souls: Anor Londo - p. 4
- Dark Souls: Anor Londo - p. 5
- Dark Souls: Anor Londo - p. 6
- Dark Souls: Lordvessel
- Dark Souls: Darkroot Basin -> Darkroot Garden II
- Dark Souls: Darkroot Garden II
- Dark Souls: New Londo Ruins - p. 1
- Dark Souls: New Londo Ruins - p. 2
- Dark Souls: New Londo Ruins - Lower level
- Dark Souls: The Catacombs - p. 1
- Dark Souls: The Catacombs - p. 2
- Dark Souls: The Catacombs - p. 3
- Dark Souls: Tomb of Giants - p. 1
- Dark Souls: Tomb of Giants - p. 2
- Dark Souls: Demon Ruins - p. 1
- Dark Souls: Demon Ruins - p. 2
- Dark Souls: Lost Izalith - p. 1
- Dark Souls: Lost Izalith - p. 2
- Dark Souls: The Duke's Archives - p. 1
- Dark Souls: The Duke's Archives - p. 2
- Dark Souls: The Duke's Archives - Prison
- Dark Souls: The Duke's Archives II - p. 1
- Dark Souls: The Duke's Archives II - p. 2
- Dark Souls: Crystal Cave
- Dark Souls: Kiln of the First Flame
- Dark Souls: Two game endings
- Dark Souls: Bonus - Valley of Drakes
- Dark Souls: Bonus - The Great Hollow
- Dark Souls: Bonus - Ash Lake
- Dark Souls: Bonus - Painted World of Ariamis - p. 1
- Dark Souls: Bonus - Painted World of Ariamis - p. 2
- Dark Souls: Bonus - Painted World of Ariamis - p. 3
- Dark Souls: Walkthrough
- Dark Souls: Game Guide
You are not permitted to copy any image, text or info from this page. This site is not associated with and/or endorsed by the developers and the publishers. All logos and images are copyrighted by their respective owners.
Copyright © 2000 - 2026 Webedia Polska SA for gamepressure.com, unofficial game guides, walkthroughs, secrets, game tips, maps & strategies for top games.