Dark Souls: Blighttown - Swamps
Keep going down, killing other spiders. Once you get to swamps, run along the right wall - there is a bonfire nearby.

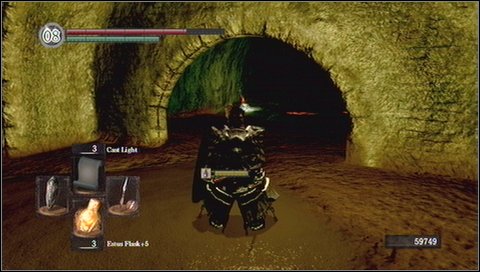
A bonfire can be found in a niche to the right. Light it on. Warning! In a corridor behind the bonfire you'll find a chest with Dragon Scale. From this bonfire you can go to several places and visit the entire swamp. Before you choose where you want to go, read all possibilities!
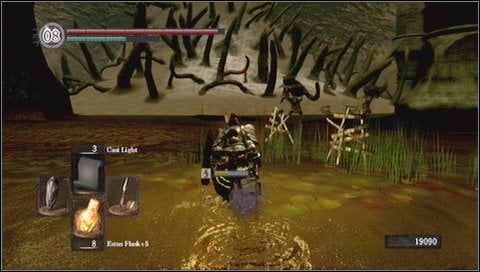
If you go to the right from bonfire, you'll get to the platform leading up to another complex of ladders, chambers and corners. Going there you will have to use a machine with walkways to go up. You'll reach a tunnel full of flaming door and enemies with blowdarts. It is worth to take look there, because at the end you'll find Fire Keeper Soul among other things.

On the platforms on the other side of the machine (you can get there over roots) you'll find more items: Crimson Set, Tin Banishment Catalyst and spell Remedy.

After collecting these items, go back over the roots over the machine and climb up. At the top you'll find a chest with Key to New Londo Ruins. A path near the chest leads to a cavern with a shortcut to Valley of the Drakes. Form that area you can easily get to Firelink Shrine. Unfortunately the passage is guarded by three ogres with clubs (you can run past and ignore them or kill them one by one).

 |  |
Once you get to Valley of the Drakes walk over the narrow bridge and head to the left. [1] Open the gate - a shortcut to New Londo Ruins and Firelink Shrine is created! [2] From a location in front of the gate you can go along the rocks to the main part of Valley of the Drakes. Watch out though for an undead dragon on your way. You can kill him with a bow from the distance.
After visiting the path described above, return to the bonfire in Blighttown swamps.
A path to the left from the bonfire, towards a giant tree, leads to the area occupied by leeches. From that place you can also enter The Great Hollow (and later Ash Lake). You can get there by climbing the giant root growing from a swamp (check the description of The Great Hollow).

But it is best to deal with Chaos Witch Quelaag - your opponent can be found inside the white hill with thorns, in front of the bonfire (Quelaag's Domain). The area is also guarded by giants throwing boulders - these are slow enemies with mighty blows. You can easily defeat them on the ground, just avoiding their slow attacks.

- Dark Souls Game Guide & Walkthrough
- Dark Souls: Game Guide
- Dark Souls: Walkthrough
- Dark Souls: In which order should you visit locations?
- Dark Souls: Undead Asylum
- Dark Souls: Firelink Shrine
- Dark Souls: Firelink Shrine -> Undead Burg
- Dark Souls: Undead Burg - p. 1
- Dark Souls: Undead Burg - p. 2
- Dark Souls: Undead Burg - A bridge with Wyvern
- Dark Souls: Undead Parish - p. 1
- Dark Souls: Undead Parish - p. 2
- Dark Souls: Undead Parish - p. 3
- Dark Souls: Undead Burg -> Depths
- Dark Souls: Depths - p. 1
- Dark Souls: Depths - p. 2
- Dark Souls: Depths - p. 3
- Dark Souls: Blighttown - p. 1
- Dark Souls: Blighttown - p. 2
- Dark Souls: Blighttown - p. 3
- Dark Souls: Blighttown - Swamps
- Dark Souls: Blighttown -> Quelaag's Domain
- Dark Souls: Darkroot Garden - p. 1
- Dark Souls: Darkroot Garden - p. 2
- Dark Souls: Darkroot Basin
- Dark Souls: Sen's Fortress - p. 1
- Dark Souls: Sen's Fortress - p. 2
- Dark Souls: Sen's Fortress - p. 3
- Dark Souls: Sen's Fortress - p. 4
- Dark Souls: Sen's Fortress - p. 5
- Dark Souls: Anor Londo - p. 1
- Dark Souls: Anor Londo - p. 2
- Dark Souls: Anor Londo - p. 3
- Dark Souls: Anor Londo - p. 4
- Dark Souls: Anor Londo - p. 5
- Dark Souls: Anor Londo - p. 6
- Dark Souls: Lordvessel
- Dark Souls: Darkroot Basin -> Darkroot Garden II
- Dark Souls: Darkroot Garden II
- Dark Souls: New Londo Ruins - p. 1
- Dark Souls: New Londo Ruins - p. 2
- Dark Souls: New Londo Ruins - Lower level
- Dark Souls: The Catacombs - p. 1
- Dark Souls: The Catacombs - p. 2
- Dark Souls: The Catacombs - p. 3
- Dark Souls: Tomb of Giants - p. 1
- Dark Souls: Tomb of Giants - p. 2
- Dark Souls: Demon Ruins - p. 1
- Dark Souls: Demon Ruins - p. 2
- Dark Souls: Lost Izalith - p. 1
- Dark Souls: Lost Izalith - p. 2
- Dark Souls: The Duke's Archives - p. 1
- Dark Souls: The Duke's Archives - p. 2
- Dark Souls: The Duke's Archives - Prison
- Dark Souls: The Duke's Archives II - p. 1
- Dark Souls: The Duke's Archives II - p. 2
- Dark Souls: Crystal Cave
- Dark Souls: Kiln of the First Flame
- Dark Souls: Two game endings
- Dark Souls: Bonus - Valley of Drakes
- Dark Souls: Bonus - The Great Hollow
- Dark Souls: Bonus - Ash Lake
- Dark Souls: Bonus - Painted World of Ariamis - p. 1
- Dark Souls: Bonus - Painted World of Ariamis - p. 2
- Dark Souls: Bonus - Painted World of Ariamis - p. 3
- Dark Souls: Walkthrough
- Dark Souls: Game Guide
You are not permitted to copy any image, text or info from this page. This site is not associated with and/or endorsed by the developers and the publishers. All logos and images are copyrighted by their respective owners.
Copyright © 2000 - 2026 Webedia Polska SA for gamepressure.com, unofficial game guides, walkthroughs, secrets, game tips, maps & strategies for top games.