Dark Souls: Blighttown - p. 1
After the fight with Gaping Dragon, you will obtain a key to Blightown. Enter the location through a door near the arena in Depths and behind the merchant.
Go down the ladder (on the left). In this location you'll often move this way. Sometimes it is hard to see a ladder but they are usually marked with torches.

In the darkness you'll see ogres/trolls armed with clubs (stubby humanoid creatures). They are dangerous opponents, whose blows can't be rather blocked. A fight with two of them at once is tough - it is better to lure out only one of them at a time.

Try to lure them out using arrows (aim at head to inflict more damage). If you prefer a melee fight then be very careful. Enemies are slow, but there is not too much place for maneuvers. You have to get behind the opponent and then attack him.
Going forward you'll encounter weaker but also dangerous violet ghouls. It is best to lure them one by one and kill. Some of them will be hiding on boards below. Look around carefully while moving, because enemies sometimes move towards you and you do not want them to surprise you.

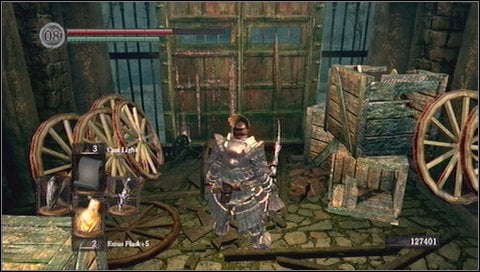
A several meters further, next to wooden construction, you'll see a warrior with a blowdart. His shoots are toxic. If you have a bow, you can kill him quickly from a distance, avoiding his darts.

After the fight you'll be able to see a further part of the location with the "window to outside" in the background. From this position you can lure several ghouls standing on distance platforms and kill them.

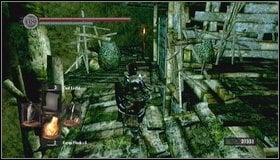 |  |
Before you go any further, you might take a look to the right, where you've killed blowdart monster previously. [1] Then you can go down a ladder and move back a little to pick up souls. [2]
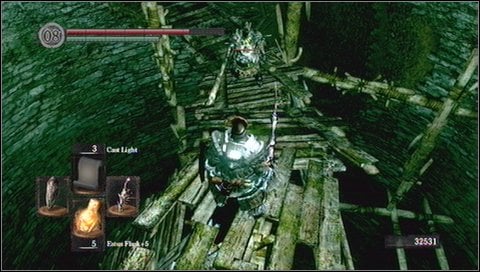
Go on. On a stone transverse element of the "bridge" you can see a bonfire. You'll get there soon. Bonus - if you stand in a place as seen on screen below, you can jump down on the rooftop of one of the building below to pick up Iaito weapon. This jump is quite demanding, so you can try it later, after unlocking a local bonfire.

Go down, walking on the right side and using narrow bridges. After a moment you'll see an item - if you jump to pick it up, the floor will collapse under you and you'll fall down.


- Dark Souls Game Guide & Walkthrough
- Dark Souls: Game Guide
- Dark Souls: Walkthrough
- Dark Souls: In which order should you visit locations?
- Dark Souls: Undead Asylum
- Dark Souls: Firelink Shrine
- Dark Souls: Firelink Shrine -> Undead Burg
- Dark Souls: Undead Burg - p. 1
- Dark Souls: Undead Burg - p. 2
- Dark Souls: Undead Burg - A bridge with Wyvern
- Dark Souls: Undead Parish - p. 1
- Dark Souls: Undead Parish - p. 2
- Dark Souls: Undead Parish - p. 3
- Dark Souls: Undead Burg -> Depths
- Dark Souls: Depths - p. 1
- Dark Souls: Depths - p. 2
- Dark Souls: Depths - p. 3
- Dark Souls: Blighttown - p. 1
- Dark Souls: Blighttown - p. 2
- Dark Souls: Blighttown - p. 3
- Dark Souls: Blighttown - Swamps
- Dark Souls: Blighttown -> Quelaag's Domain
- Dark Souls: Darkroot Garden - p. 1
- Dark Souls: Darkroot Garden - p. 2
- Dark Souls: Darkroot Basin
- Dark Souls: Sen's Fortress - p. 1
- Dark Souls: Sen's Fortress - p. 2
- Dark Souls: Sen's Fortress - p. 3
- Dark Souls: Sen's Fortress - p. 4
- Dark Souls: Sen's Fortress - p. 5
- Dark Souls: Anor Londo - p. 1
- Dark Souls: Anor Londo - p. 2
- Dark Souls: Anor Londo - p. 3
- Dark Souls: Anor Londo - p. 4
- Dark Souls: Anor Londo - p. 5
- Dark Souls: Anor Londo - p. 6
- Dark Souls: Lordvessel
- Dark Souls: Darkroot Basin -> Darkroot Garden II
- Dark Souls: Darkroot Garden II
- Dark Souls: New Londo Ruins - p. 1
- Dark Souls: New Londo Ruins - p. 2
- Dark Souls: New Londo Ruins - Lower level
- Dark Souls: The Catacombs - p. 1
- Dark Souls: The Catacombs - p. 2
- Dark Souls: The Catacombs - p. 3
- Dark Souls: Tomb of Giants - p. 1
- Dark Souls: Tomb of Giants - p. 2
- Dark Souls: Demon Ruins - p. 1
- Dark Souls: Demon Ruins - p. 2
- Dark Souls: Lost Izalith - p. 1
- Dark Souls: Lost Izalith - p. 2
- Dark Souls: The Duke's Archives - p. 1
- Dark Souls: The Duke's Archives - p. 2
- Dark Souls: The Duke's Archives - Prison
- Dark Souls: The Duke's Archives II - p. 1
- Dark Souls: The Duke's Archives II - p. 2
- Dark Souls: Crystal Cave
- Dark Souls: Kiln of the First Flame
- Dark Souls: Two game endings
- Dark Souls: Bonus - Valley of Drakes
- Dark Souls: Bonus - The Great Hollow
- Dark Souls: Bonus - Ash Lake
- Dark Souls: Bonus - Painted World of Ariamis - p. 1
- Dark Souls: Bonus - Painted World of Ariamis - p. 2
- Dark Souls: Bonus - Painted World of Ariamis - p. 3
- Dark Souls: Walkthrough
- Dark Souls: Game Guide
You are not permitted to copy any image, text or info from this page. This site is not associated with and/or endorsed by the developers and the publishers. All logos and images are copyrighted by their respective owners.
Copyright © 2000 - 2026 Webedia Polska SA for gamepressure.com, unofficial game guides, walkthroughs, secrets, game tips, maps & strategies for top games.