Dark Souls: Lost Izalith - p. 2
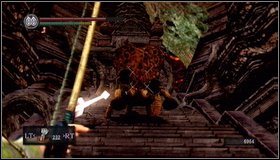 |  |
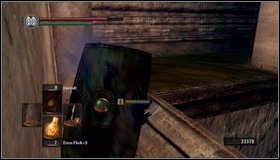
At the bottom of the stairs you'll see a very strange creature (a walking octopus?) - lure it out with arrows. [1] Be very careful fighting the beast: if you stay too long near tentacles, you risk that you'll be swallowed which can be fatal. [2]
 |  |
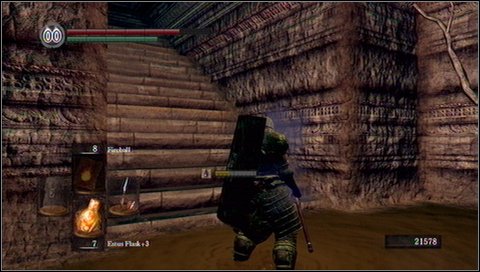
Run up the stairs and walk through a small chamber to the right. [1] You'll find yourself in an area with three paths. [2]
 |  |
First go to the right. [1] Go down the branch to the lower tower. Here you'll find 2 statues and two items: a soul and Rare Ring of Sacrifice (on the outside part of the wall - you have to gently descend on the branch). [2]
 | 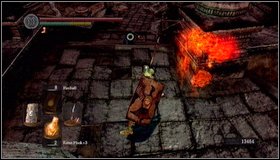 |
Go back to the starting point and go up the stairs to the left. [1] At the top you'll encounter a dangerous enemy - a mage. [2] The mage can cast area spells (everything starts burning) and has a "flamethrower" (similar to flame spitting statues - but he is weaker).
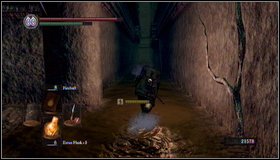
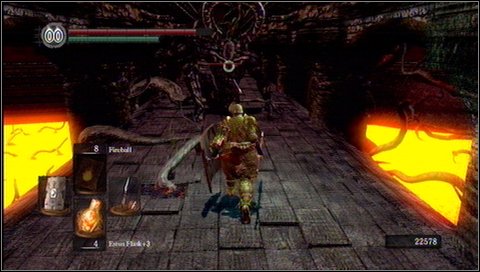
 | ![Before you go to the large foggy passage [1], move ahead - Lost Izalith - p. 2 | Walkthrough - Walkthrough - Dark Souls Game Guide & Walkthrough](/darksouls/gfx/word/468449546.jpg) |
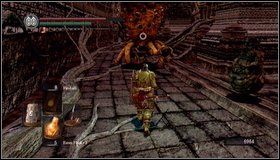
Before you go to the large foggy passage [1], move ahead. After turning to the right, you'll encounter another monster with tentacles. [2] Behind him you'll find a chest with spell Chaos Firewhip.
Now you can take a look at the lower part of this location - go down the branch there. Watch out for statues - there are a lot of them.

 | 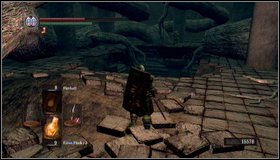 |
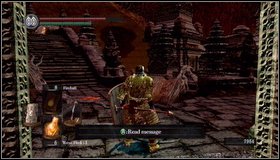
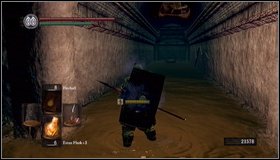
Once you get to the bottom, kill statues and turn to the tunnel where you can see an item. [1] The floor will collapse. [2]
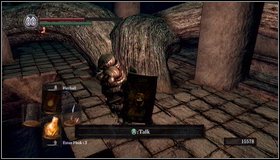 |  |
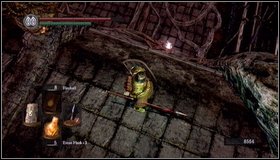
Look for the onion-knight. [1] After short conversation, he should engage tentacle monsters. Follow him and try to save him. [2]
 |  |
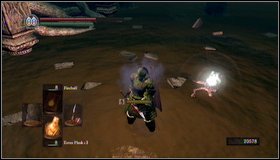
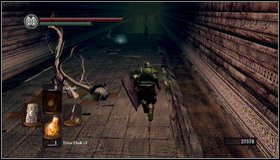
In water you'll be poisoned and slowed down - you should wear Rusted Iron Ring (makes walking in mud easier). Kill rest of monsters [1] and watch out for holes in the ground. [2]
Behind the hole to the right you'll find a way up the stairs.
 |  |
If you go behind an opposite hole in the ground, you'll get to the long corridor. [1] Move forward until you'll reach the stairs but collect a treasure from a chest (in one of the side branches). [2]
Use one of the roots to go up.

 |  |
From this part of the location you can go to the long bridge through one of the side buildings. [1] On the bridge you'll meet Titanite Demon and evil version of Solaire of Astoria knight. [2]
You can kill Titanie Demon in two ways - in a melee fight or from a half distance. The second method is safer but slow - it is enough to shoot your enemy with 1-2 arrows in pauses between his spells.
 | 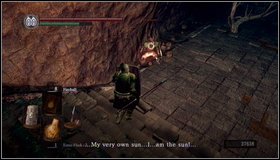 |
At the end of the bridge you'll find a magic animal with resources (it starts fleeing). [1] There will be also Solaire of Astoria mentioned before. [2] He is no too difficult to defeat - most of his attacks can be blocked. As a reward for killing him you'll get his armor and shield. And if you kill all creatures here, you'll receive a sunlight maggot helmet.
After exploring all crannies, go through the foggy passage to deal with The Bed of Chaos.

- Dark Souls Game Guide & Walkthrough
- Dark Souls: Game Guide
- Dark Souls: Walkthrough
- Dark Souls: In which order should you visit locations?
- Dark Souls: Undead Asylum
- Dark Souls: Firelink Shrine
- Dark Souls: Firelink Shrine -> Undead Burg
- Dark Souls: Undead Burg - p. 1
- Dark Souls: Undead Burg - p. 2
- Dark Souls: Undead Burg - A bridge with Wyvern
- Dark Souls: Undead Parish - p. 1
- Dark Souls: Undead Parish - p. 2
- Dark Souls: Undead Parish - p. 3
- Dark Souls: Undead Burg -> Depths
- Dark Souls: Depths - p. 1
- Dark Souls: Depths - p. 2
- Dark Souls: Depths - p. 3
- Dark Souls: Blighttown - p. 1
- Dark Souls: Blighttown - p. 2
- Dark Souls: Blighttown - p. 3
- Dark Souls: Blighttown - Swamps
- Dark Souls: Blighttown -> Quelaag's Domain
- Dark Souls: Darkroot Garden - p. 1
- Dark Souls: Darkroot Garden - p. 2
- Dark Souls: Darkroot Basin
- Dark Souls: Sen's Fortress - p. 1
- Dark Souls: Sen's Fortress - p. 2
- Dark Souls: Sen's Fortress - p. 3
- Dark Souls: Sen's Fortress - p. 4
- Dark Souls: Sen's Fortress - p. 5
- Dark Souls: Anor Londo - p. 1
- Dark Souls: Anor Londo - p. 2
- Dark Souls: Anor Londo - p. 3
- Dark Souls: Anor Londo - p. 4
- Dark Souls: Anor Londo - p. 5
- Dark Souls: Anor Londo - p. 6
- Dark Souls: Lordvessel
- Dark Souls: Darkroot Basin -> Darkroot Garden II
- Dark Souls: Darkroot Garden II
- Dark Souls: New Londo Ruins - p. 1
- Dark Souls: New Londo Ruins - p. 2
- Dark Souls: New Londo Ruins - Lower level
- Dark Souls: The Catacombs - p. 1
- Dark Souls: The Catacombs - p. 2
- Dark Souls: The Catacombs - p. 3
- Dark Souls: Tomb of Giants - p. 1
- Dark Souls: Tomb of Giants - p. 2
- Dark Souls: Demon Ruins - p. 1
- Dark Souls: Demon Ruins - p. 2
- Dark Souls: Lost Izalith - p. 1
- Dark Souls: Lost Izalith - p. 2
- Dark Souls: The Duke's Archives - p. 1
- Dark Souls: The Duke's Archives - p. 2
- Dark Souls: The Duke's Archives - Prison
- Dark Souls: The Duke's Archives II - p. 1
- Dark Souls: The Duke's Archives II - p. 2
- Dark Souls: Crystal Cave
- Dark Souls: Kiln of the First Flame
- Dark Souls: Two game endings
- Dark Souls: Bonus - Valley of Drakes
- Dark Souls: Bonus - The Great Hollow
- Dark Souls: Bonus - Ash Lake
- Dark Souls: Bonus - Painted World of Ariamis - p. 1
- Dark Souls: Bonus - Painted World of Ariamis - p. 2
- Dark Souls: Bonus - Painted World of Ariamis - p. 3
- Dark Souls: Walkthrough
- Dark Souls: Game Guide
You are not permitted to copy any image, text or info from this page. This site is not associated with and/or endorsed by the developers and the publishers. All logos and images are copyrighted by their respective owners.
Copyright © 2000 - 2026 Webedia Polska SA for gamepressure.com, unofficial game guides, walkthroughs, secrets, game tips, maps & strategies for top games.