Dark Souls: The Duke's Archives - p. 1
You can get to The Duke's Archives only after placing Lordvessel under Firelink Shrine.
 | 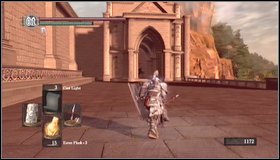 |
In order to get to The Duke's Archives. Move to the bonfire Anor Londo (use the Warp option) and go up. [1] Turn left heading to the building. [2]
|  |

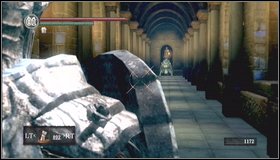
Run through the right exit and kill or bypass a knight blocking the passage. [1] Follow the stairs. [2]
A further way leads up.

 |  |
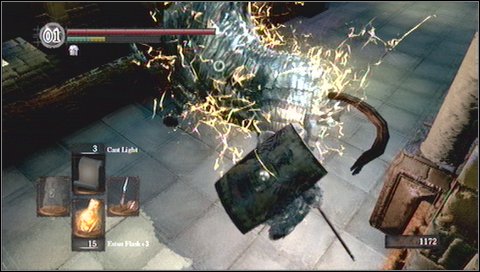
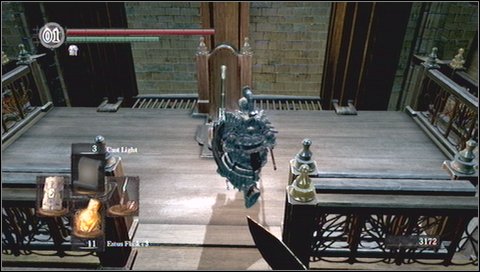
You'll get to a long corridor - at its end you'll encounter the armored boar. You can lure him out with an arrow. [1] Block his attack with your shield. [2]
A fight with upgraded version of the boar is not too difficult - you have to stick on his side and block his attacks. The boar can kick with his legs, attack with his muzzle and even reach you, when you walk next to him, but in the last from this positions you'll be however most safe.
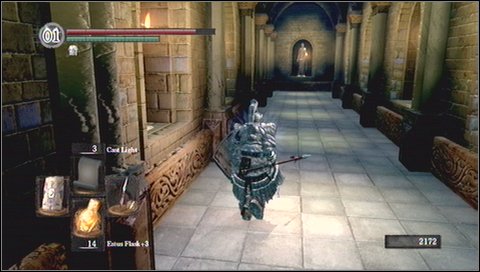
After killing the boar, turn to the left and prepare for a fight with next such a best, lurking around the corner to the right.
 |  |
You'll get to the larger chamber. [1] Light on the bonfire. [2]
Use the elevator by pulling the lever.
 |  |
At the top you'll be attacked by crystal goblins - retreat behind the corner to hide from enemy archers and kill knights. [1] After killing the first group of enemies, enter inside and look for others. Keep hiding from archers. [2] Also, find the Crystal Golem. Kill it and claim the necklace (it is required to unlock the Sanctuary Oolacile from the Artorias Of The Abyss DLC). If the AoTA DLC is not installed, the golem will drop Titanite Chunk.
 |  |
Run to archers and kill them. [1] Watch out however for goblins reinforcements - they will come running from the next section. In the next chamber you'll additionally encounter an enemy mage. [2]

- Dark Souls Game Guide & Walkthrough
- Dark Souls: Game Guide
- Dark Souls: Walkthrough
- Dark Souls: In which order should you visit locations?
- Dark Souls: Undead Asylum
- Dark Souls: Firelink Shrine
- Dark Souls: Firelink Shrine -> Undead Burg
- Dark Souls: Undead Burg - p. 1
- Dark Souls: Undead Burg - p. 2
- Dark Souls: Undead Burg - A bridge with Wyvern
- Dark Souls: Undead Parish - p. 1
- Dark Souls: Undead Parish - p. 2
- Dark Souls: Undead Parish - p. 3
- Dark Souls: Undead Burg -> Depths
- Dark Souls: Depths - p. 1
- Dark Souls: Depths - p. 2
- Dark Souls: Depths - p. 3
- Dark Souls: Blighttown - p. 1
- Dark Souls: Blighttown - p. 2
- Dark Souls: Blighttown - p. 3
- Dark Souls: Blighttown - Swamps
- Dark Souls: Blighttown -> Quelaag's Domain
- Dark Souls: Darkroot Garden - p. 1
- Dark Souls: Darkroot Garden - p. 2
- Dark Souls: Darkroot Basin
- Dark Souls: Sen's Fortress - p. 1
- Dark Souls: Sen's Fortress - p. 2
- Dark Souls: Sen's Fortress - p. 3
- Dark Souls: Sen's Fortress - p. 4
- Dark Souls: Sen's Fortress - p. 5
- Dark Souls: Anor Londo - p. 1
- Dark Souls: Anor Londo - p. 2
- Dark Souls: Anor Londo - p. 3
- Dark Souls: Anor Londo - p. 4
- Dark Souls: Anor Londo - p. 5
- Dark Souls: Anor Londo - p. 6
- Dark Souls: Lordvessel
- Dark Souls: Darkroot Basin -> Darkroot Garden II
- Dark Souls: Darkroot Garden II
- Dark Souls: New Londo Ruins - p. 1
- Dark Souls: New Londo Ruins - p. 2
- Dark Souls: New Londo Ruins - Lower level
- Dark Souls: The Catacombs - p. 1
- Dark Souls: The Catacombs - p. 2
- Dark Souls: The Catacombs - p. 3
- Dark Souls: Tomb of Giants - p. 1
- Dark Souls: Tomb of Giants - p. 2
- Dark Souls: Demon Ruins - p. 1
- Dark Souls: Demon Ruins - p. 2
- Dark Souls: Lost Izalith - p. 1
- Dark Souls: Lost Izalith - p. 2
- Dark Souls: The Duke's Archives - p. 1
- Dark Souls: The Duke's Archives - p. 2
- Dark Souls: The Duke's Archives - Prison
- Dark Souls: The Duke's Archives II - p. 1
- Dark Souls: The Duke's Archives II - p. 2
- Dark Souls: Crystal Cave
- Dark Souls: Kiln of the First Flame
- Dark Souls: Two game endings
- Dark Souls: Bonus - Valley of Drakes
- Dark Souls: Bonus - The Great Hollow
- Dark Souls: Bonus - Ash Lake
- Dark Souls: Bonus - Painted World of Ariamis - p. 1
- Dark Souls: Bonus - Painted World of Ariamis - p. 2
- Dark Souls: Bonus - Painted World of Ariamis - p. 3
- Dark Souls: Walkthrough
- Dark Souls: Game Guide
You are not permitted to copy any image, text or info from this page. This site is not associated with and/or endorsed by the developers and the publishers. All logos and images are copyrighted by their respective owners.
Copyright © 2000 - 2026 Webedia Polska SA for gamepressure.com, unofficial game guides, walkthroughs, secrets, game tips, maps & strategies for top games.