Dark Souls: The Catacombs - p. 3
 |  |
If you return to the spiral stairs down (leading to the previous lever), you can get to the blacksmith Vamos. [1] Just slide along the right wall down. [2]
 | 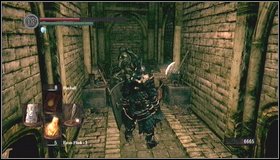 |
At the bottom jump into the hole in the floor. [1] After a short cutscene you can use blacksmith's services. [2]
 |  |
You can leave Vamos' chamber through the hole made by him. [1] Outside you'll have to deal with Pinwheels - block them with a shield and attack when they stop. It is best to stand next to the wall, so enemies will stop on it. [2]
 |  |
From this place you can go in two ways - if you go to the right from Vamos, you'll get to the boss' chamber. If you go to the opposite direction, you'll return to the bypassed part of the location (which normally is accessed by the bridge rotated previously). [2] You can be attacked by a knight on your way.
 |  |
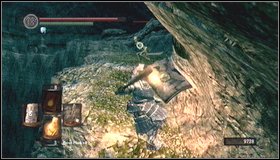
It is worth to return to the earlier fragment in order to get rid of necromancers and obtain additional items. If you go back and reach the corridor, turn to the left - right behind a corner you'll encounter a necromancer with two skeletons. [1] Use ladders to go up. [2]
In a chamber with two tombs you can go to the clearly marked places to fall down and collect additional items.
Go back to the top using the second ladder
.
 |  |
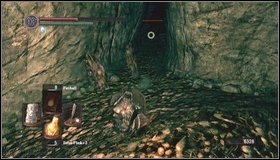
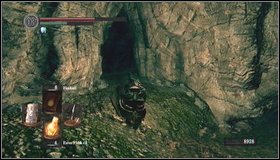
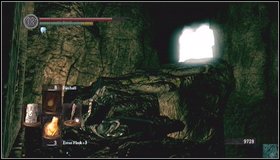
You'll find yourself in the dark corridor - on one side you'll find Titanite Demon. Demon guards three Eye of Death and a secret chamber with Nito (in the coffin). [1] If you walk to the opposite direction, you'll go outside. [2]
 |  |
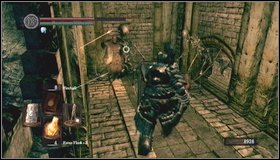
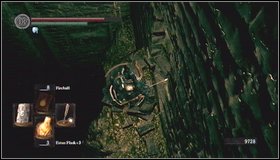
Follow this direction until you get to the passage behind fog, which you've previously seen from the other side (rotated bridge was leading there). [1] In a lower part of the chamber with foggy passage you can find a bricked passage - break it down. [2]
 | 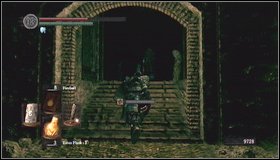 |
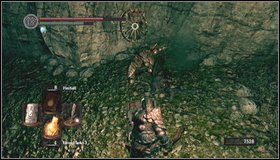
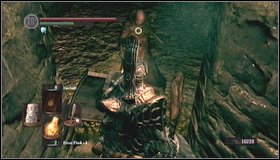
Once you get to the other side, turn to the right - jump down on the skeleton and kill him. [1] Jump down again and kill all opponents. Use the stairs to get to the corridor with a huge statue at its end. [2]
 | 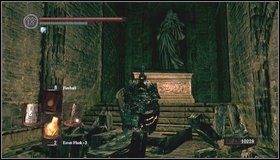 |
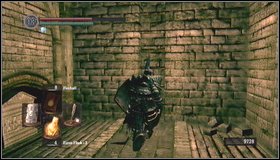
In the middle of the way to the statue, a giant skeleton will jump on you. [1] Kill him and then collect a ring from a tomb (Darkmoon Seance Ring). [2]
 |  |
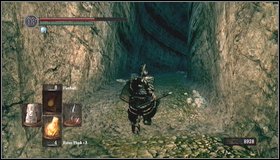
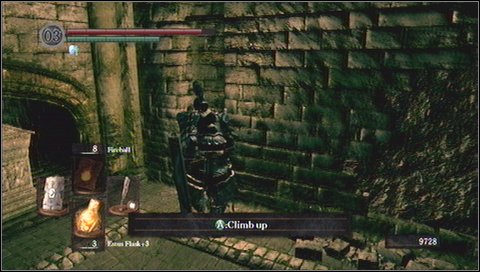
Next to the tomb you'll find one more passage - a hole in the wall. [1] If you follow this way you'll encounter another necromancer. [2] Further you'll find a miracle Tranquil Walk of Peace.
After exploring the location, go down and fight with Pinwheel.


- Dark Souls Game Guide & Walkthrough
- Dark Souls: Game Guide
- Dark Souls: Walkthrough
- Dark Souls: In which order should you visit locations?
- Dark Souls: Undead Asylum
- Dark Souls: Firelink Shrine
- Dark Souls: Firelink Shrine -> Undead Burg
- Dark Souls: Undead Burg - p. 1
- Dark Souls: Undead Burg - p. 2
- Dark Souls: Undead Burg - A bridge with Wyvern
- Dark Souls: Undead Parish - p. 1
- Dark Souls: Undead Parish - p. 2
- Dark Souls: Undead Parish - p. 3
- Dark Souls: Undead Burg -> Depths
- Dark Souls: Depths - p. 1
- Dark Souls: Depths - p. 2
- Dark Souls: Depths - p. 3
- Dark Souls: Blighttown - p. 1
- Dark Souls: Blighttown - p. 2
- Dark Souls: Blighttown - p. 3
- Dark Souls: Blighttown - Swamps
- Dark Souls: Blighttown -> Quelaag's Domain
- Dark Souls: Darkroot Garden - p. 1
- Dark Souls: Darkroot Garden - p. 2
- Dark Souls: Darkroot Basin
- Dark Souls: Sen's Fortress - p. 1
- Dark Souls: Sen's Fortress - p. 2
- Dark Souls: Sen's Fortress - p. 3
- Dark Souls: Sen's Fortress - p. 4
- Dark Souls: Sen's Fortress - p. 5
- Dark Souls: Anor Londo - p. 1
- Dark Souls: Anor Londo - p. 2
- Dark Souls: Anor Londo - p. 3
- Dark Souls: Anor Londo - p. 4
- Dark Souls: Anor Londo - p. 5
- Dark Souls: Anor Londo - p. 6
- Dark Souls: Lordvessel
- Dark Souls: Darkroot Basin -> Darkroot Garden II
- Dark Souls: Darkroot Garden II
- Dark Souls: New Londo Ruins - p. 1
- Dark Souls: New Londo Ruins - p. 2
- Dark Souls: New Londo Ruins - Lower level
- Dark Souls: The Catacombs - p. 1
- Dark Souls: The Catacombs - p. 2
- Dark Souls: The Catacombs - p. 3
- Dark Souls: Tomb of Giants - p. 1
- Dark Souls: Tomb of Giants - p. 2
- Dark Souls: Demon Ruins - p. 1
- Dark Souls: Demon Ruins - p. 2
- Dark Souls: Lost Izalith - p. 1
- Dark Souls: Lost Izalith - p. 2
- Dark Souls: The Duke's Archives - p. 1
- Dark Souls: The Duke's Archives - p. 2
- Dark Souls: The Duke's Archives - Prison
- Dark Souls: The Duke's Archives II - p. 1
- Dark Souls: The Duke's Archives II - p. 2
- Dark Souls: Crystal Cave
- Dark Souls: Kiln of the First Flame
- Dark Souls: Two game endings
- Dark Souls: Bonus - Valley of Drakes
- Dark Souls: Bonus - The Great Hollow
- Dark Souls: Bonus - Ash Lake
- Dark Souls: Bonus - Painted World of Ariamis - p. 1
- Dark Souls: Bonus - Painted World of Ariamis - p. 2
- Dark Souls: Bonus - Painted World of Ariamis - p. 3
- Dark Souls: Walkthrough
- Dark Souls: Game Guide
You are not permitted to copy any image, text or info from this page. This site is not associated with and/or endorsed by the developers and the publishers. All logos and images are copyrighted by their respective owners.
Copyright © 2000 - 2026 Webedia Polska SA for gamepressure.com, unofficial game guides, walkthroughs, secrets, game tips, maps & strategies for top games.