Dark Souls: Undead Asylum
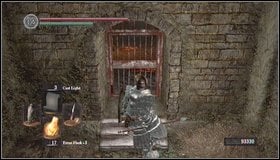 | 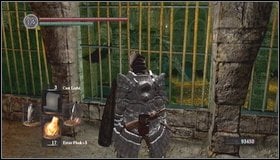 |
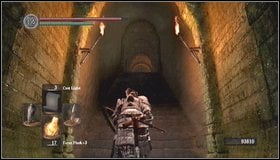
Pick up a key in center of a cell and go out through the door. [1] You'll see a big boss to the right behind bars. Do not worry though - you'll flight him only during your second visit in Undead Asylum. [2]
 | ![Go through a chamber filled with water [1] and go up a ladder - Undead Asylum | Walkthrough - Walkthrough - Dark Souls Game Guide & Walkthrough](/darksouls/gfx/word/355801667.jpg) |
Go through a chamber filled with water [1] and go up a ladder. [2]
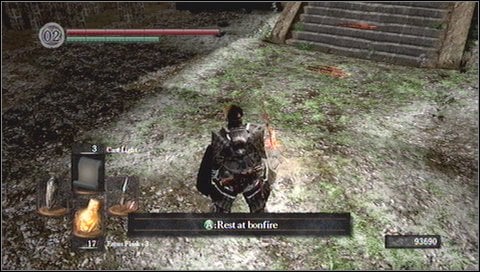
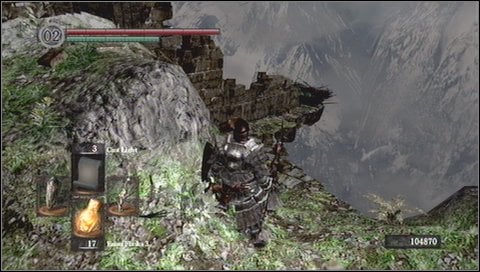
Once you get upstairs, move towards a bonfire and light it on.
 |  |
Go through a large door now. [1] A monster will appear on the other side but do not fight him now. [2]
Instead of fighting, flee through a passage on the left.
 |  |
In the next chamber, light another bonfire. [1] Follow a long corridor until you encounter bowman at its end. Pick up a shield on your way, to defend yourself against his shots. [2]
Run to the bowman and after he escapes, pick up a mace.

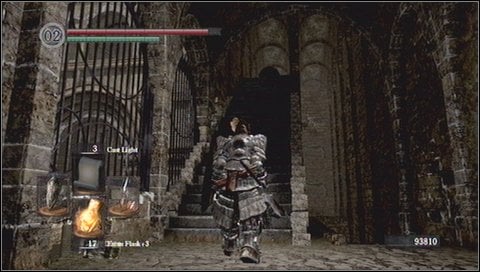
 | ![Run up the stairs [1] and go through a fog - Undead Asylum | Walkthrough - Walkthrough - Dark Souls Game Guide & Walkthrough](/darksouls/gfx/word/355801807.jpg) |
Run up the stairs [1] and go through a fog. [2]
On the other side, turn right and go up the stairs. A monster above us will throw a large ball. Jump to the right in order to avoid it.
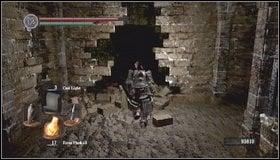 |  |
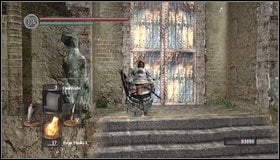
The ball destroys a wall. [1] Go inside and talk to the knight. Choose and affirmative answer to his question. [2] He will give you a key and Estus Flask.
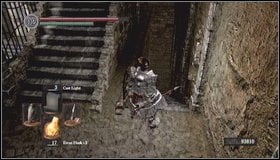 | ![Go down the stairs [1] and open the door - Undead Asylum | Walkthrough - Walkthrough - Dark Souls Game Guide & Walkthrough](/darksouls/gfx/word/355801885.jpg) |
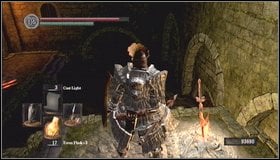
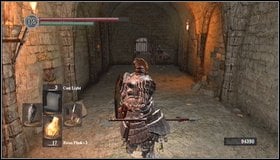
Go down the stairs [1] and open the door. [2] You will unlock a shortcut to a bonfire this way, so you can use it to replenish your HP. Remember thought, that after each usage of a bonfire, monsters return to game world.
 | 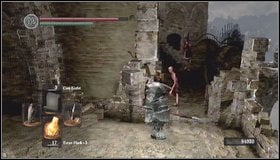 |
Go back upstairs and move one level up (to the place where a ball was thrown). Kill the enemy here and open another grate. [1] Lure enemies around the corner to avoid bowman shots. [2]
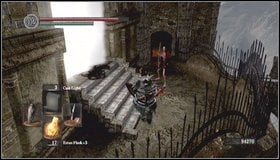 |  |
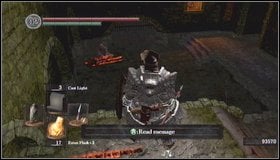
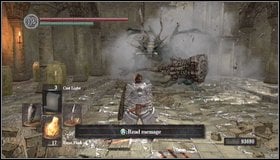
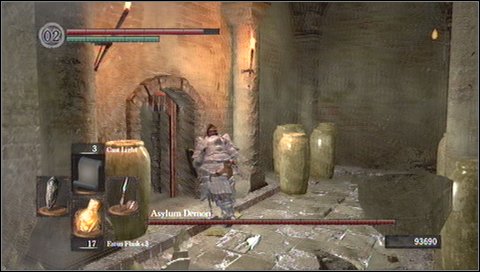
Run past large portion of fog and kill a bowman. [1] In a passage in front of you, you'll encounter an opponent wielding a shield and a sword - defeat him. [2] The door is close right now - we'll get a key several hours later.
Asylum Demon lurks behind fog. After the fight, open a large door.

Run up the hill.
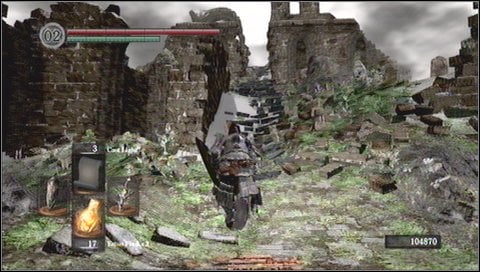
You might notice that there is a small nest to the right. In it lives Sparkly, NPC who exchanges items.
Go to the very top. A bird will take you further.


- Dark Souls Game Guide & Walkthrough
- Dark Souls: Game Guide
- Dark Souls: Walkthrough
- Dark Souls: In which order should you visit locations?
- Dark Souls: Undead Asylum
- Dark Souls: Firelink Shrine
- Dark Souls: Firelink Shrine -> Undead Burg
- Dark Souls: Undead Burg - p. 1
- Dark Souls: Undead Burg - p. 2
- Dark Souls: Undead Burg - A bridge with Wyvern
- Dark Souls: Undead Parish - p. 1
- Dark Souls: Undead Parish - p. 2
- Dark Souls: Undead Parish - p. 3
- Dark Souls: Undead Burg -> Depths
- Dark Souls: Depths - p. 1
- Dark Souls: Depths - p. 2
- Dark Souls: Depths - p. 3
- Dark Souls: Blighttown - p. 1
- Dark Souls: Blighttown - p. 2
- Dark Souls: Blighttown - p. 3
- Dark Souls: Blighttown - Swamps
- Dark Souls: Blighttown -> Quelaag's Domain
- Dark Souls: Darkroot Garden - p. 1
- Dark Souls: Darkroot Garden - p. 2
- Dark Souls: Darkroot Basin
- Dark Souls: Sen's Fortress - p. 1
- Dark Souls: Sen's Fortress - p. 2
- Dark Souls: Sen's Fortress - p. 3
- Dark Souls: Sen's Fortress - p. 4
- Dark Souls: Sen's Fortress - p. 5
- Dark Souls: Anor Londo - p. 1
- Dark Souls: Anor Londo - p. 2
- Dark Souls: Anor Londo - p. 3
- Dark Souls: Anor Londo - p. 4
- Dark Souls: Anor Londo - p. 5
- Dark Souls: Anor Londo - p. 6
- Dark Souls: Lordvessel
- Dark Souls: Darkroot Basin -> Darkroot Garden II
- Dark Souls: Darkroot Garden II
- Dark Souls: New Londo Ruins - p. 1
- Dark Souls: New Londo Ruins - p. 2
- Dark Souls: New Londo Ruins - Lower level
- Dark Souls: The Catacombs - p. 1
- Dark Souls: The Catacombs - p. 2
- Dark Souls: The Catacombs - p. 3
- Dark Souls: Tomb of Giants - p. 1
- Dark Souls: Tomb of Giants - p. 2
- Dark Souls: Demon Ruins - p. 1
- Dark Souls: Demon Ruins - p. 2
- Dark Souls: Lost Izalith - p. 1
- Dark Souls: Lost Izalith - p. 2
- Dark Souls: The Duke's Archives - p. 1
- Dark Souls: The Duke's Archives - p. 2
- Dark Souls: The Duke's Archives - Prison
- Dark Souls: The Duke's Archives II - p. 1
- Dark Souls: The Duke's Archives II - p. 2
- Dark Souls: Crystal Cave
- Dark Souls: Kiln of the First Flame
- Dark Souls: Two game endings
- Dark Souls: Bonus - Valley of Drakes
- Dark Souls: Bonus - The Great Hollow
- Dark Souls: Bonus - Ash Lake
- Dark Souls: Bonus - Painted World of Ariamis - p. 1
- Dark Souls: Bonus - Painted World of Ariamis - p. 2
- Dark Souls: Bonus - Painted World of Ariamis - p. 3
- Dark Souls: Walkthrough
- Dark Souls: Game Guide
You are not permitted to copy any image, text or info from this page. This site is not associated with and/or endorsed by the developers and the publishers. All logos and images are copyrighted by their respective owners.
Copyright © 2000 - 2026 Webedia Polska SA for gamepressure.com, unofficial game guides, walkthroughs, secrets, game tips, maps & strategies for top games.