Batman Arkham Origins: The best hidden datapacks - Extortion File 20 (Burnley)
Datapack 1
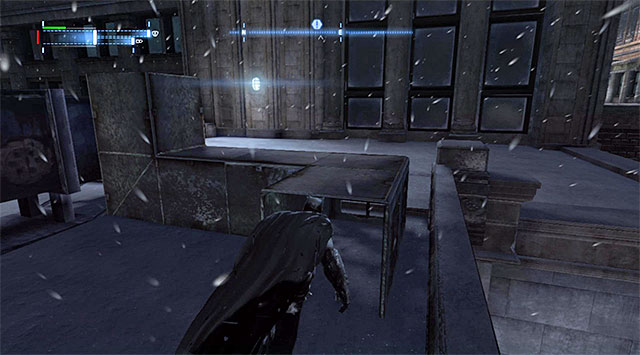
Datapack has been hidden in the venting shaft on the rooftop of one of the buildings and the entrance to this shaft has been shown in the above screenshot. Obtaining the collectible does not require you to use any of Batman's gadgets.
Datapack 2
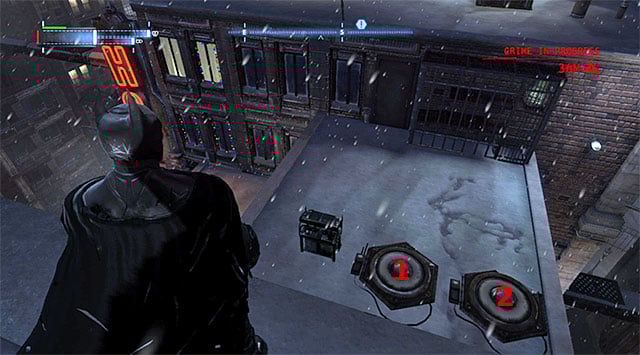
Locate all of the objects shown in the above screenshot, i.e. the cage with the ball, with the collectible, generator and two pressure plates. Start by charging the generator, using the Shock Gloves. Walk onto the plate on the left (1), then onto the one on the right (2) and return to the one on the left (1). You can now approach the cage (do not worry about the fact that it did not open ) and collect the Datapack directly from the ball that you have recently rolled.
Datapack 3 (The Police Station)
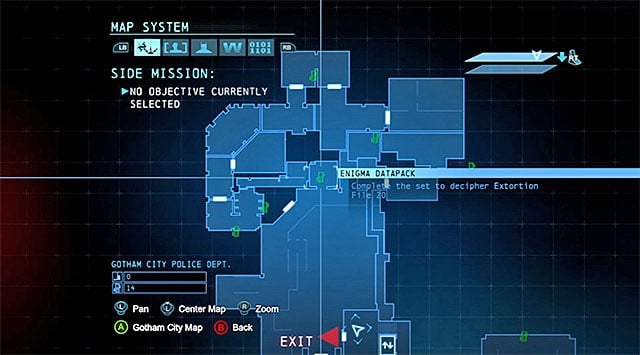
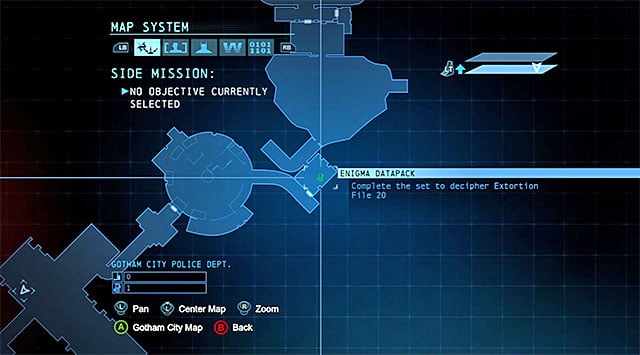
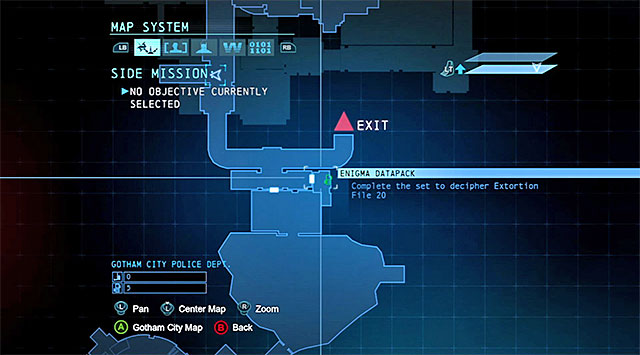
![Start in a small room on the upper floor [Maintenance Access], located to the North of the GCPD - Bullpen - The best hidden datapacks - Extortion File 20 (Burnley) | Enigma Datapacks - Enigma Datapacks - Batman: Arkham Origins Game Guide](/batmanarkhamorigins/gfx/word/76767468.jpg)
Start in a small room on the upper floor [Maintenance Access], located to the North of the GCPD - Bullpen. You walk through this room the first time you visit the building, right before you enter the abovementioned Bullpen. Find here the manhole, shown in screenshot 2, and open it.
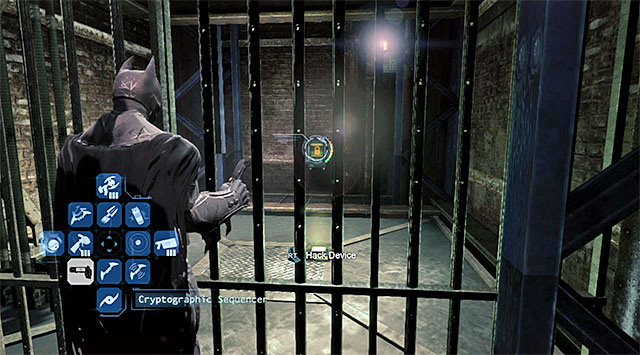
Jump down into the room on the ground floor and approach the locked gate. You need to use the cryptographic sequencer at a distance, here, in order to determine the correct password (CONVICTION), which will unlock access to the room with the Datapack.
Datapack 4 (The Police Station)
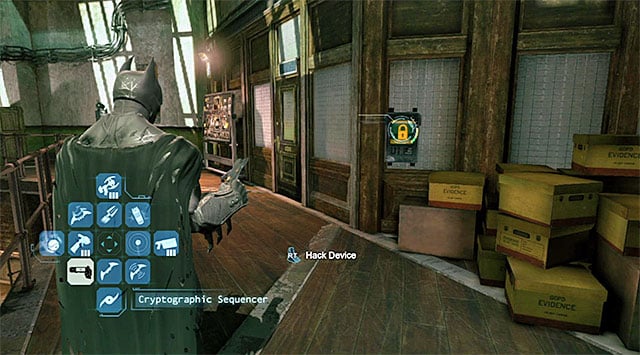
Start in the GCPD - Bullpen and explore the North-Western part of its upper level. This way you will find a locked room shown in the screenshot. Use the cryptographic sequencer onto the control panel to determine the correct password (PROUDTOSERVE). You can now enter Capt. Gordon's Office and detach the Datapack from the wall.
Datapack 5 (The Police Station)
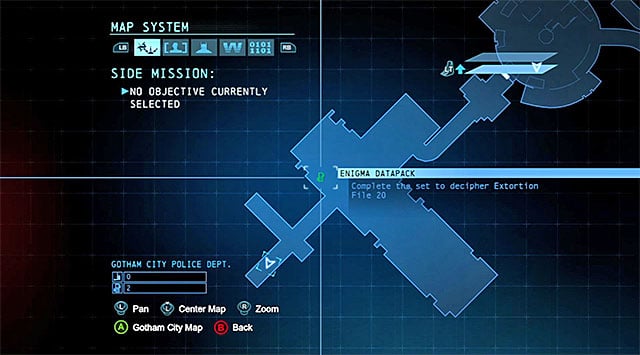
The collectible is in the GCPD Telecom Room which you can access only from the side of the Burnley Sewers - West. You visit this location for the first time during the Uplink the National Criminal Database to the batcomputer main mission .
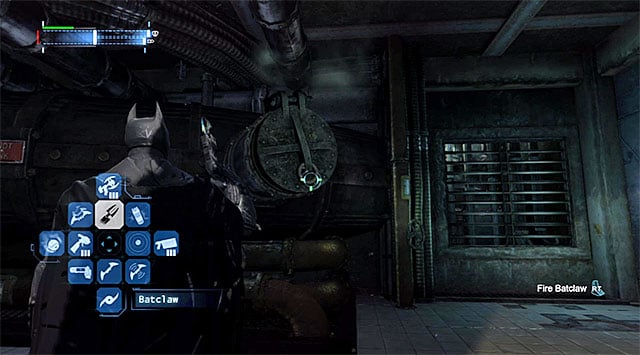
After you get into a small room, locate the interactive manhole and open it, using the claw. Use it again, this time to grab the Datapack.
Datapack 6 (The Police Station)
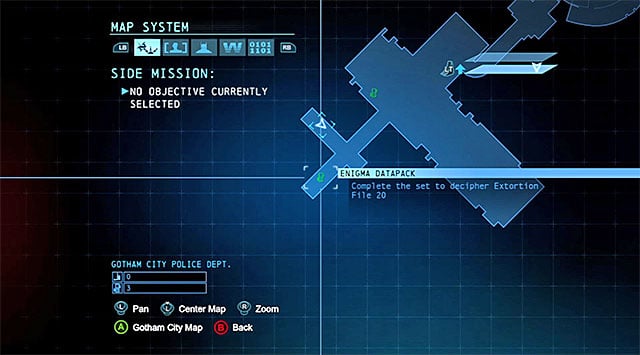
The collectible is in the Burnley Sewers - West under the police station, which you can access by taking the manhole located in the Northern part of the Burnley district. You use this passage for the first time during the Access the sewers beneath GCPD main mission.

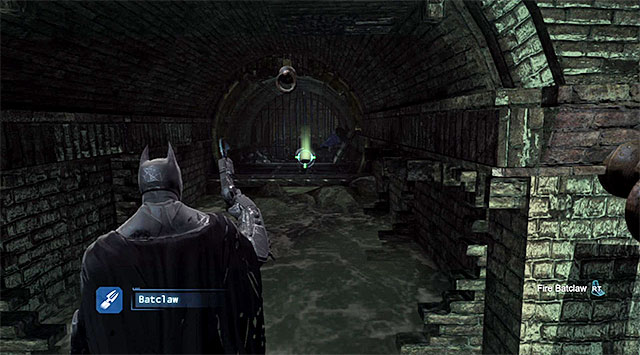
Right after you get into the sewers, stop after you reach the first fork. Turn right and use a glue grenade to insulate the pipe. You can crouch and reach the place where the Datapack is.
Datapack 7 (The Police Station)
The collectible is in the Burnley Sewers - West under the police station, which you can access by taking the manhole located in the Northern part of the Burnley district. You use this passage for the first time during the Access the sewers beneath GCPD main mission).
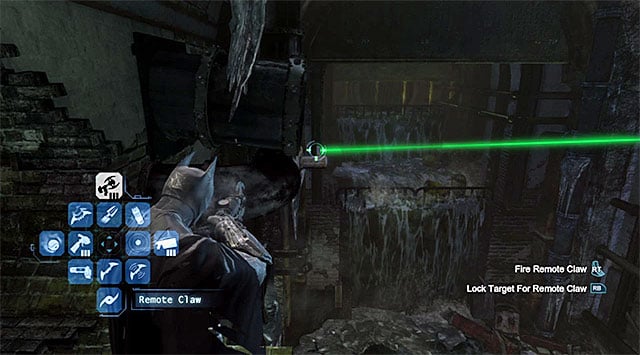
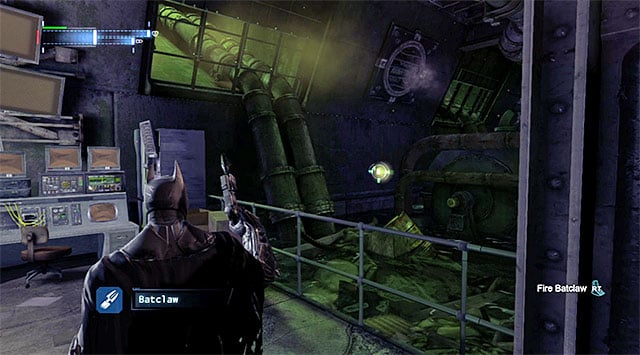
You need to gain access to the area with the big water reservoir and extend the rope, using the grapple, in the spot shown in the screenshot. Use the hook to reach the rope, turn left and find the Datapack.
Datapack 8 (The Police Station)
The collectible is in the central part of the Burnley Sewers under the police station. You can reach there either from the building's basement, or by taking the manhole to the North of the police station.
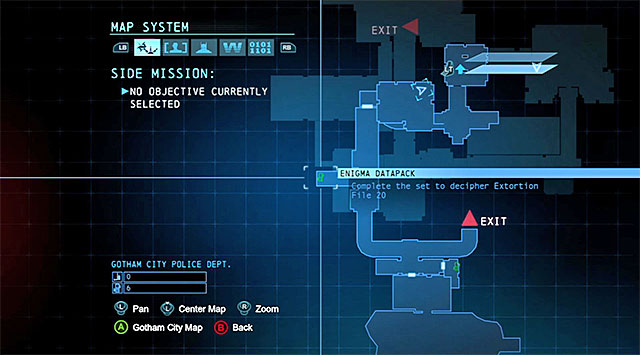
Regardless of the path that you have chosen, you will reach a flooded part of the sewers, which means the necessity to use the glue grenade to make a floating platform. Jump onto that platform and use the claw to hook up to the successive anchor points. Ultimately, you need to reach the tunnel leading to the West and reach out for the Datapack (the screenshot) at a distance.
Datapack 9 (The Police Station)
The collectible is in the central part of the Burnley Sewers under the police station, near the sewers descent located to the North of the police building.
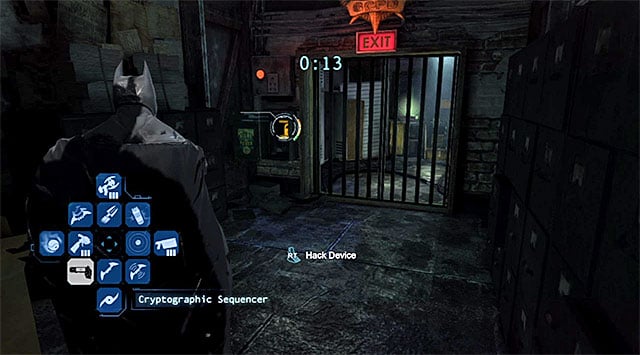
After you come close to the collectible, start by targeting the generator and charge it with the Shock Gloves. QUICKLY run up to the terminal shown in the screenshot and hack into it with the cryptographic sequencer. You only have 15 seconds to determine the correct password (PROFITEERING), but if you didn't make it at the first attempt, you can charge the generator again and give it another try. Enter the storage and collect the Datapack.
Datapack 10 (Enigma's HQ)
You get the opportunity to visit Enigma's HQ, for the first time, after you have unlocked the side mission connected with this character. Of course, you can go there anytime throughout the game. You need to reach the room with the madman's central computer, turn right and use the claw to grab the Datapack that you can see in the distance.
For finding all of the datapacks, you are rewarded with the audio file connected with Joker.

- Batman: Arkham Origins Game Guide
- Batman Arkham Origins: Game Guide
- Batman Arkham Origins: Enigma Datapacks
- Batman Arkham Origins: World map
- Batman Arkham Origins: The best hidden datapacks - Extortion File 1 (Park Row)
- Batman Arkham Origins: The best hidden datapacks - Extortion File 2 (Park Row)
- Batman Arkham Origins: The best hidden datapacks - Extortion File 3 (The Bowery)
- Batman Arkham Origins: The best hidden datapacks - Extortion File 4 (The Bowery)
- Batman Arkham Origins: The best hidden datapacks - Extortion File 5 (Amusement Mile)
- Batman Arkham Origins: The best hidden datapacks - Extortion File 6 (Amusement Mile)
- Batman Arkham Origins: The best hidden datapacks - Extortion File 7 (Amusement Mile)
- Batman Arkham Origins: The best hidden datapacks - Extortion File 8 (Industrial District)
- Batman Arkham Origins: The best hidden datapacks - Extortion File 9 (Industrial District)
- Batman Arkham Origins: The best hidden datapacks - Extortion File 10 (Industrial District)
- Batman Arkham Origins: Gotham Pioneers Bridge - entrance into the bridge
- Batman Arkham Origins: The best hidden datapacks - Extortion File 11 (Gotham Pioneers Bridge)
- Batman Arkham Origins: The best hidden datapacks - Extortion File 12 (Gotham Pioneers Bridge)
- Batman Arkham Origins: The best hidden datapacks - Extortion File 13 (Coventry)
- Batman Arkham Origins: The best hidden datapacks - Extortion File 14 (Coventry)
- Batman Arkham Origins: The best hidden datapacks - Extortion File 15 (Diamond District)
- Batman Arkham Origins: The best hidden datapacks - Extortion File 16 (Diamond District)
- Batman Arkham Origins: The best hidden datapacks - Extortion File 17 (Diamond District)
- Batman Arkham Origins: The Burnley District - entrances to the police station and the sewers
- Batman Arkham Origins: The best hidden datapacks - Extortion File 18 (Burnley)
- Batman Arkham Origins: The best hidden datapacks - Extortion File 19 (Burnley)
- Batman Arkham Origins: The best hidden datapacks - Extortion File 20 (Burnley)
- Batman Arkham Origins: Cyrus Pinkney's Plaques
- Batman Arkham Origins: Anarky Tags
- Batman Arkham Origins: Enigma Datapacks
- Batman Arkham Origins: Game Guide
You are not permitted to copy any image, text or info from this page. This site is not associated with and/or endorsed by the developers and the publishers. All logos and images are copyrighted by their respective owners.
Copyright © 2000 - 2026 Webedia Polska SA for gamepressure.com, unofficial game guides, walkthroughs, secrets, game tips, maps & strategies for top games.