Sekiro Shadows Die Twice: Chained Ogre Boss Fight
This section describes the boss fight with the second boss of Sekiro: Shadows Die Twice - the Chained Ogre. It's a greater challenge than the first enemy of this type. The advice below will enable you to learn how to get to the boss, what preparations to make and what to pay attention to during the fight.
Where to find the Chained Ogre?
Location: Ashina Outskirts [Outskirts Wall Stairway]
Rewards: Prayer Bead, Skills: Shinobi Medicine Rank 1
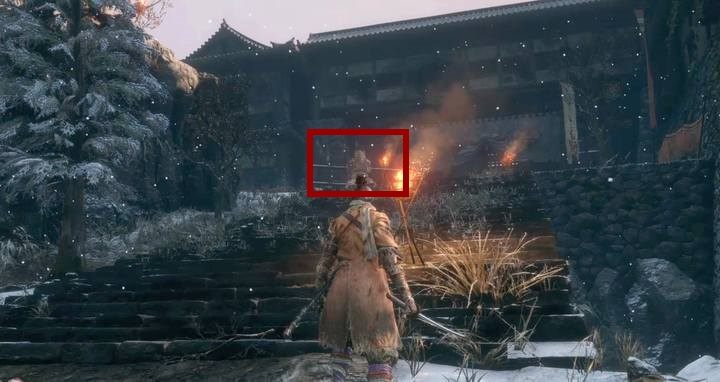
You encounter Chained Ogre on your way to Outskirts Wall Stairway, near the Sculptor's Idol located at the top of the stairs. This is the second boss in Sekiro: Shadows Die Twice, and the second boss in Ashina Outskirts.
You can't stab the Ogre in the back. Even though the Ogre starts the fight immobilized, he will free himself. Simply focus on dealing as much damage as possible.
How to defeat the Chained Ogre?
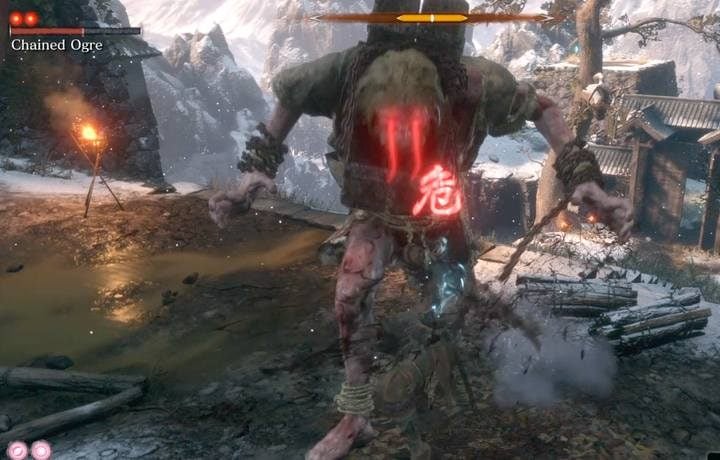
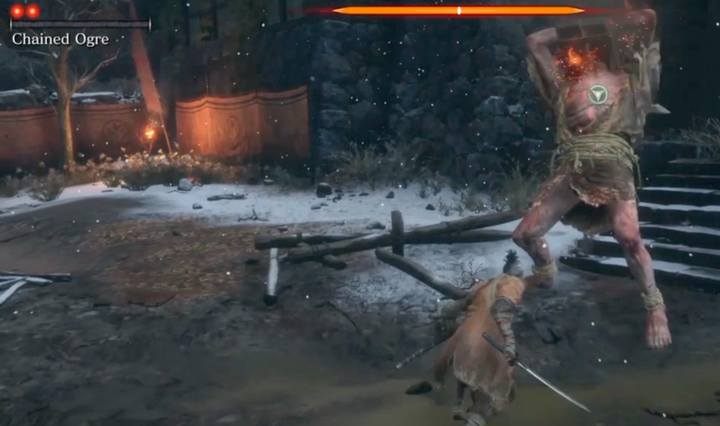
When the Ogre frees himself, he will use the following attacks - triple kick, drop attack, overhead attacks. He will also use a special attack - grapple. If he catches you, this attack will take about 90% of your health.
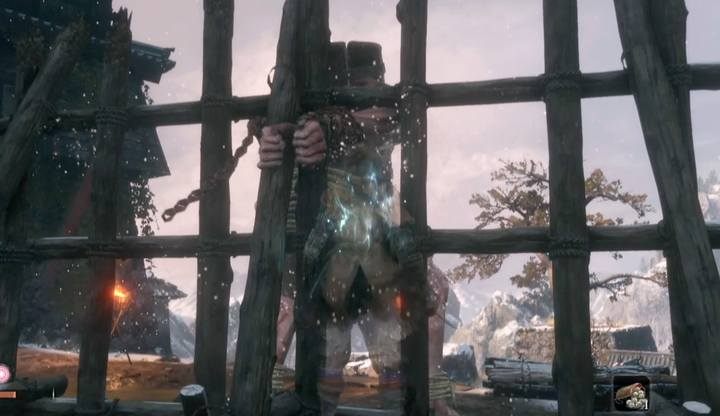
Important note - when you deplete one health bar of the Ogre, you have to deal him critical damage by using the grappling hook on him. Press the right button when you notice the grappling hook icon above the Ogre's head.
You can't parry this boss's attacks. Use dodges and jumps to avoid the Ogre's attacks. You can avoid the grab attack by jumping - dodge may not be enough.
- You can sneak up on the Ogre unnoticed to deal him more damage before he frees himself - this requires you to use Gachiin's Sugar.
- Watch out for a soldier with a pike - he is waiting for you on top of a small hill, left of the stairs. When he notices you, he will join the Ogre.
- Flame Vent prosthetic tool is great for this fight. If you use it, the boss won't attack you for a few seconds. You can also set the Ogre on fire - he will receive fire damage over time. Increase this effect by throwing Oil at the boss before you use Flame Vent. If you don't have this tool, you can use, e.g. Shinobi Firecracker.
- The Sculptor's Idol is nearby - go back here if you lost too much health. Rest and return to the boss.

Win the fight to receive a Prayer Bead (collect four to increase vitality and damage). If you died many times during this battle and in the battles before it, you will receive Shinobi Medicine Rank 1 skill.
- Sekiro Guide and Walkthrough
- Sekiro Shadows Die Twice: Game guide
- Sekiro Shadows Die Twice: Bosses
- Sekiro Shadows Die Twice: General Naomori Kawarada Boss Fight
- Sekiro Shadows Die Twice: Chained Ogre Boss Fight
- Sekiro Shadows Die Twice: General Tenzen Yamauchi Boss Fight
- Sekiro Shadows Die Twice: Great Serpent Boss Fight
- Sekiro Shadows Die Twice: Great Serpent - the second and third encounter
- Sekiro Shadows Die Twice: Juzou the Drunkard Boss Fight
- Sekiro Shadows Die Twice: Lady Butterfly Boss Fight
- Sekiro Shadows Die Twice: Unnamed masked purple enemy Boss Fight
- Sekiro Shadows Die Twice: Gyoubu Oniwa Boss Fight
- Sekiro Shadows Die Twice: The Blazing Bull Boss Fight
- Sekiro Shadows Die Twice: Shinobi Hunter Enshin of Misen Boss Fight
- Sekiro Shadows Die Twice: Lone Shadow Longswordsman Boss Fight
- Sekiro Shadows Die Twice: Seven Ashina Spears Boss Fight
- Sekiro Shadows Die Twice: Armored Warrior Boss Fight
- Sekiro Shadows Die Twice: Genichiro Ashina Boss Fight
- Sekiro Shadows Die Twice: Guardian Ape in Sunken Valley Boss Fight
- Sekiro Shadows Die Twice: Headless Guardian Ape in Ashina Depths Boss Fight
- Sekiro Shadows Die Twice: Tokujiro the Glutton Boss Fight
- Sekiro Shadows Die Twice: Mist Noble Boss Fight
- Sekiro Shadows Die Twice: O'Rin of the Water Boss Fight
- Sekiro Shadows Die Twice: Chained Ogre from Ashina Castle Boss Fight
- Sekiro Shadows Die Twice: Lonely Shadow Vilehand Boss Fight
- Sekiro Shadows Die Twice: Long-arm Centipede Sen'un Boss Fight
- Sekiro Shadows Die Twice: Snake Eyes Shirafuji Boss Fight
- Sekiro Shadows Die Twice: Long-arm Centipede Giraffe Boss Fight
- Sekiro Shadows Die Twice: Shinobi Eyes Shirahagi Boss Fight
- Sekiro Shadows Die Twice: Corrupted Monk Boss Fight
- Sekiro Shadows Die Twice: General Kuranosuke Matsumoto Boss Fight
- Sekiro Shadows Die Twice: Shichimen Warrior Boss Fight
- Sekiro Shadows Die Twice: Ashina Elite - Jinsuke Saze Boss Fight
- Sekiro Shadows Die Twice: Headless (underwater) #1 Boss Fight
- Sekiro Shadows Die Twice: Lone Shadow Masanaga Boss Fight
- Sekiro Shadows Die Twice: Emma, the Gentle Blade Boss Fight
- Sekiro Shadows Die Twice: Isshin Ashina Boss Fight
- Sekiro Shadows Die Twice: Great Shinobi Owl Boss Fight
- Sekiro Shadows Die Twice: True Corrupted Monk Boss Fight
- Sekiro Shadows Die Twice: Sakura Bull of the Palace Boss Fight
- Sekiro Shadows Die Twice: Demon of Hatred Boss Fight
- Sekiro Shadows Die Twice: Ashina Elite - Ujinari Mizuo Boss Fight
- Sekiro Shadows Die Twice: Shigekichi of the Red Guard Boss Fight
- Sekiro Shadows Die Twice: Seven Ashina Spears - Shume Masaji Oniwa Boss Fight
- Sekiro Shadows Die Twice: Genichiro & Isshin, the Sword Saint Boss Fight
- Sekiro Shadows Die Twice: Okami Leader Shizu Boss Fight
- Sekiro Shadows Die Twice: Headless #2 Boss Fight
- Sekiro Shadows Die Twice: Shichimen Warrior #1 Boss Fight
- Sekiro Shadows Die Twice: Shichimen Warrior #2 Boss Fight
- Sekiro Shadows Die Twice: Headless (underwater) #3 Boss Fight
- Sekiro Shadows Die Twice: Headless #4 Boss Fight
- Sekiro Shadows Die Twice: Headless #5 Boss Fight
- Sekiro Shadows Die Twice: Divine Dragon - Main Boss
- Sekiro Shadows Die Twice: Bosses
- Sekiro Shadows Die Twice: Game guide
You are not permitted to copy any image, text or info from this page. This site is not associated with and/or endorsed by the developers and the publishers. All logos and images are copyrighted by their respective owners.
Copyright © 2000 - 2026 Webedia Polska SA for gamepressure.com, unofficial game guides, walkthroughs, secrets, game tips, maps & strategies for top games.