Sekiro Shadows Die Twice: Headless #2 Boss Fight
This page in our guide to Sekiro: Shadows Die Twice contains the strategy for the fight with the Headless in Ashina Outskirts. We have described two different paths leading to the boss's lair, and we gave our suggestions on how to prepare Wolf for this fight.
Headless enemies appear in a few locations. They differ in strength and they are found in various areas (some Headless are encountered under the water). Descriptions of fights with other Headless are on the Bosses page.
- How to prepare yourself for the fight with the Headless?
- Reaching the Headless lair by starting in Ashina Outskirts
- Reaching the Headless lair by starting in Senpou Temple
- Defeating the Headless
How to prepare yourself for the fight with the Headless?
Location: Ashina Outskirts
Rewards: Ako's Spiritfall - a renewable item which consumes your Spirit Emblems to increase your damage temporarily.
You can find the lair of this Headless during your exploration of Ashina Outskirts - you get there within the first few hours with the game. We don't recommend fighting this enemy with a weak character - you won't stand a chance. Leave this optional mini-boss for later, e.g. after you explore Ashina Depths.
The biggest threat while facing a Headless enemy is Terror, one of the negative effects found in the game. If the purple bar at the bottom of the screen gets full, you will die. Luckily, you can use certain items to protect yourself from this effect. These items are:
- Pacifying Agent - A consumable that can be found, e.g. as loot.
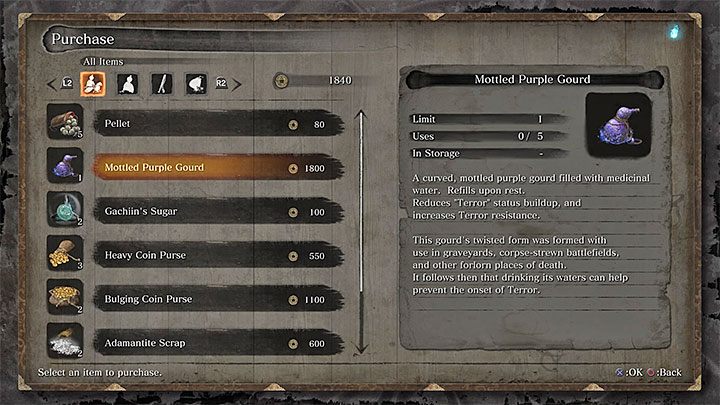
- Mottled Purple Gourd - Sold by Exiled Memorial Mob in Ashina Depths (Mibu Village). This potion replenishes automatically after resting.
Get one of these two items (preferably the Mottled Purple Gourd) and place it on the Quick Items bar.
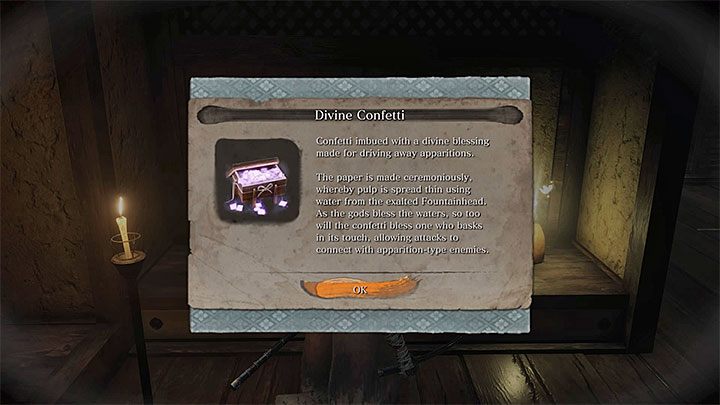
Besides having an item that increases your Terror resistance, you should also get Divine Confetti. This particular item increases damage dealt to apparition-type enemies. Divine Confetti can be found as loot.
Reaching the Headless lair by starting in Ashina Outskirts
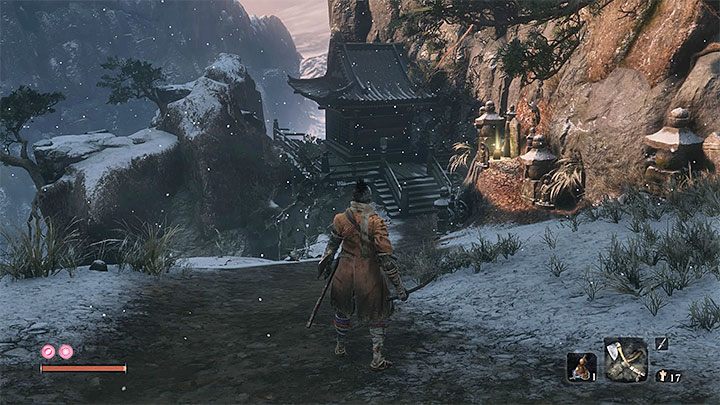
The first path to this mini-boss starts in the main part of Ashina Outskirts, the area you have to go through to reach Ashina Castle. Choose Outskirts Wall - Stairway Sculptor's Idol as your starting point. Go through the locations where you fought with Chained Ogre and General Tenzen Yamauchi.
Go through the fort's right exit, the one where the General stood. Go to the building presented in the picture (the one next to the chasm).
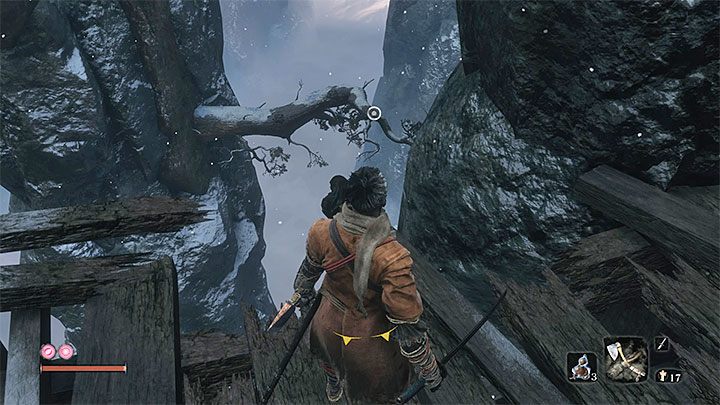
Move from one hook point to another. The last step is to grab the interactive ledge next to the wall.
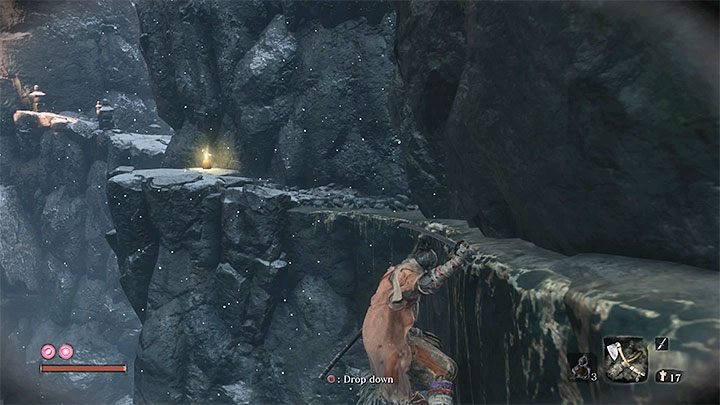
Hang down the ledge and start moving left. Climb up the ledge and then jump down to the platform below. There, you will find the entrance to the cave. Go inside. Soon, you will encounter the mini-boss.
Reaching the Headless lair by starting in Senpou Temple
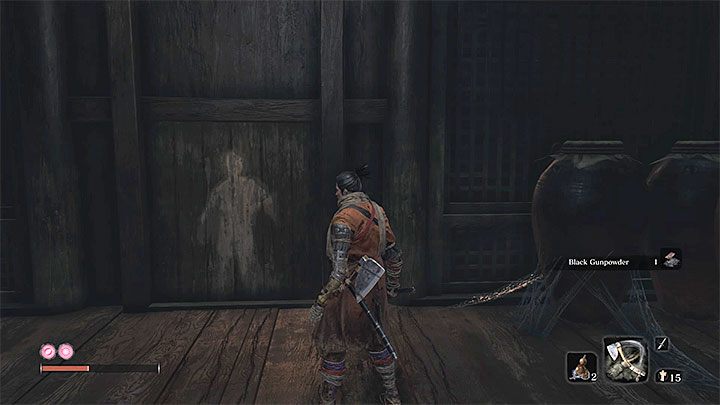
This path is much easier - you won't have to jump between hook points located above a chasm. Start at Bell Demon's Temple Sculptor's Idol in Senpou Temple - you will appear near the single building standing on the hill.
Enter the small temple, kill a few monsters with blades instead of hands and then find the rotating wall presented in the picture. Hug the wall and press the interaction button to rotate it 180 degrees.
Go through the cave, and you will go back to Ashina Outskirts. The lair of the Headless is nearby.
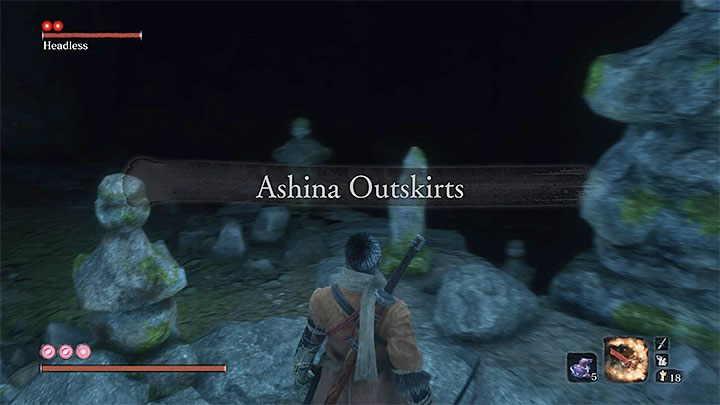
Defeating the Headless
Use Pacifying Agent or Mottled Purple Gourd and apply Divine Confetti before you enter the cave. Your character will get two buffs - one reduces the damage received from Terror-based attacks and the second increases damage dealt to apparition-type enemies.
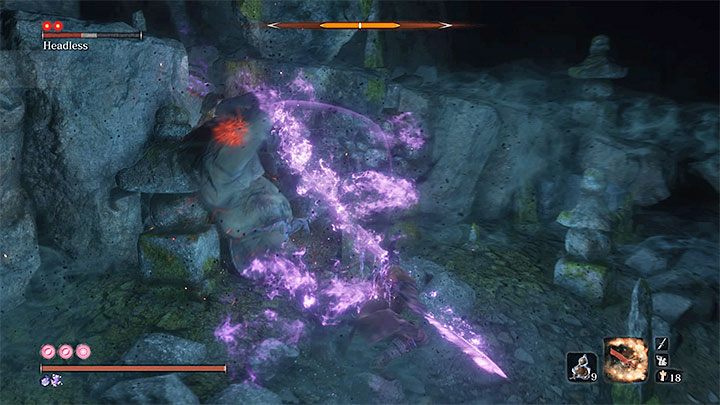
Don't waste your time on figuring out a way to stealth attack this Headless - you can't do that. Instead, jump down to his lair and start attacking. You can use basic attacks. Thanks to the purple effect created by your blade, you will deal more damage to the Headless.
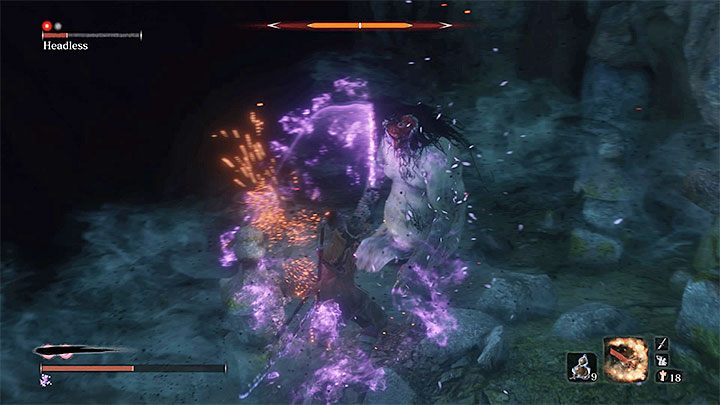
Headless is rather slow. However, the fog covering this place will slow you down a bit. Try to run around the mini-boss and look for a chance to attack him from a side or from the back. If you know that you can't dodge his attack, block it (Wolf will lose only a small portion of his health bar).
The mini-boss can disappear in the fog and reappear somewhere else. Find him as fast as you can and continue attacking. Move away from the Headless if Pacifying Agent/Mottled Purple Gourd has stopped working. Otherwise, your Terror bar will grow faster. Defeat the mini-boss by performing two Deathblows.

- Sekiro Guide and Walkthrough
- Sekiro Shadows Die Twice: Game guide
- Sekiro Shadows Die Twice: Bosses
- Sekiro Shadows Die Twice: General Naomori Kawarada Boss Fight
- Sekiro Shadows Die Twice: Chained Ogre Boss Fight
- Sekiro Shadows Die Twice: General Tenzen Yamauchi Boss Fight
- Sekiro Shadows Die Twice: Great Serpent Boss Fight
- Sekiro Shadows Die Twice: Great Serpent - the second and third encounter
- Sekiro Shadows Die Twice: Juzou the Drunkard Boss Fight
- Sekiro Shadows Die Twice: Lady Butterfly Boss Fight
- Sekiro Shadows Die Twice: Unnamed masked purple enemy Boss Fight
- Sekiro Shadows Die Twice: Gyoubu Oniwa Boss Fight
- Sekiro Shadows Die Twice: The Blazing Bull Boss Fight
- Sekiro Shadows Die Twice: Shinobi Hunter Enshin of Misen Boss Fight
- Sekiro Shadows Die Twice: Lone Shadow Longswordsman Boss Fight
- Sekiro Shadows Die Twice: Seven Ashina Spears Boss Fight
- Sekiro Shadows Die Twice: Armored Warrior Boss Fight
- Sekiro Shadows Die Twice: Genichiro Ashina Boss Fight
- Sekiro Shadows Die Twice: Guardian Ape in Sunken Valley Boss Fight
- Sekiro Shadows Die Twice: Headless Guardian Ape in Ashina Depths Boss Fight
- Sekiro Shadows Die Twice: Tokujiro the Glutton Boss Fight
- Sekiro Shadows Die Twice: Mist Noble Boss Fight
- Sekiro Shadows Die Twice: O'Rin of the Water Boss Fight
- Sekiro Shadows Die Twice: Chained Ogre from Ashina Castle Boss Fight
- Sekiro Shadows Die Twice: Lonely Shadow Vilehand Boss Fight
- Sekiro Shadows Die Twice: Long-arm Centipede Sen'un Boss Fight
- Sekiro Shadows Die Twice: Snake Eyes Shirafuji Boss Fight
- Sekiro Shadows Die Twice: Long-arm Centipede Giraffe Boss Fight
- Sekiro Shadows Die Twice: Shinobi Eyes Shirahagi Boss Fight
- Sekiro Shadows Die Twice: Corrupted Monk Boss Fight
- Sekiro Shadows Die Twice: General Kuranosuke Matsumoto Boss Fight
- Sekiro Shadows Die Twice: Shichimen Warrior Boss Fight
- Sekiro Shadows Die Twice: Ashina Elite - Jinsuke Saze Boss Fight
- Sekiro Shadows Die Twice: Headless (underwater) #1 Boss Fight
- Sekiro Shadows Die Twice: Lone Shadow Masanaga Boss Fight
- Sekiro Shadows Die Twice: Emma, the Gentle Blade Boss Fight
- Sekiro Shadows Die Twice: Isshin Ashina Boss Fight
- Sekiro Shadows Die Twice: Great Shinobi Owl Boss Fight
- Sekiro Shadows Die Twice: True Corrupted Monk Boss Fight
- Sekiro Shadows Die Twice: Sakura Bull of the Palace Boss Fight
- Sekiro Shadows Die Twice: Demon of Hatred Boss Fight
- Sekiro Shadows Die Twice: Ashina Elite - Ujinari Mizuo Boss Fight
- Sekiro Shadows Die Twice: Shigekichi of the Red Guard Boss Fight
- Sekiro Shadows Die Twice: Seven Ashina Spears - Shume Masaji Oniwa Boss Fight
- Sekiro Shadows Die Twice: Genichiro & Isshin, the Sword Saint Boss Fight
- Sekiro Shadows Die Twice: Okami Leader Shizu Boss Fight
- Sekiro Shadows Die Twice: Headless #2 Boss Fight
- Sekiro Shadows Die Twice: Shichimen Warrior #1 Boss Fight
- Sekiro Shadows Die Twice: Shichimen Warrior #2 Boss Fight
- Sekiro Shadows Die Twice: Headless (underwater) #3 Boss Fight
- Sekiro Shadows Die Twice: Headless #4 Boss Fight
- Sekiro Shadows Die Twice: Headless #5 Boss Fight
- Sekiro Shadows Die Twice: Divine Dragon - Main Boss
- Sekiro Shadows Die Twice: Bosses
- Sekiro Shadows Die Twice: Game guide
You are not permitted to copy any image, text or info from this page. This site is not associated with and/or endorsed by the developers and the publishers. All logos and images are copyrighted by their respective owners.
Copyright © 2000 - 2026 Webedia Polska SA for gamepressure.com, unofficial game guides, walkthroughs, secrets, game tips, maps & strategies for top games.