Sekiro Shadows Die Twice: Headless Guardian Ape in Ashina Depths Boss Fight
This page in our guide to Sekiro: Shadows Die Twice contains the description of the second fight with the Guardian Ape in Ashina Depths. Check our walkthrough to learn what conditions you have to fulfill to unlock this fight with Headless Guardian Ape, how to survive and win the fight.
- How to unlock the second fight with the Guardian Ape?
- The first phase of the fight with Headless Guardian Ape
- The second phase of the fight with Headless Guardian Ape
How to unlock the second fight with the Guardian Ape?
![Location: Ashina Depths [Guardian Apes Burrow] - Headless Guardian Ape in Ashina Depths | Sekiro Shadows Die Twice Boss Fight - Bosses - Sekiro Guide and Walkthrough](/sekiro-shadows-die-twice/gfx/word/100126140.jpg)
Location: Ashina Depths [Guardian Ape's Burrow]
Rewards: Memory: Headless Ape, 2 Prayer Beads, Bestowal Ninjutsu - you need to use the Mortal Blade (this technique allows you to cover your katana in enemy's blood to extend its reach).
Defeat the Guardian Ape in the Sunken Valley first to unlock the second battle. The description of the first battle with the Guardian Ape is on a separate page. Another condition is to own the Mortal Blade. You get this item by defeating Folding Screen Monkeys in the illusion in Senpou Temple.
Go to Ashina Depths - fast travel to Poison Pool Sculptor's Idol. Reach the small passage on the opposite end of the room (see the picture above), the one that was guarded by Snake Eyes Shirahagi (one of the mini-bosses).
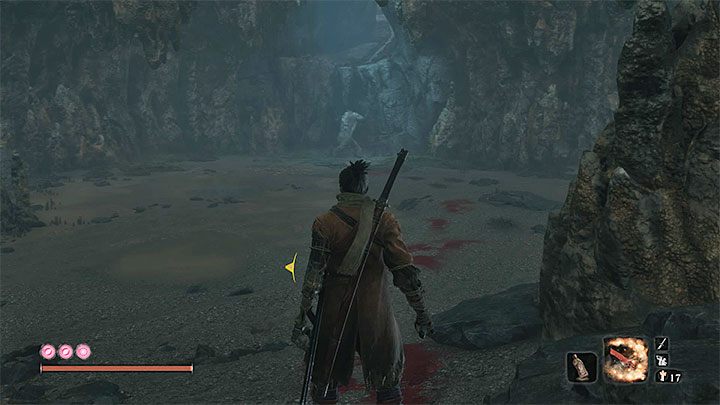
You reach a huge cave. Headless Guardian Ape is located at its opposite end - start the fight by approaching the monster. You can't go around the beast. You have to defeat this boss if you haven't unlocked further Sculptor's Idols in Ashina Depths yet.
The first phase of the fight with Headless Guardian Ape

This Guardian Ape starts the fight already without its head. This means that this phase is the same as the second stage of the fight that took place in Sunken Valley. Here is a brief summary:
- Focus on deflecting the boss's large blade. Block the entire series of attacks to "encourage" the boss to perform a single powerful strike. Deflect this one too, and the boss will fall to the ground - this is your chance to deal some damage.
- Jump over the boss's swing attacks and move away from the monster when it is about to perform a long jump.
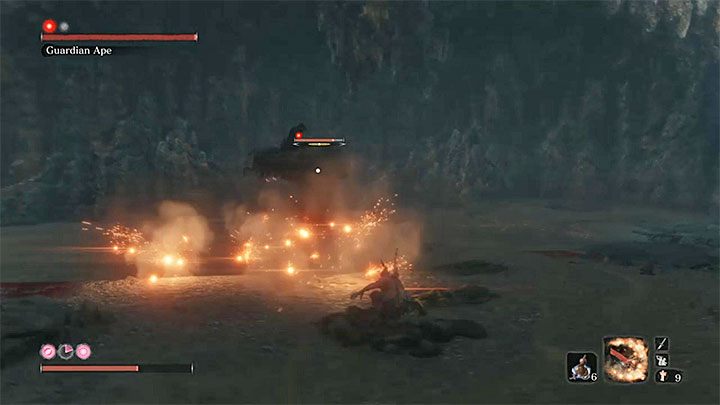
- Move away when you notice that the Guardian Ape is about to roar (see the picture above). If you stay too close to the monster, you will receive a lot of damage or even die when the Terror bar gets full. You can limit the negative effects of Terror status by using certain consumables (e.g. Divine Confetti or Pacifying Agent) or prosthetic tools (e.g. Loaded Umbrella with Phoenix Umbrella upgrade).
- The easiest way to defeat the boss is to weaken its posture bar. Don't waste your time on slowly chipping the boss's health bar away.
The second phase of the fight with Headless Guardian Ape
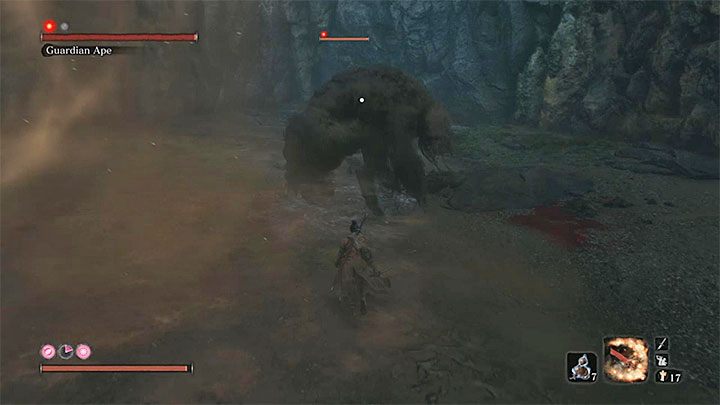
The biggest problem in the second phase is that the boss will summon another giant ape. This means that you will have to face two enemies at the same time.
Focus on the summoned ape - this enemy is much easier to defeat. Don't ignore the main boss - remember to avoid its attacks while you are fighting with the summoned ape.
The summoned ape has a similar moveset to the Guardian Ape's first phase (the one you fought in Sunken Valley) - it attacks with fists, can grab Sekiro, or perform long jumps. Weaken the Ape by using powerful abilities, e.g. Mortal Draw you get after receiving the Mortal Blade. You can also use Shinobi Firecracker (see the picture) to deplete the beast's posture bar fast.
Go back to attacking Headless Guardian Ape after eliminating the summoned ape. Follow the pattern from the first phase.
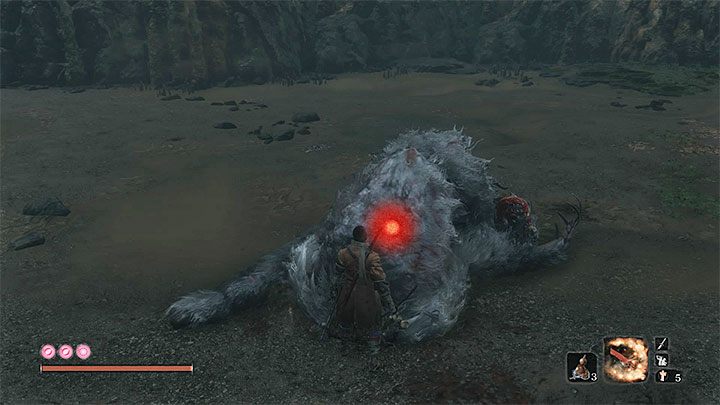
Despite performing Shinobi Execution, the beast is still alive. Use the Mortal Blade on Headless Ape - approach the monster and press the Deathblow button (R1 / RB). You will deprive the Guardian Ape of its immortality. As a reward, you get a related trophy/achievement and a ninjutsu technique.
- Sekiro Guide and Walkthrough
- Sekiro Shadows Die Twice: Game guide
- Sekiro Shadows Die Twice: Bosses
- Sekiro Shadows Die Twice: General Naomori Kawarada Boss Fight
- Sekiro Shadows Die Twice: Chained Ogre Boss Fight
- Sekiro Shadows Die Twice: General Tenzen Yamauchi Boss Fight
- Sekiro Shadows Die Twice: Great Serpent Boss Fight
- Sekiro Shadows Die Twice: Great Serpent - the second and third encounter
- Sekiro Shadows Die Twice: Juzou the Drunkard Boss Fight
- Sekiro Shadows Die Twice: Lady Butterfly Boss Fight
- Sekiro Shadows Die Twice: Unnamed masked purple enemy Boss Fight
- Sekiro Shadows Die Twice: Gyoubu Oniwa Boss Fight
- Sekiro Shadows Die Twice: The Blazing Bull Boss Fight
- Sekiro Shadows Die Twice: Shinobi Hunter Enshin of Misen Boss Fight
- Sekiro Shadows Die Twice: Lone Shadow Longswordsman Boss Fight
- Sekiro Shadows Die Twice: Seven Ashina Spears Boss Fight
- Sekiro Shadows Die Twice: Armored Warrior Boss Fight
- Sekiro Shadows Die Twice: Genichiro Ashina Boss Fight
- Sekiro Shadows Die Twice: Guardian Ape in Sunken Valley Boss Fight
- Sekiro Shadows Die Twice: Headless Guardian Ape in Ashina Depths Boss Fight
- Sekiro Shadows Die Twice: Tokujiro the Glutton Boss Fight
- Sekiro Shadows Die Twice: Mist Noble Boss Fight
- Sekiro Shadows Die Twice: O'Rin of the Water Boss Fight
- Sekiro Shadows Die Twice: Chained Ogre from Ashina Castle Boss Fight
- Sekiro Shadows Die Twice: Lonely Shadow Vilehand Boss Fight
- Sekiro Shadows Die Twice: Long-arm Centipede Sen'un Boss Fight
- Sekiro Shadows Die Twice: Snake Eyes Shirafuji Boss Fight
- Sekiro Shadows Die Twice: Long-arm Centipede Giraffe Boss Fight
- Sekiro Shadows Die Twice: Shinobi Eyes Shirahagi Boss Fight
- Sekiro Shadows Die Twice: Corrupted Monk Boss Fight
- Sekiro Shadows Die Twice: General Kuranosuke Matsumoto Boss Fight
- Sekiro Shadows Die Twice: Shichimen Warrior Boss Fight
- Sekiro Shadows Die Twice: Ashina Elite - Jinsuke Saze Boss Fight
- Sekiro Shadows Die Twice: Headless (underwater) #1 Boss Fight
- Sekiro Shadows Die Twice: Lone Shadow Masanaga Boss Fight
- Sekiro Shadows Die Twice: Emma, the Gentle Blade Boss Fight
- Sekiro Shadows Die Twice: Isshin Ashina Boss Fight
- Sekiro Shadows Die Twice: Great Shinobi Owl Boss Fight
- Sekiro Shadows Die Twice: True Corrupted Monk Boss Fight
- Sekiro Shadows Die Twice: Sakura Bull of the Palace Boss Fight
- Sekiro Shadows Die Twice: Demon of Hatred Boss Fight
- Sekiro Shadows Die Twice: Ashina Elite - Ujinari Mizuo Boss Fight
- Sekiro Shadows Die Twice: Shigekichi of the Red Guard Boss Fight
- Sekiro Shadows Die Twice: Seven Ashina Spears - Shume Masaji Oniwa Boss Fight
- Sekiro Shadows Die Twice: Genichiro & Isshin, the Sword Saint Boss Fight
- Sekiro Shadows Die Twice: Okami Leader Shizu Boss Fight
- Sekiro Shadows Die Twice: Headless #2 Boss Fight
- Sekiro Shadows Die Twice: Shichimen Warrior #1 Boss Fight
- Sekiro Shadows Die Twice: Shichimen Warrior #2 Boss Fight
- Sekiro Shadows Die Twice: Headless (underwater) #3 Boss Fight
- Sekiro Shadows Die Twice: Headless #4 Boss Fight
- Sekiro Shadows Die Twice: Headless #5 Boss Fight
- Sekiro Shadows Die Twice: Divine Dragon - Main Boss
- Sekiro Shadows Die Twice: Bosses
- Sekiro Shadows Die Twice: Game guide
You are not permitted to copy any image, text or info from this page. This site is not associated with and/or endorsed by the developers and the publishers. All logos and images are copyrighted by their respective owners.
Copyright © 2000 - 2026 Webedia Polska SA for gamepressure.com, unofficial game guides, walkthroughs, secrets, game tips, maps & strategies for top games.